For those that have been following Wholesteading.com for a while, you probably remember my first real woodworking project…the Ana White 4×4 Farmhouse Truss Beam Table. That project was a huge success and has given me the confidence to take on many other woodworking projects. My most recent project was a special request from Bethany for a homemade powder room vanity with vessel sink for use in the new house we are building.
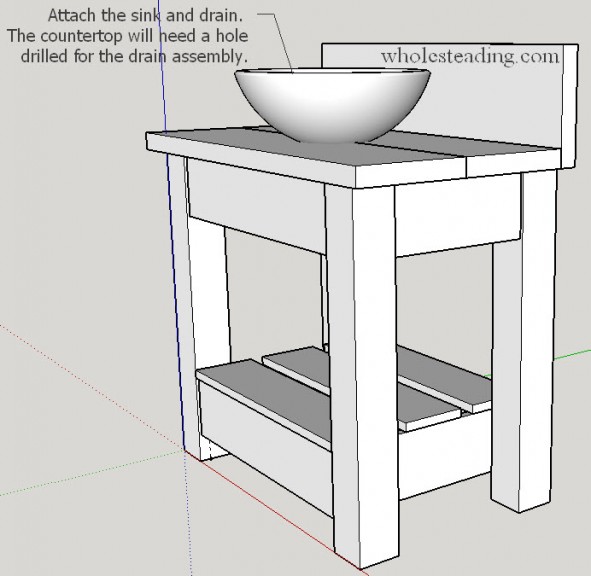
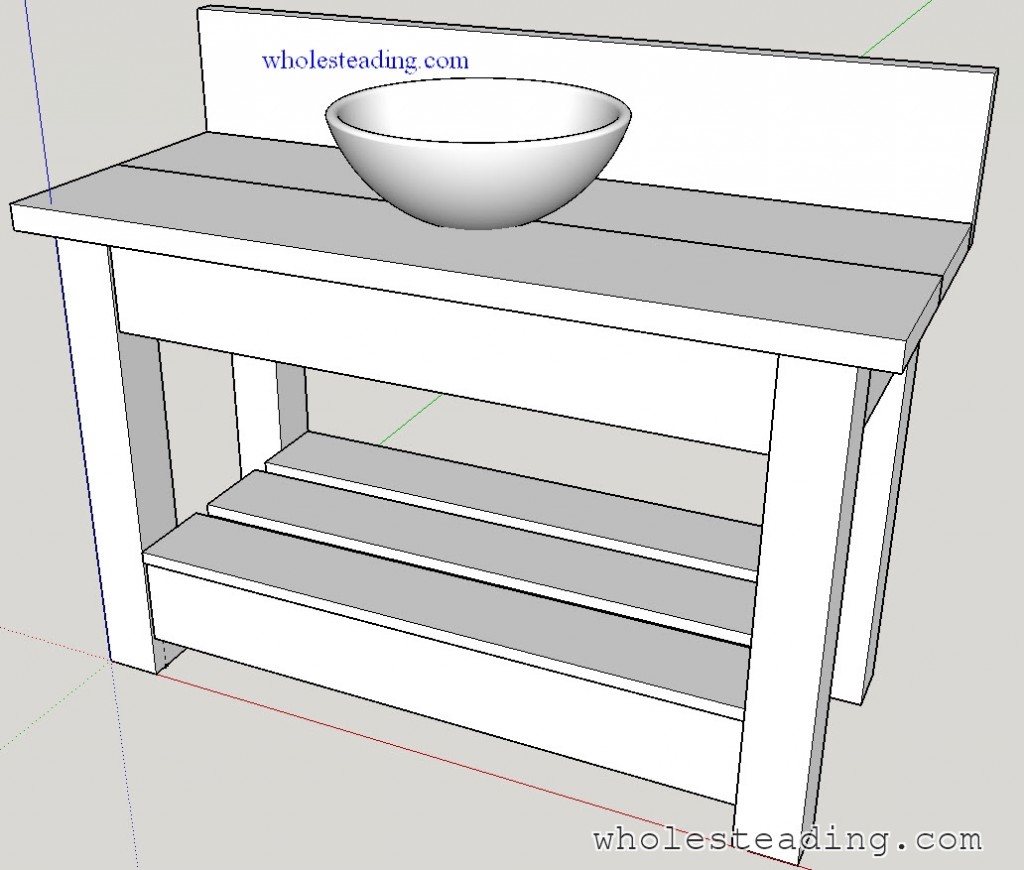
Bethany provided me a link to another Ana White plan to use as a starting point: Simple Open Farmhouse Style Vanity. This plan was useful as a starting point but needed a lot of adjustments so that it would meet Bethany’s requirements and properly fit the dimensions of our powder room. Unfortunately, Ana White does not provide the Google SketchUp files for her plans so I had to recreate the plan from scratch in order to make my modifications. I thought that was going to be a very time consuming task but it ended up being a lot of fun and didn’t take too long. Here is screenshot of the plan when I finished making it in SketchUp:
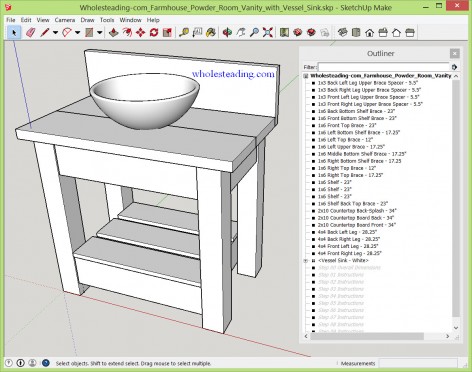 When I went to purchase the wood I discovered that Lowe’s does not sell 1×5 boards so I modified the plan to use 1×6’s instead. Here is the SketchUp plan if you want to download it to view the details or to modify the plan to suit your own needs:
Wholesteading.com – Farmhouse Powder Room Vanity with Vessel Sink Sketchup Files in WinZip archive
I viewed many example plans and read a lot about vessel sinks, plumbing, etc. to come up with this plan. One of the things I found frustrating was that no one showed some of the important details, like how exactly the drain is installed and how the wood is fastened together.
In this post I hope to answer all of those questions and more as I show step by step, in excessive detail, how exactly I built this vanity. If I missed anything just leave a reply and I will try to answer your questions.
Tools Needed to Complete this Project:
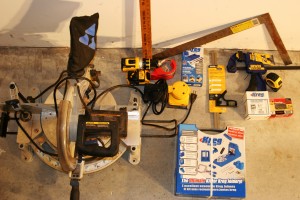 Here is a complete list of everything I used to build this vanity:
- Kreg Jig Master System
- Kreg Jig HD
- Compound Miter Saw
- Circular Saw
- Cordless Drill
- Lenox Tools 3-Inch Speed Slot Arbored Hole Saw
- Palm Grip Sander
- Tape Measure
- Square
- Assorted Clamps
- Mechanical Carpenter Pencil
- Safety Goggles
- Hearing Protection
Materials:
- Lumber (We used pine and cedar from Lowe’s but almost any kind of wood should work fine)
- 2 – 4×4 at 8 feet long – (I was hoping to use 1 ten foot pine 4×4 but Lowe’s only had 8 foot cedar 4x4s….either option will work. Cedar could make the legs look darker when staining but we thought it added some character to the piece)
- 1 – 1×3 at least 22″ long
- 3 – 1×6’s at 8 feet long each
- 2 – 2×10’s at 8 feet long
- Kreg Jig 2.5 inch HD Pocket Hole screws
– I bought a box of 125 screws on Amazon as both Lowe’s and Home Depot didn’t have these in stock
- Kreg Jig 1.25 inch Pocket Hole Screws
- 2.5 inch Wood Screw, 40-Piece
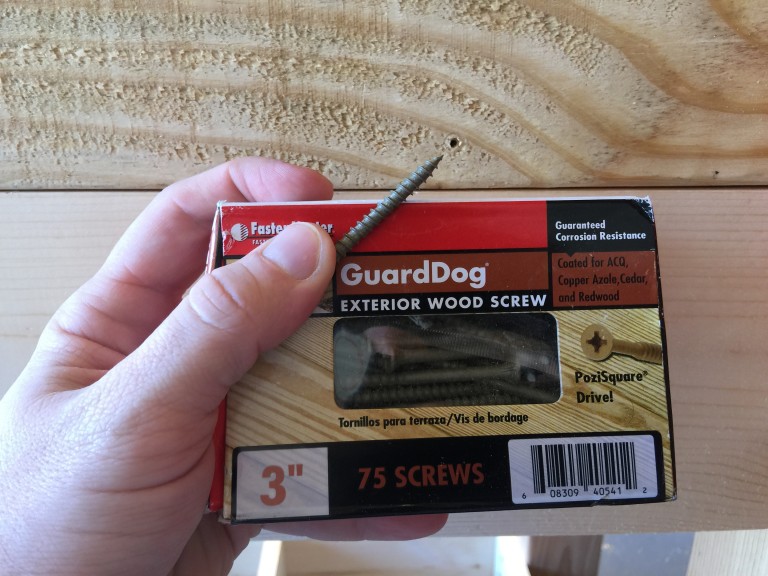
- 3 inch wood screws
- Gorilla wood glue
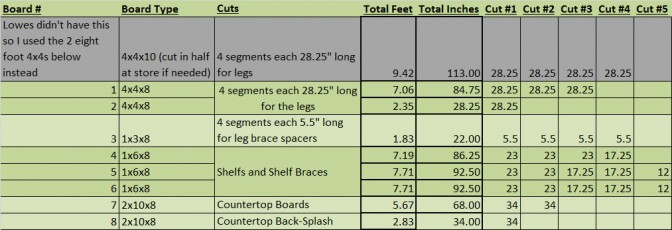
Here is a summary of the cuts for each board to maximize the use of the lumber:
Instructions:
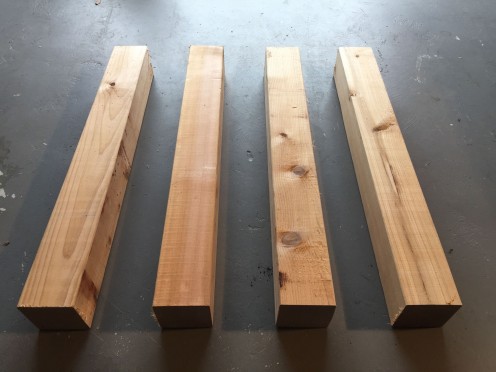
First you need to cut 4 equal segments from the 4×4’s, each 28.25 inches long. I used a miter-saw to make these cuts. I measured the first one and then I used a guide to cut the other three so I could be confident they are all the exact same length:
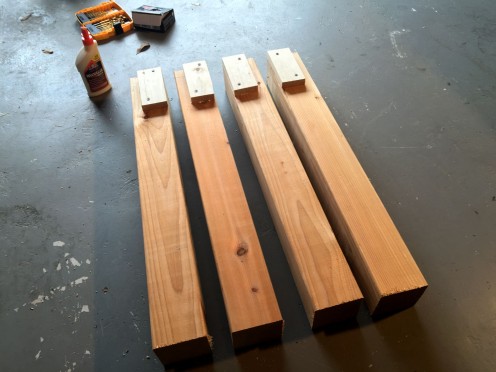
Then I cut the 4 spacers from the 1×3 board using the same approach as above, each cut to 5.5 inches long. Then I attached the spacers to the 4x4s using a little wood glue and a couple 2.5 inch screws for each piece. This picture shows the proper placement of each spacer:
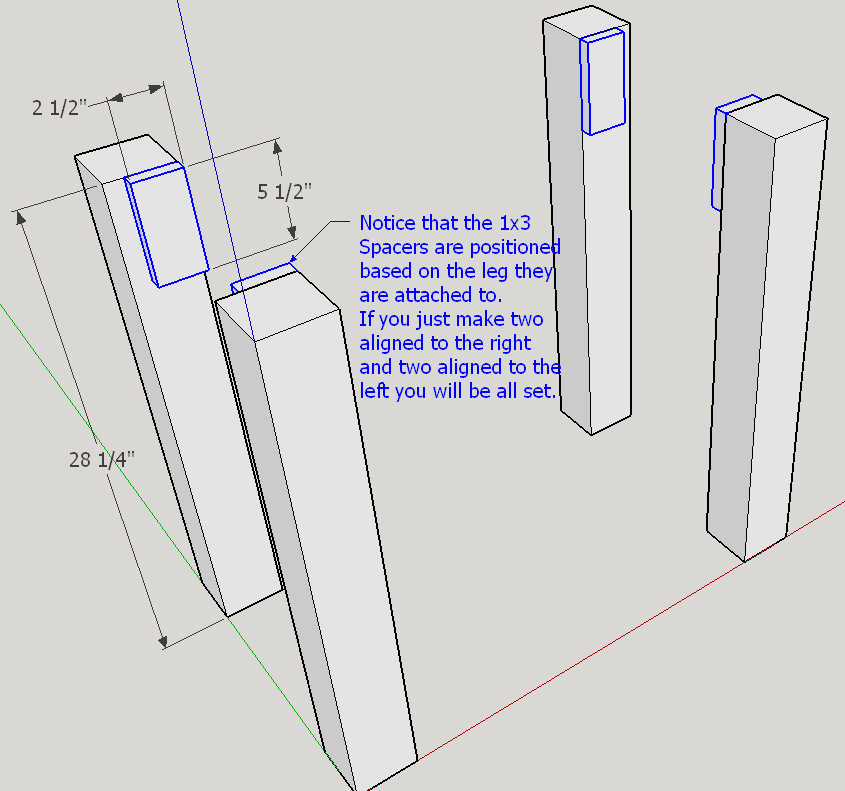
And this picture shows the actual four legs and the attached spacers we used in our project:
After you attach the spacers you need to connect each of the side legs together using the 12 inch side braces:
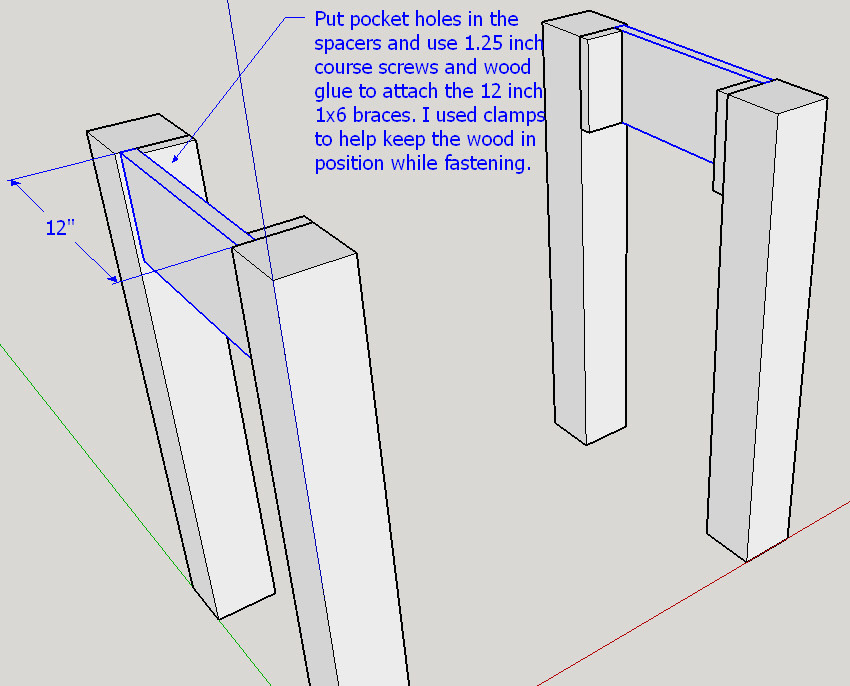
Once the spacers were connected I used the standard Kreg Jig to drill the pocket holes into the spacers.
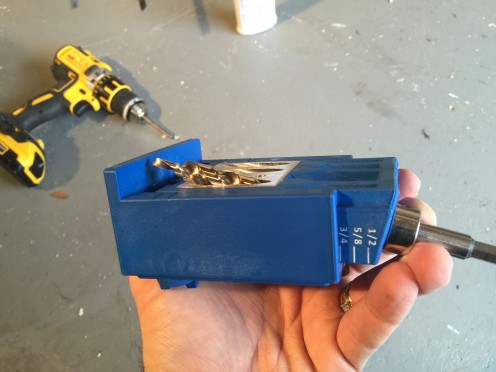
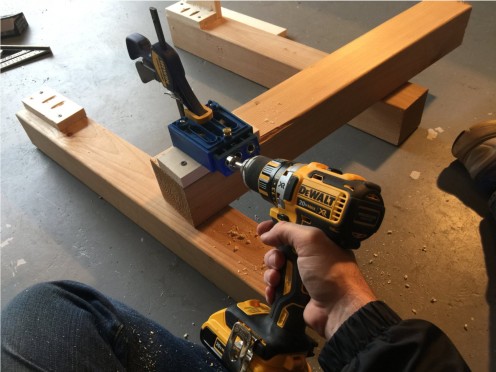 I set the Kreg Jig up for pockets holes in 3/4 inch thick wood, connecting to 3/4 inch wood. There is a KREG “Selecting the Correct Screw” Chart from Kreg’s site if you need more detail. Here is what my Kreg Jig looked like when set correctly:
 The placement of the Kreg Jig is important…the screws that will be going in these holes are to connect the side braces:
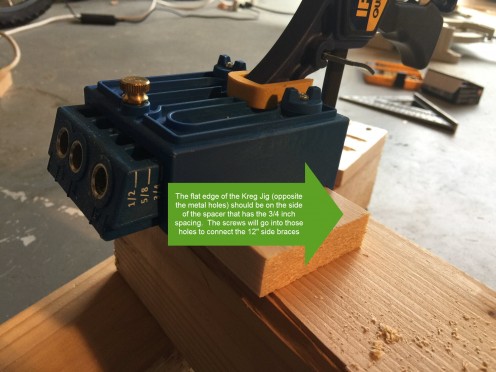 Here are some more pictures of what connecting the top side 12″ braces looks like:
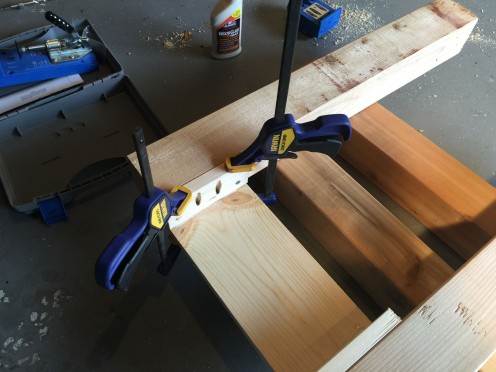
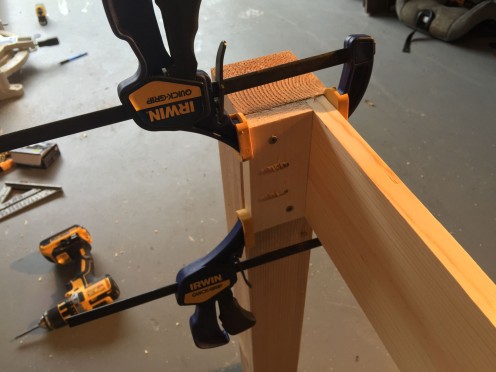 One thing to think about while you are first attaching each leg to the structure is keeping the overall structure level. When you first attach each leg if you do it on a level surface and in the position it will be in at the end of the project then you should end up with a level vanity when you finish.
After the outer braces are attached you need to position and attach the inner braces for each pair of legs. Before doing this next step I recommend cutting all the 17.25″ boards and going ahead and drilling the pocket holes. It will be easier to drill the holes before they are attached. First, place the Kreg Jig on each piece like this (remember to do both ends):
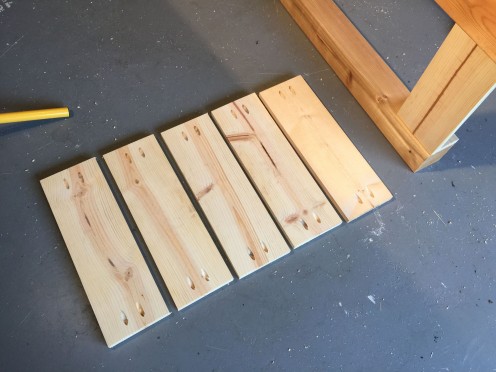
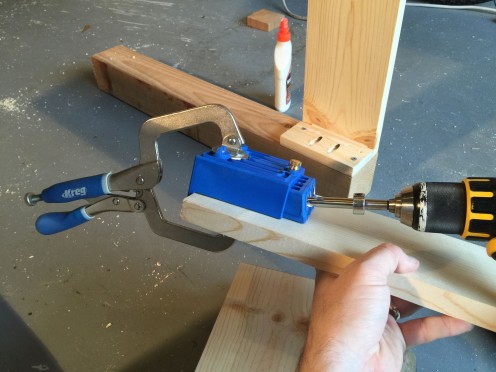 After the pieces are cut and the holes are drilled it should look like this:
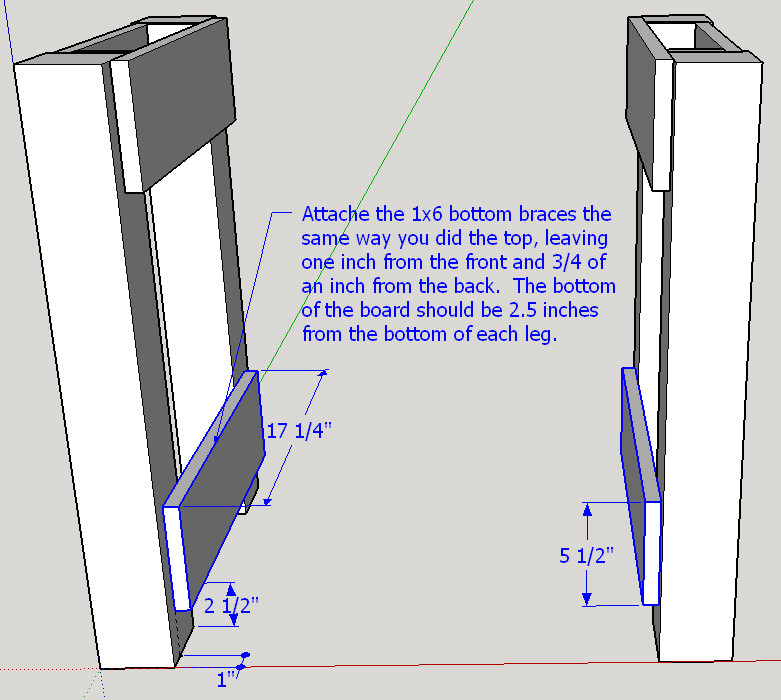
This diagram shows how the boards you just prepared should be attached:
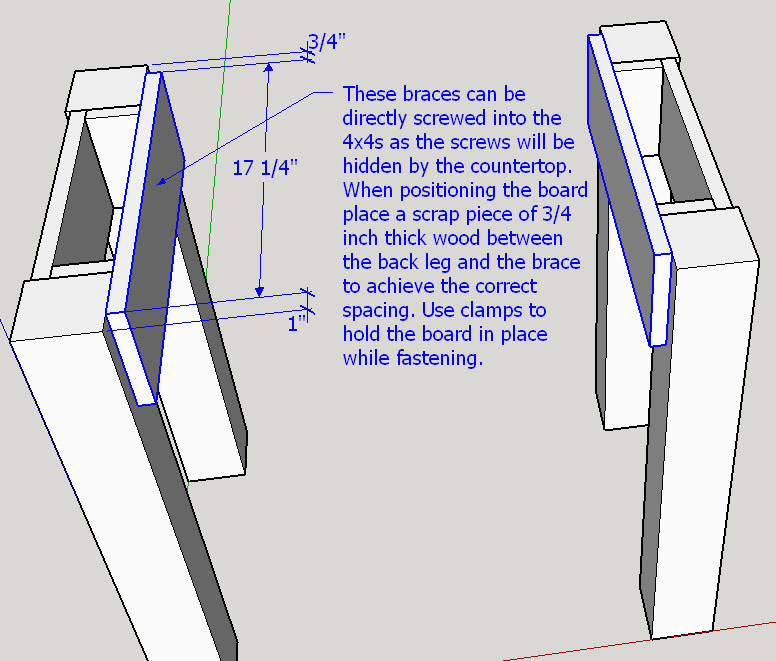
Now you will do the same exact thing for the bottom braces:
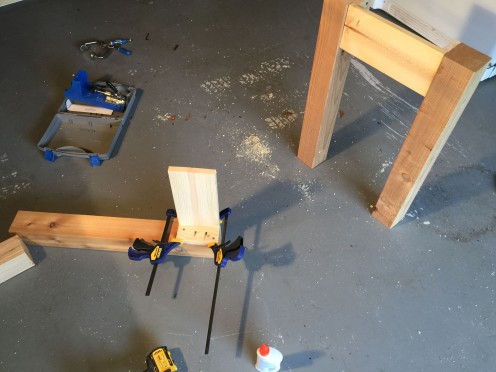
For the two steps above I just directly screwed each piece into the legs. I had to use various techniques to get the spacing correct. Here is an example of how I got the 2.5 inch spacing off the floor for the bottom side braces:
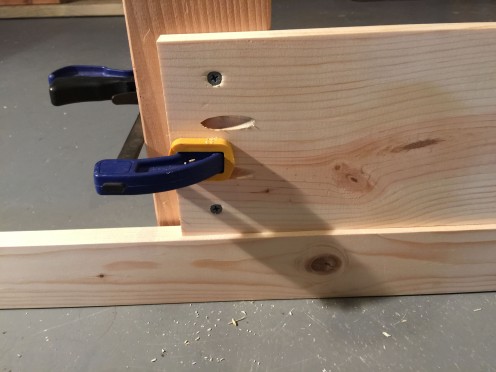 And here is how I made sure the back edge was exactly 3/4 inch offset (the clamps are holding a 3/4 board in place so I could butt up the side piece and brace it in the correct place before attaching with the screws):
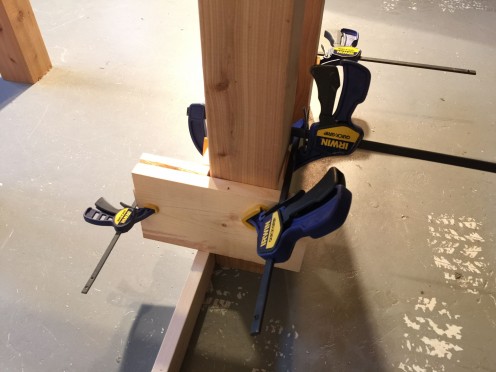 Its not important how you ensure the placement is correct but I wanted to show you my system for those that get frustrated when the instructions don’t show these kinds of steps :-). Here is what the whole spacing contraption looked like from the other side, with the board in position:
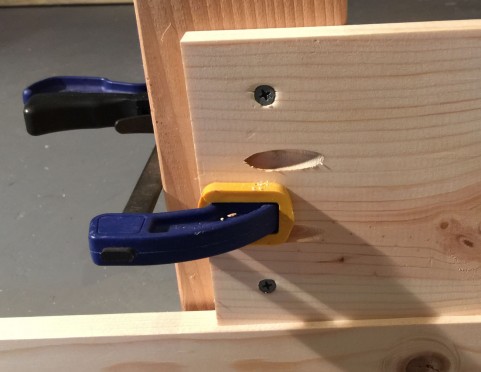
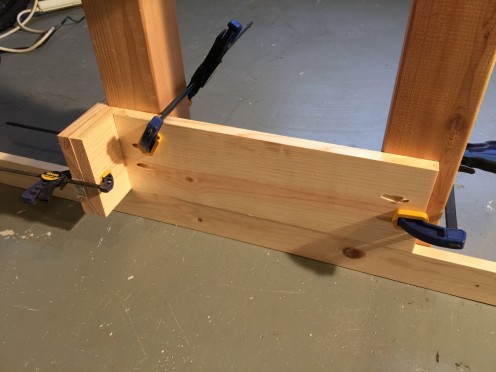 Remember, these boards are not attached with the pocket holes, they are attached with wood screws directly into the wood (be sure to pre-drill a hole for each screw so the wood doesn’t crack when inserting the screws):
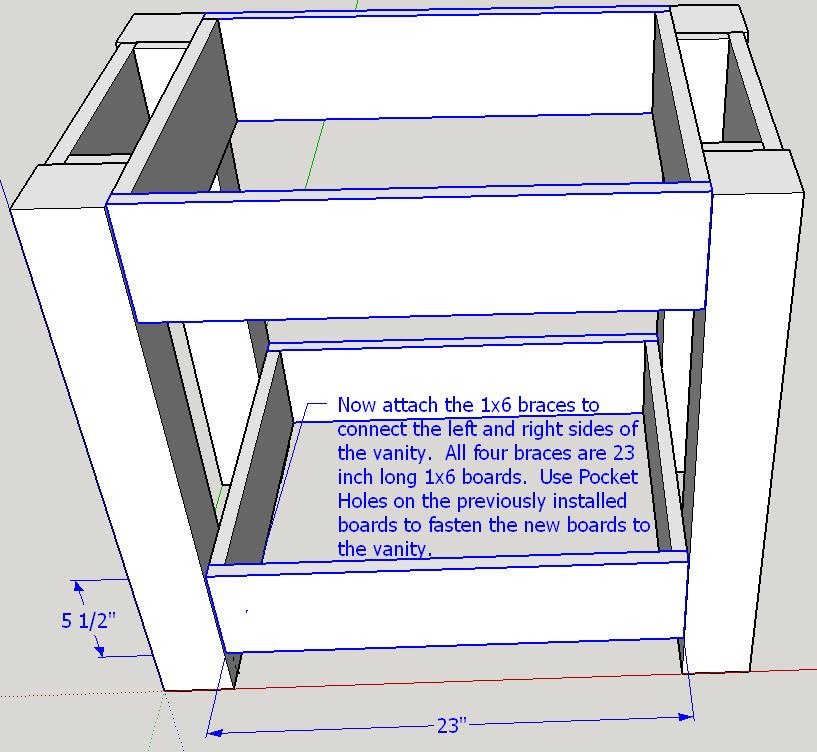
 Now you can connect the left and right sides using the four 23 inch front and back braces:
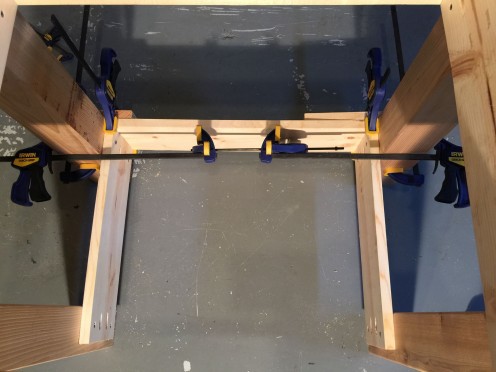
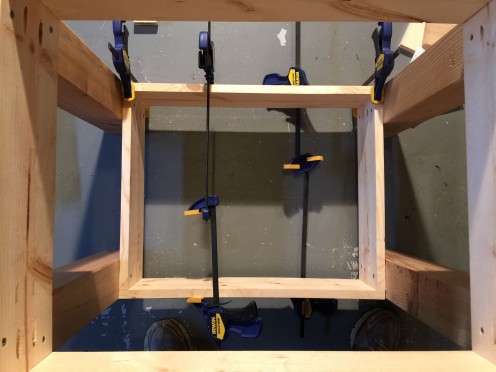
As before, I cut all the 23″ boards at the same time. Again, the toughest part of this step is just figuring out how to get the boards to stay in the correct position while you fasten them with the pocket hole screws. Here are two pictures showing what I did. I used multiple clamps, clamped to each other since I didn’t have a single clamp long enough, to pull the sides tightly together and to lock the boards in place before fastening. The first picture shows the back board and then the second picture shows the configuration when I attached the front board (the board being attached is the one at the top of each picture):
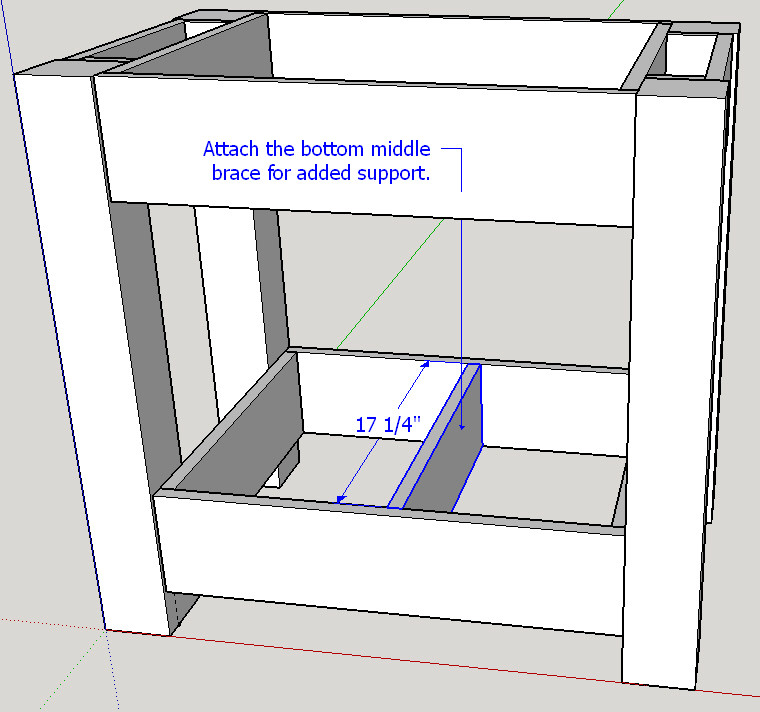
This step might be optional but I thought it would be good to add some support for the bottom shelf so I added a middle brace:
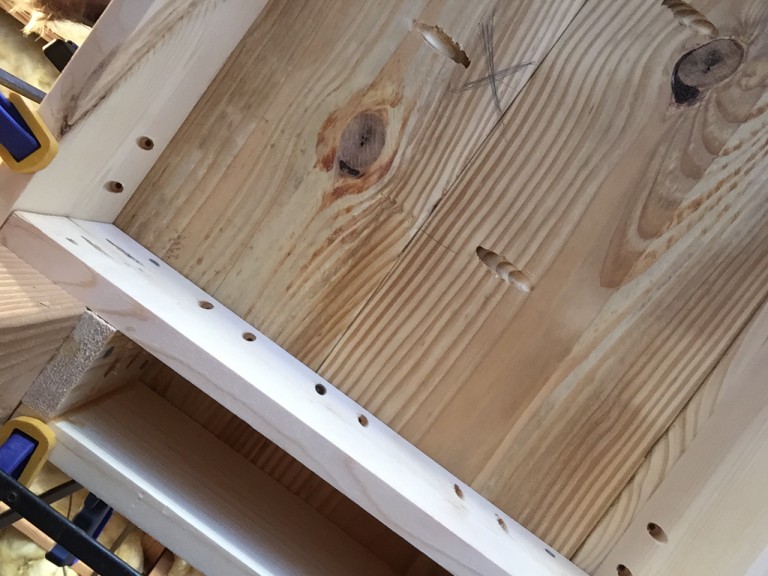
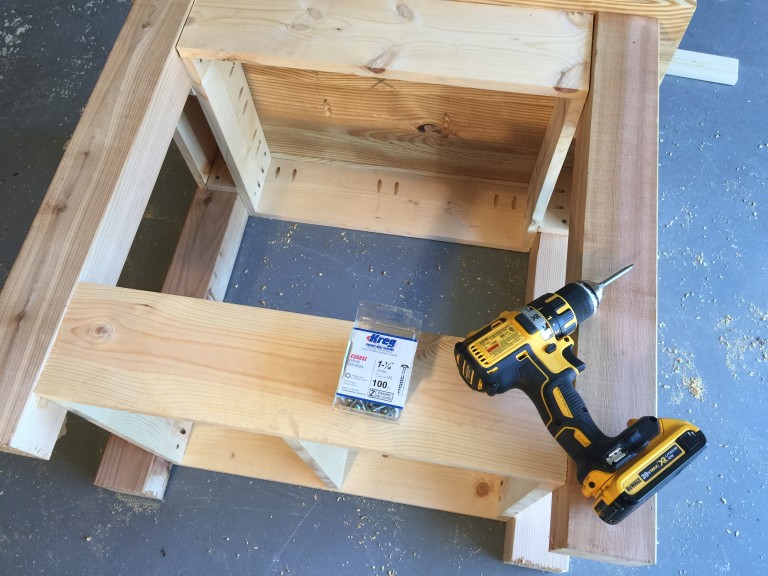
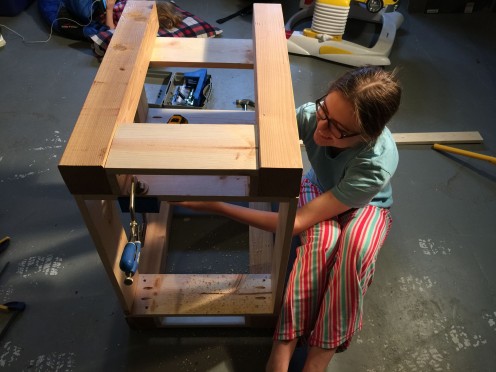
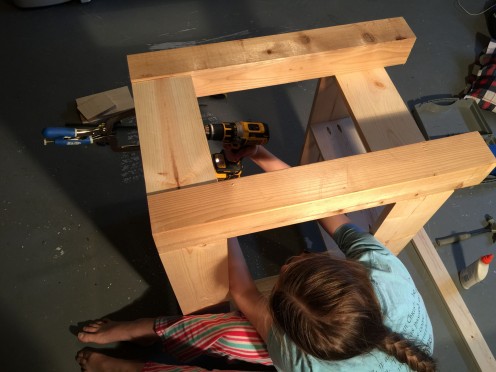
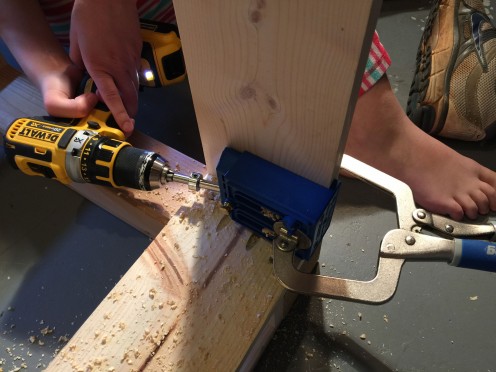
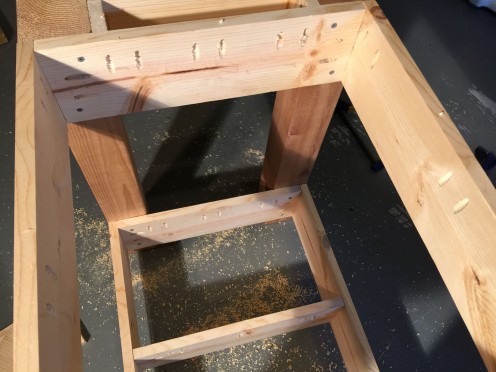
Before I moved on to the next steps I drilled pocket holes around the top edges of each level so that in the future steps I could easily attach the countertop and the shelves. Here are some pictures showing that process (my daughter Haven drilled all the pocket holes…while in her Pajamas….proving that this is no big deal and everyone should feel comfortable taking on this project  ):
):
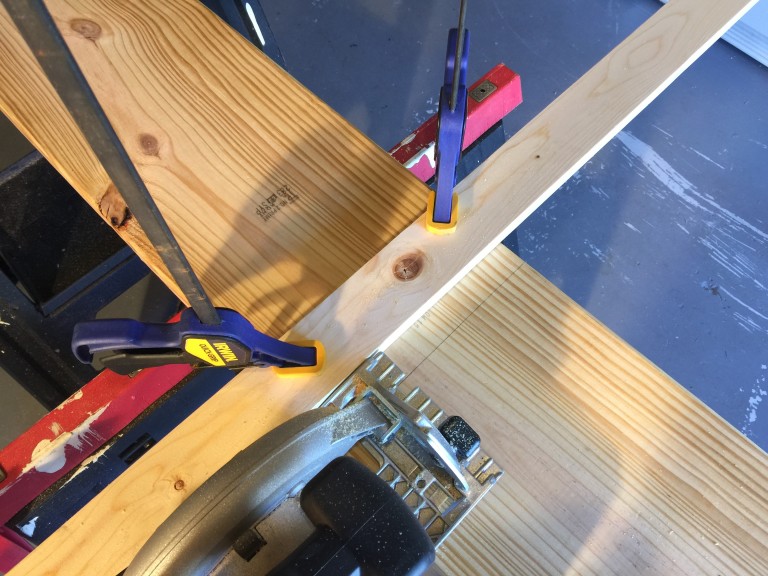
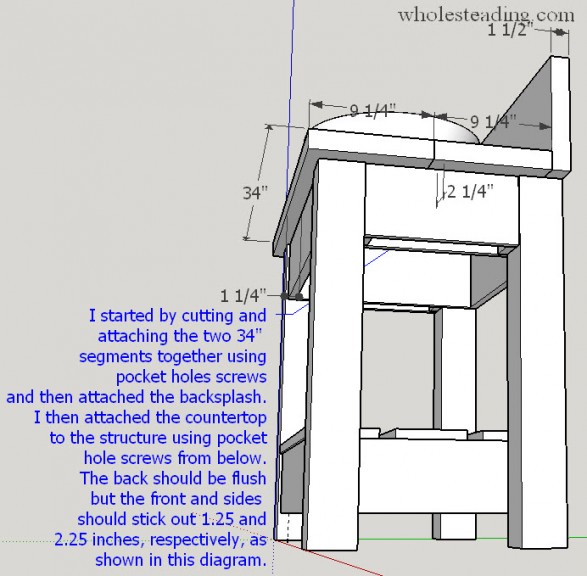
Now that the basic structure is in place you can go ahead and attach the countertop. The countertop is made of three pieces of 2×10, each cut to 34 inches long. Depending on the dimensions of the room you have to work with you could use different boards to achieve the desired size of the counter-top. I used clamps to attach a guide to make sure I got a nice straight cut:
After I cut the 2x10s to the desired 34″ length I used KregJig HD pocket holes to fasten the two flat boards together. Here is what the HD jig looks like when set correctly:
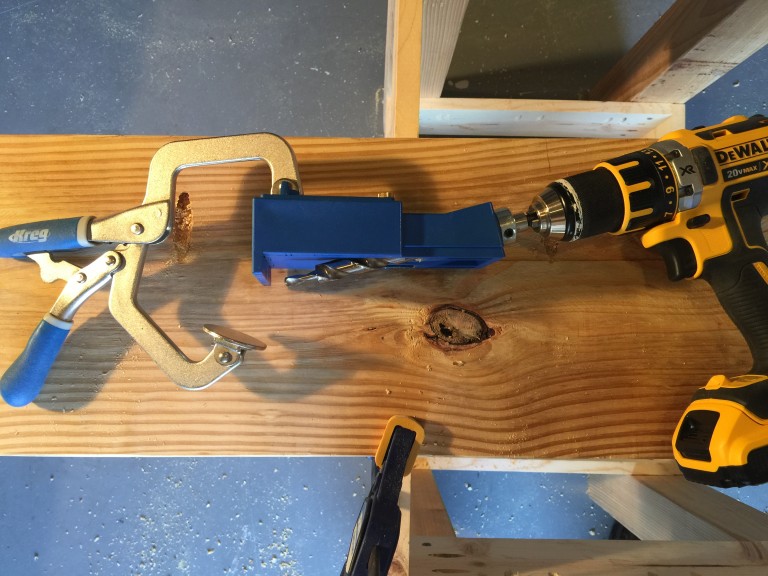
The pocket holes are drilled just like the previous ones…they are just bigger and hold a larger pocket screw:
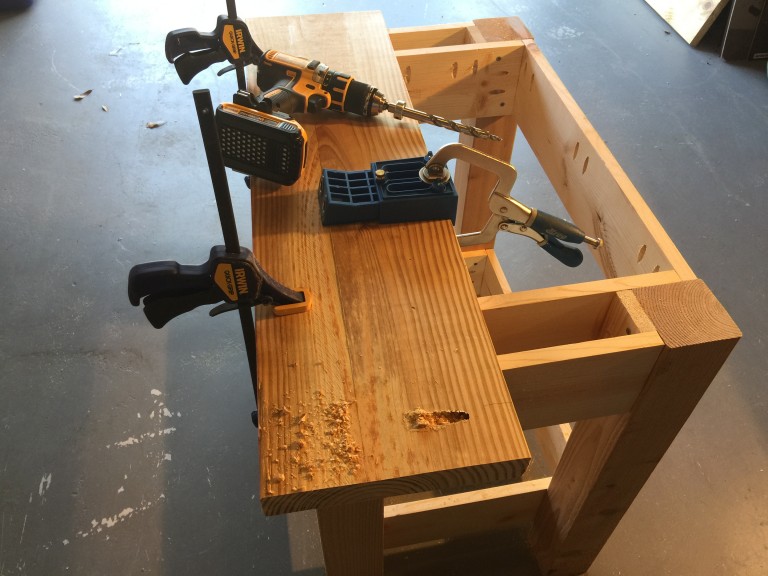
Here is the pattern I used for the pocket holes:
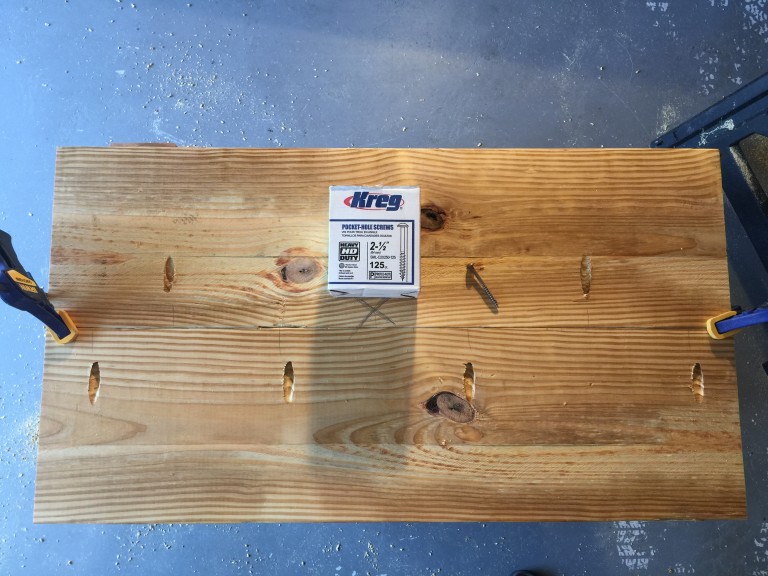
Once the two halves are connected I lined them up on top of the vanity, lined up the backsplash, clamped everything together and then used wood screws to attach the backsplash. Here are some pictures of that process:
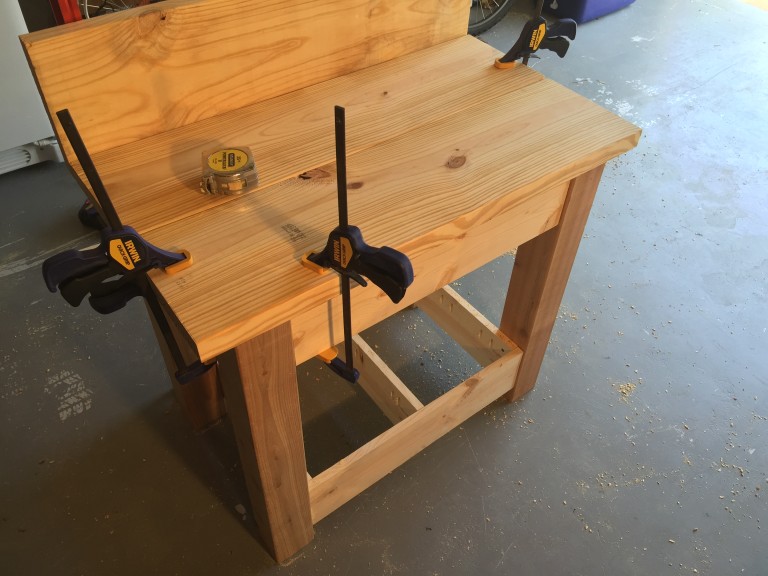
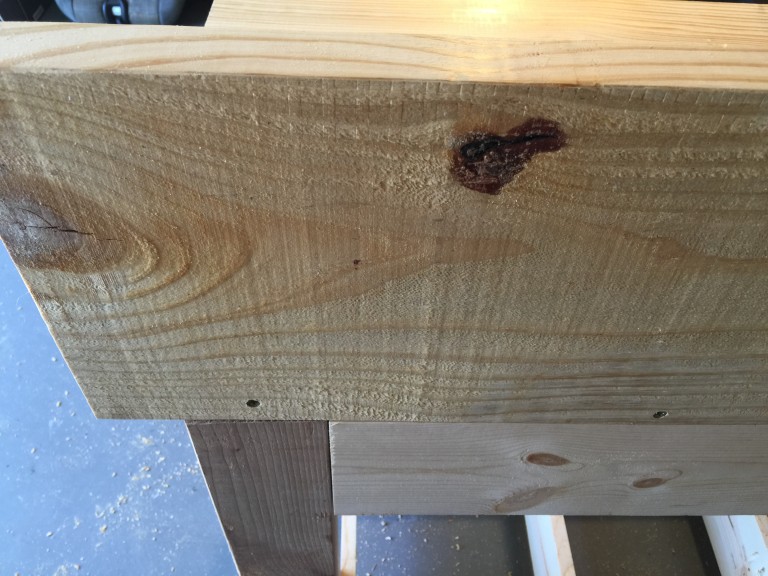
Be sure to attach the top so it is flush with the back and centered on the left and right sides:
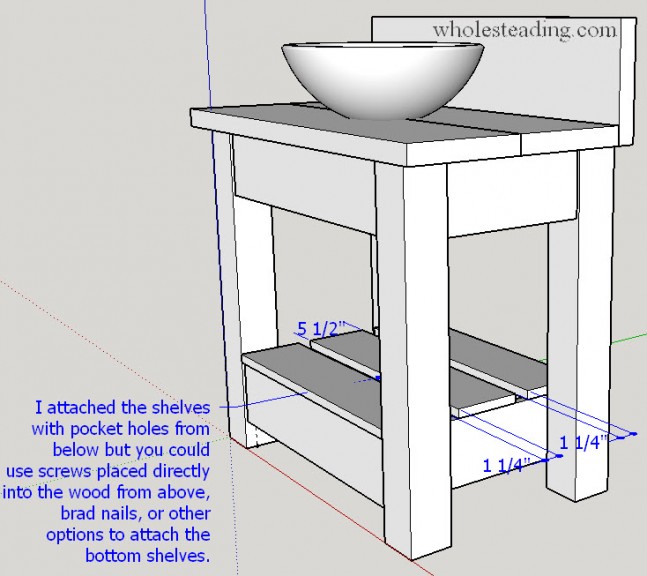
I waited to attach the bottom shelves so I would have easy access for the drill while fastening the countertop using the underneath pocket holes. Once the countertop is on you can attach the bottom shelves:
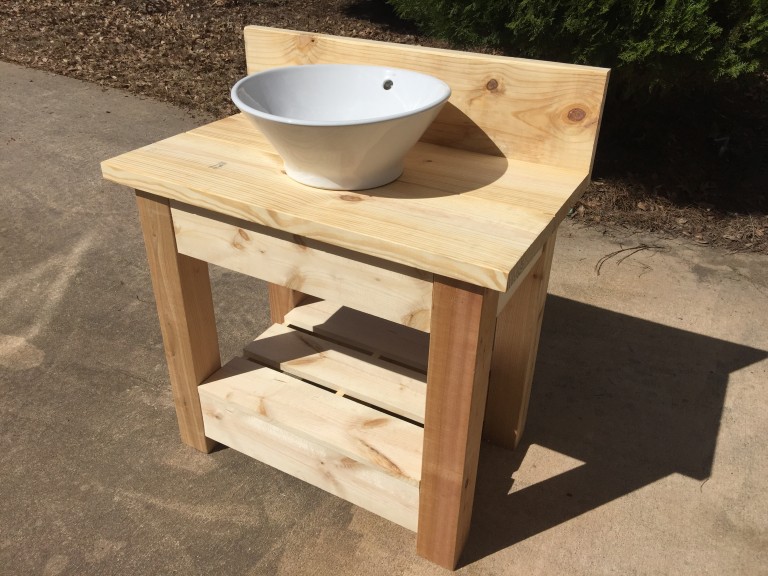
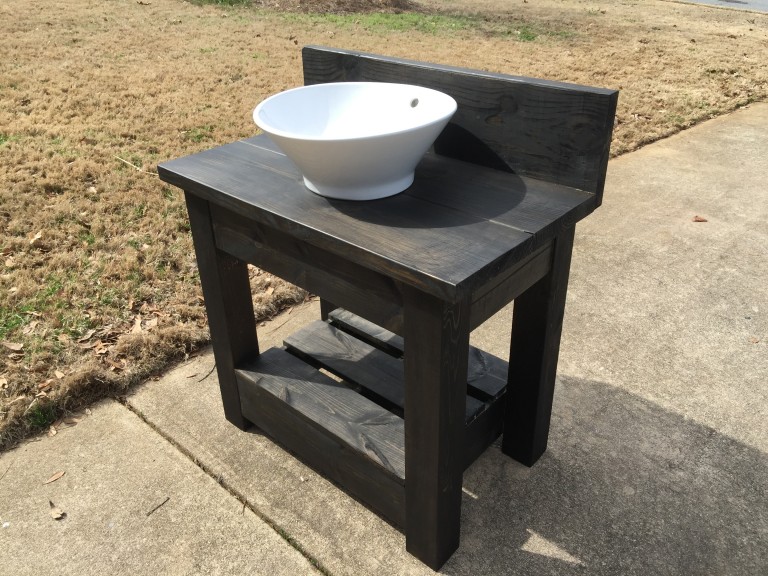
You are almost done! At this point, before attaching the sink and plumbing, you should go ahead and sand/stain/paint/finish the vanity as desired. We stained ours with Minwax Ebony. Here is what it looked like before and after being stained:
After the vanity stain is dry its time to add the sink. We had planned to use a galvanized metal bucket but it wouldn’t drain properly so we ended up going with a standard vessel sink. The sink or bucket will need to be centered on a drilled hole in the countertop:
We purchased the sink on Amazon. Its a Decolav 1435-CWH Round Vitreous China Tapered and Angled Above-Counter Vessel with Overflow, White
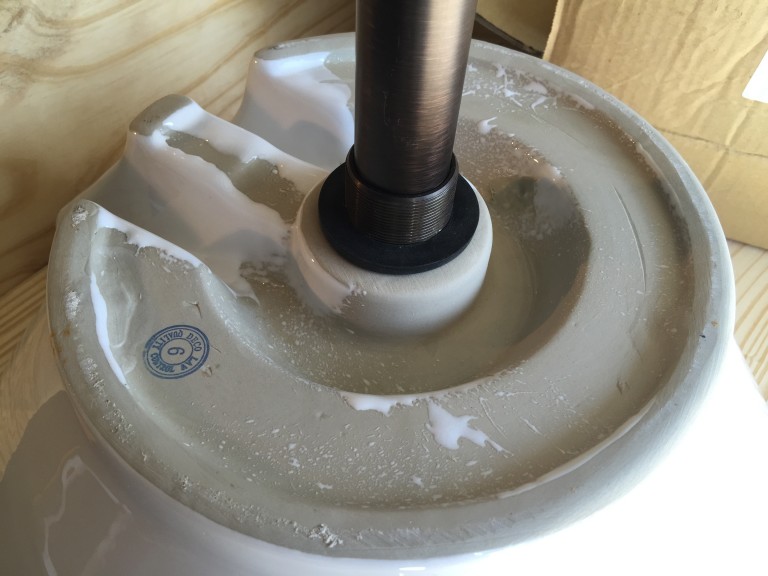
The faucet will be coming directly out of the wall. I plan to build another one of these for the Guest Bathroom where the faucet comes out of the sink or the vanity. I will include those instructions when I write that post. At the time of writing this, the vanity bath is not yet finished. I will hopefully be able to get some pictures of the faucet being installed and will come back and add those pictures here later if I do. As for the drain assembly, its super easy. The drain comes apart, slides into the hole in the sink, and then has an attachment that is tightened from underneath the sink:
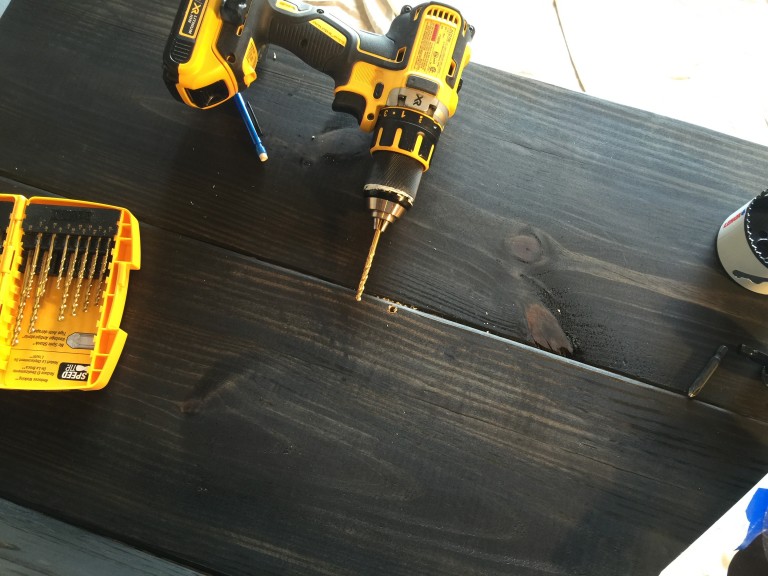
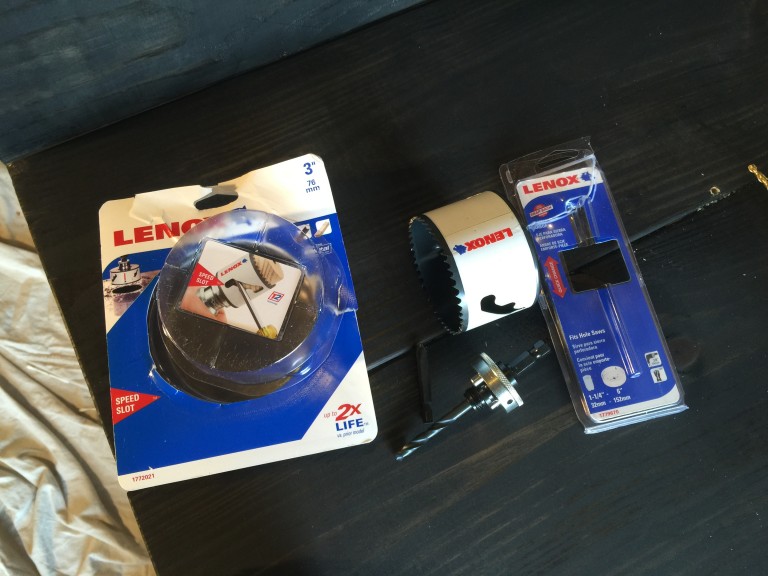
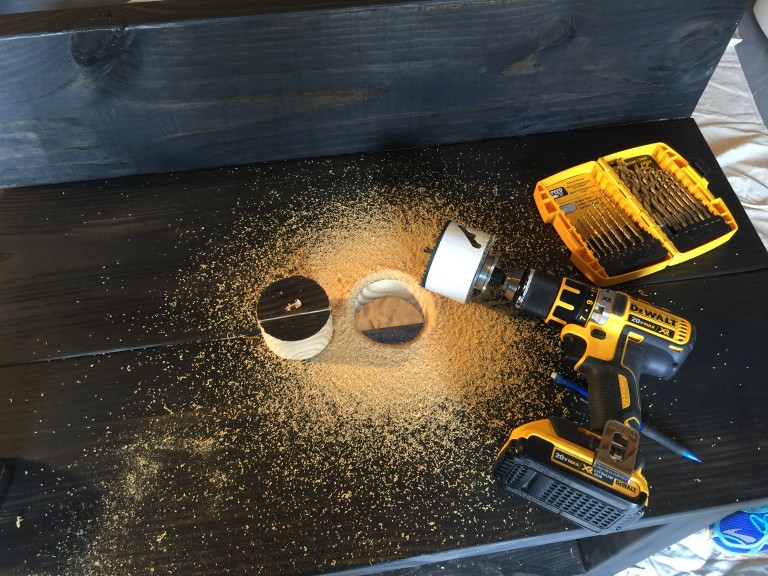
Making the hole in the countertop is a little bit tricker but wasn’t as hard as I thought it would be. First, you identify the location of the sink and mark a hole. Drill a pilot hole in that location. You then use a special drill attachment to cut the hole…I used a Lenox Tools 3-Inch Speed Slot Arbored Hole Saw. Here are what the steps look like:
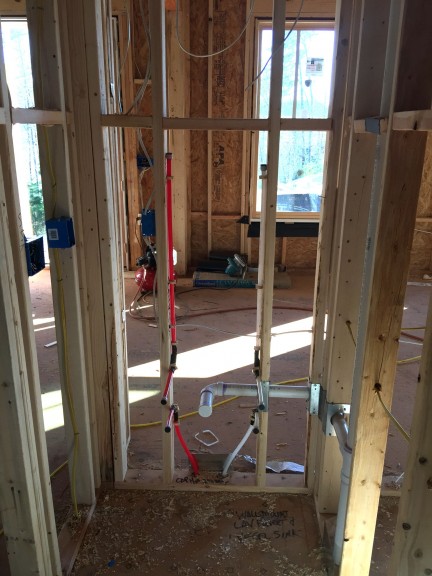
Bethany recently finished applying the polyurethane so the vanity is all set for the new house. I will update this post in the future with the final product once its installed. Here is where it will be going:
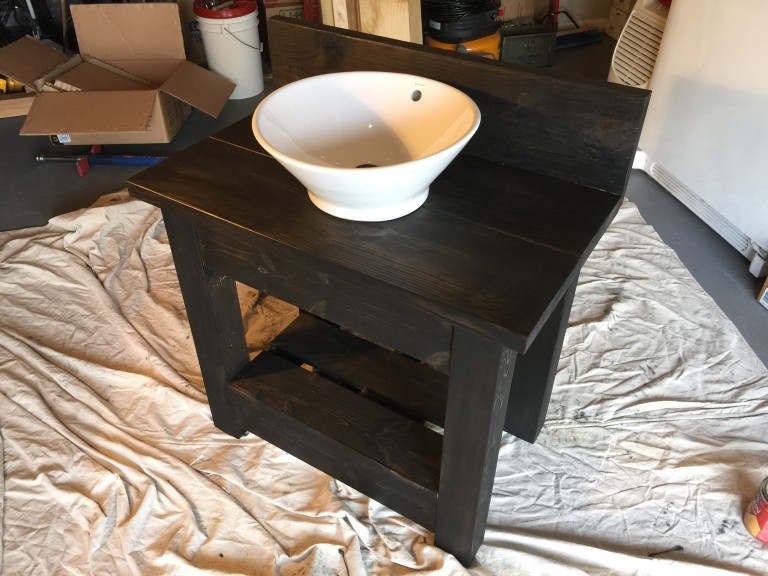
Here is what it looks like today in our garage while we wait for the construction of our new home to finish:
If you would like to see the pictures of this vanity in the finished house there is another post with pictures of all the final installed bathroom vanities HERE.
If you are looking for plans for the Guest Bathroom vanity, the plans are exactly the same as above but just longer cuts for the boards.
If you would like the Sketchup file for the Guest Vanity you can download it here:
SketchUp_File: Farmhouse_Guest_Room_Vanity_with_Vessel_Sink
You will need to install sketchup first to view the file. The file will allow you to see all the dimensions and is also easily modifiable if you want to customize it to meet your own requirements. If you have any questions please leave a reply to this post and I will answer your questions.
If you would like to follow along with our build process just follow us on Facebook or Subscribe to this site.



Thanks! This is awesome. I’m getting materials together today to make a start on ours. I’m building your plan exactly for the first piece and then hopefully adjusting for a longer double vanity unit for our master 🙂
Thanks for the detail. Super helpful!
Jonny,
Glad the plan and instructions are helpful. I just made a few updates to this post for you and added a new post. The new post shows the pictures of the final, installed vanities: https://wholesteading.com/2016/02/27/bathroom-vanities/
Our Guest Bathroom Vanity is the same as this Powder Room Vanity except its wider. I just uploaded the sketchup file and added a link near the bottom of this post. You can use the Sketchup file as a starting point for your revisions. If you have any questions or need help with anything please let me know. Can’t wait to see your final product! Anthony