
I never thought I would be writing a post about a woodworking project but I am so excited to be enjoying this new hobby! I have always had a desire to learn woodworking but it seemed too hard and I had no foundation of experiences to build from. I built a dog house years ago but it was pretty simple and turned out sloppy.
I am also extremely busy with my growing family and a demanding career so I assumed if I ever got around to woodworking it would be during my retirement years.
So what changed? Well, for my birthday my wife gave me a Kreg Jig. I didn’t even know what it was and when Bethany explained what she wanted me to do with it I felt intimidated and under qualified. She showed me a table on Ana White’s website and explained that if I could build that table we could save thousands of dollars compared to a similar table she was considering purchasing at Restoration Hardware. That got my interest.
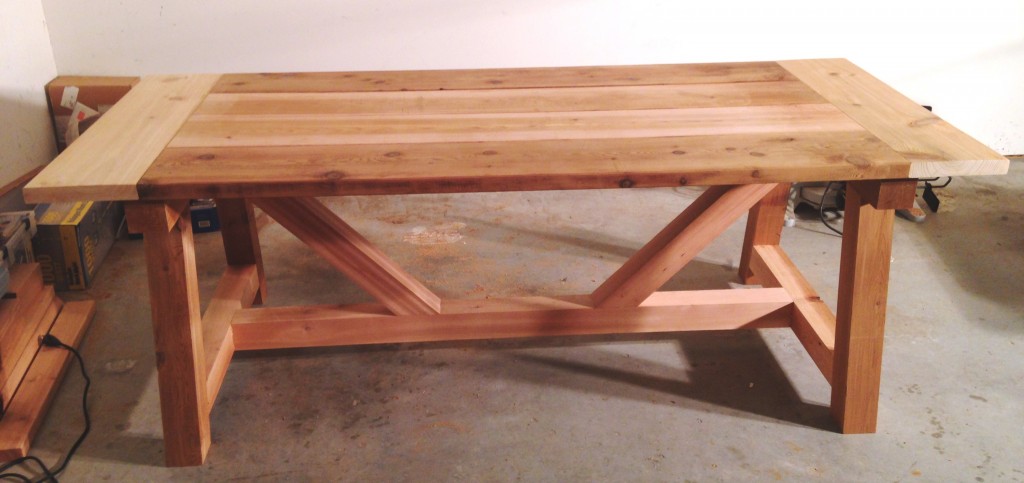
According to Ana’s site and her fellow blogger’s site (Shanty2Chic) the Ana White 4×4 Farmhouse Truss Beam Table would cost just over $100 in wood (I ended up using cedar instead of pine so the total cost of wood was $224.91). I think that was what got me to give it a try. My thinking was that even if I completely failed I would only have lost $100 trying. Seemed like low risk and high return on my investment so I plunged in. For those that would like to see the table but are not interested in the details, here is a picture of the finished table (pre-stain):
For those that are brand new to woodworking and want to give this a try, here are all the details:
Tools:
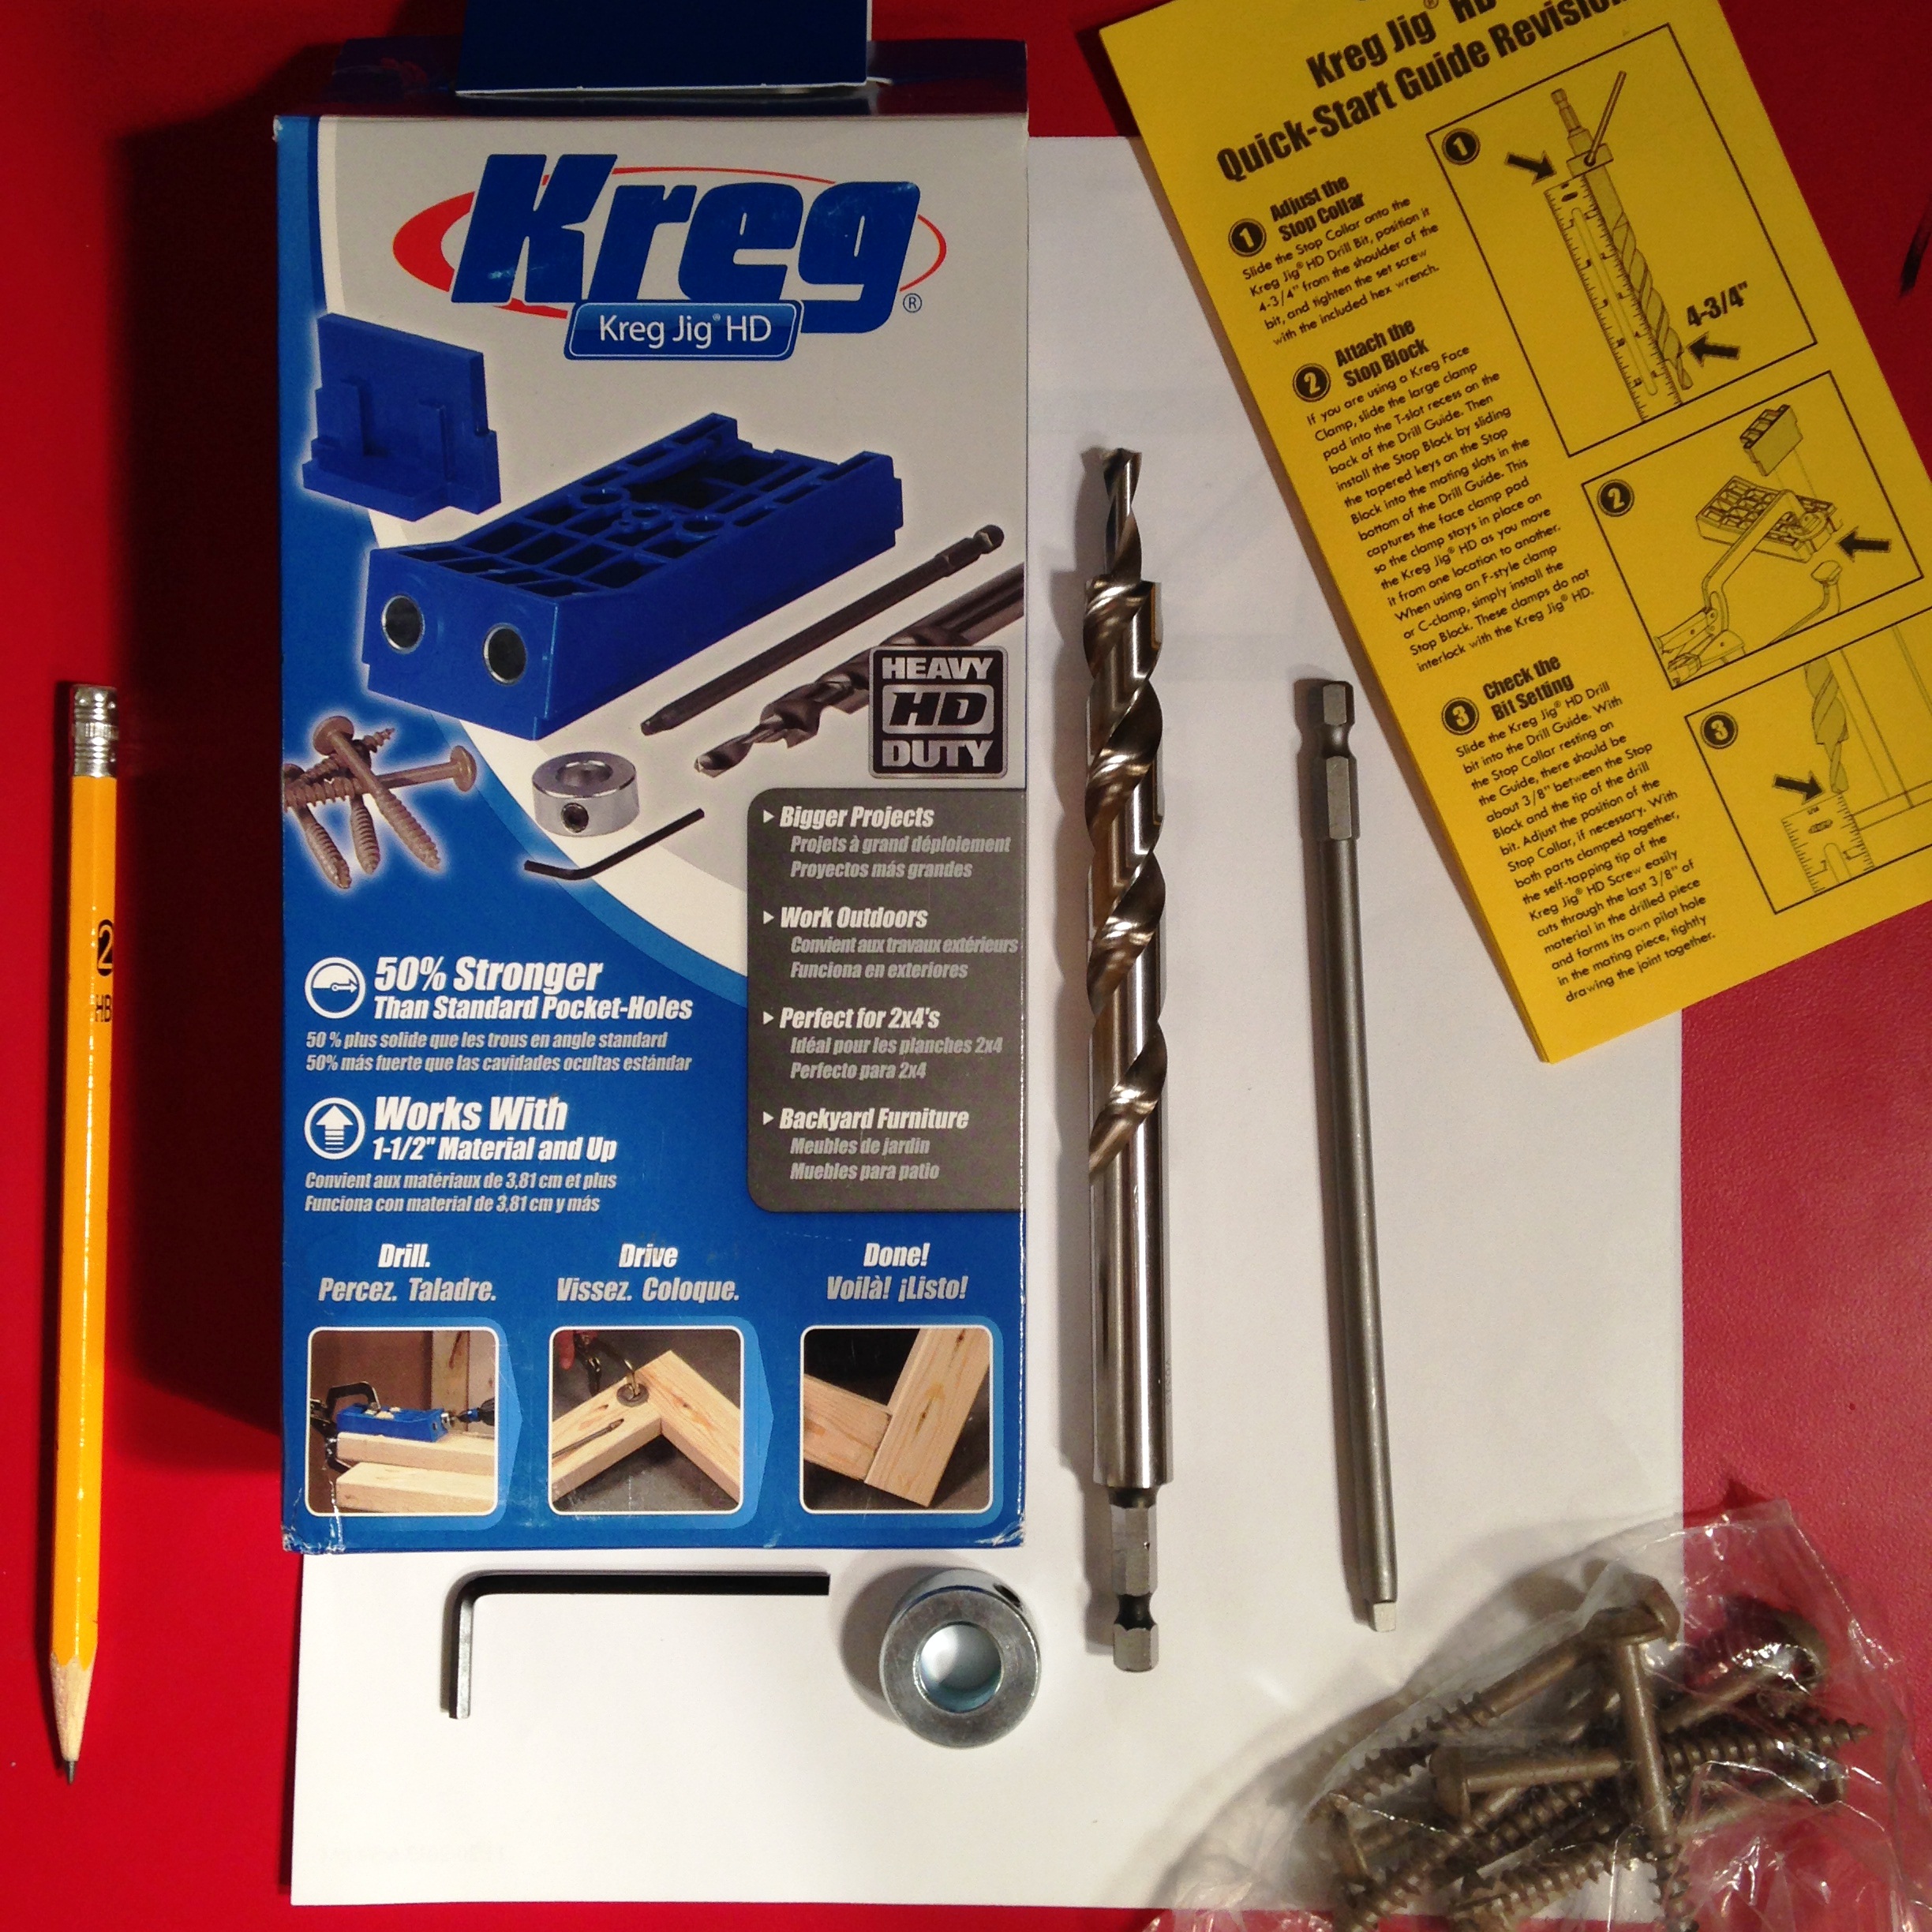
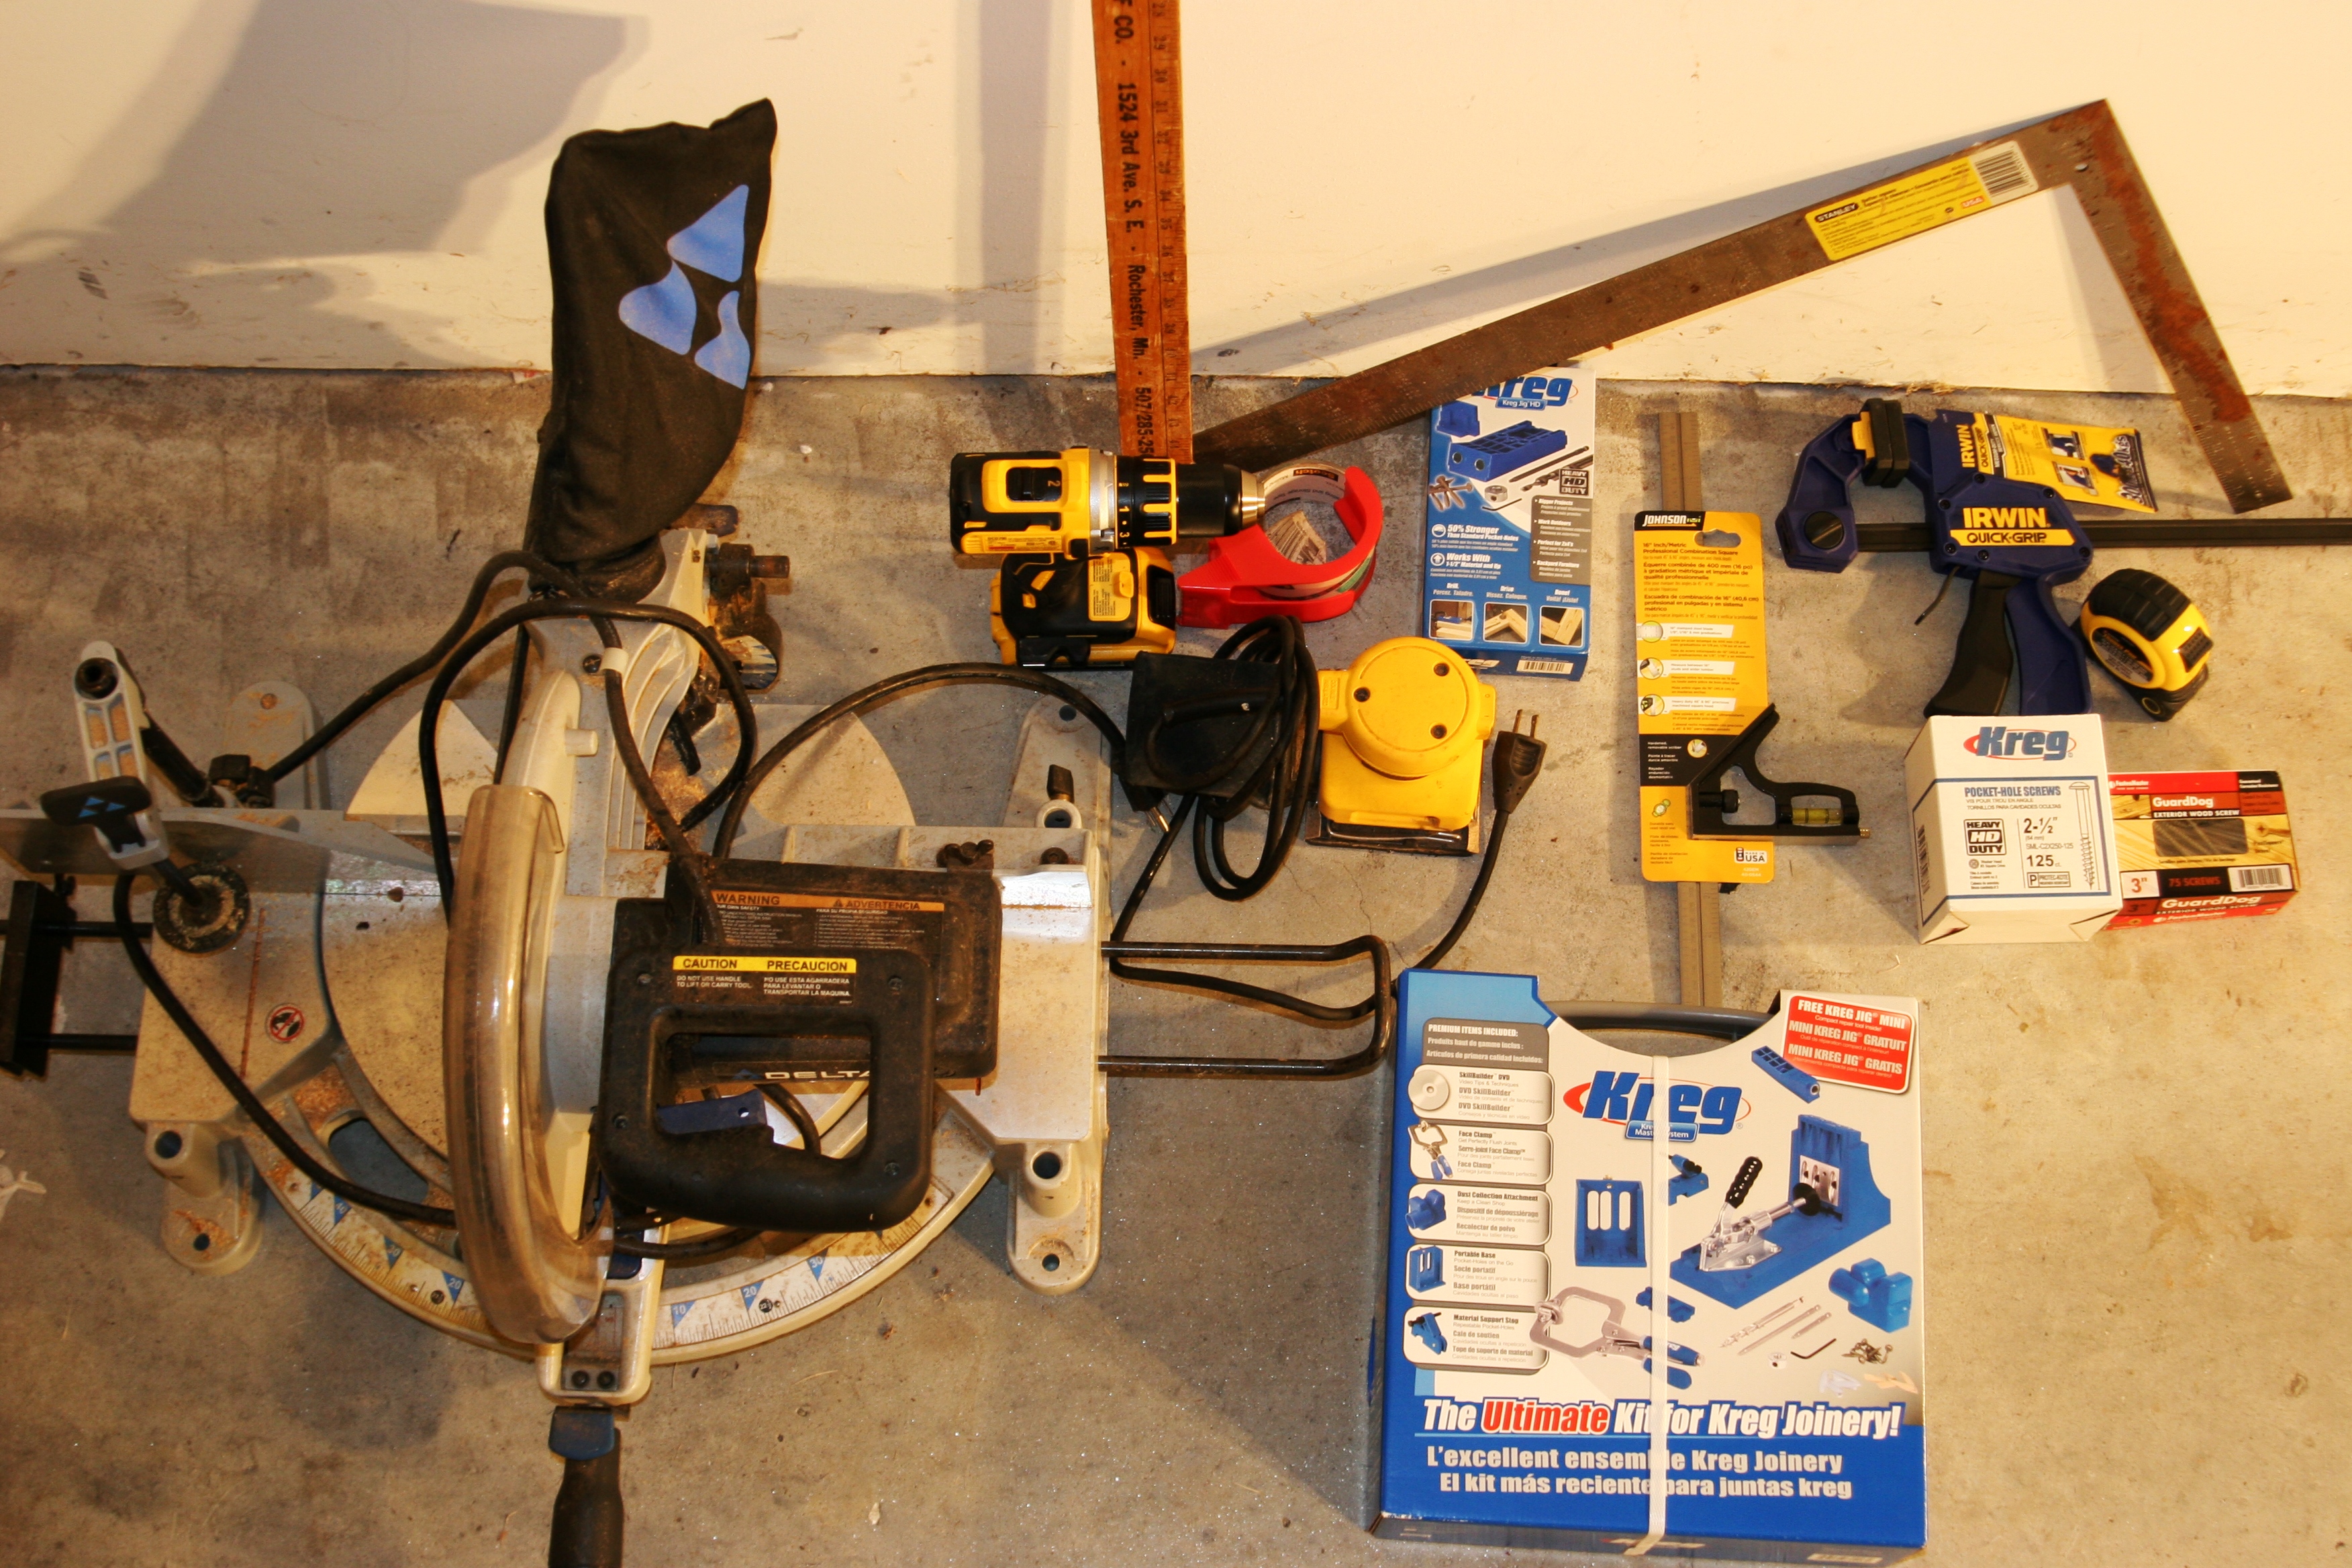 I mentioned that you need a Kreg Jig but here is a complete list of everything I used to build this table:
- Kreg Jig Master System
- Kreg Jig HD
- Compound Miter Saw
- Cordless Drill
- Palm Grip Sander
- Tape Measure
- Square
- Assorted Clamps
- Mechanical Carpenter Pencil
- Safety Goggles
- Hearing Protection
- Circular Saw
(optional but helpful)
- Gorilla Tape
(optional but helpful)
Materials:
- 5 – 4×4’s at 8 feet long
- 2 – 2×4’s at 8 feet long
- 2 – 2×10’s at 12 feet long (I had them cut these in half so I could fit them in our van)
- 1 – 2×10 at 8 feet long
- Kreg Jig 2.5 inch HD Pocket Hole screws
– I bought a box of 125 screws on Amazon as both Lowe’s and Home Depot didn’t have these in stock
- 2.5 inch wood screws 2-1/2-Inch Wood Screw, 40-Piece
- 3 inch wood screws
- 4 inch wood screws (I only used a couple of these but I couldn’t find any on Amazon so check your local hardware store)
- Gorilla wood glue
Plans:
- The plans are split across two websites, start by reading this post on Ana White’s blog:
- Then for more details and some good pictures check out Whitney’s post on Shanty2Chic:
Here are some of the other links I found helpful as I worked on understanding how to build this table:
Here are some pics and additional details on my experience:
 As I mentioned, I received the Kreg Jig as a present for my birthday and I already owned several of the other tools required but if you don’t have any of the tools then the cost to build this table is much more than the $224.91 I spent on the wood. You can order the tools by clicking on the links in the tools section above but the wood you will have to find locally.
 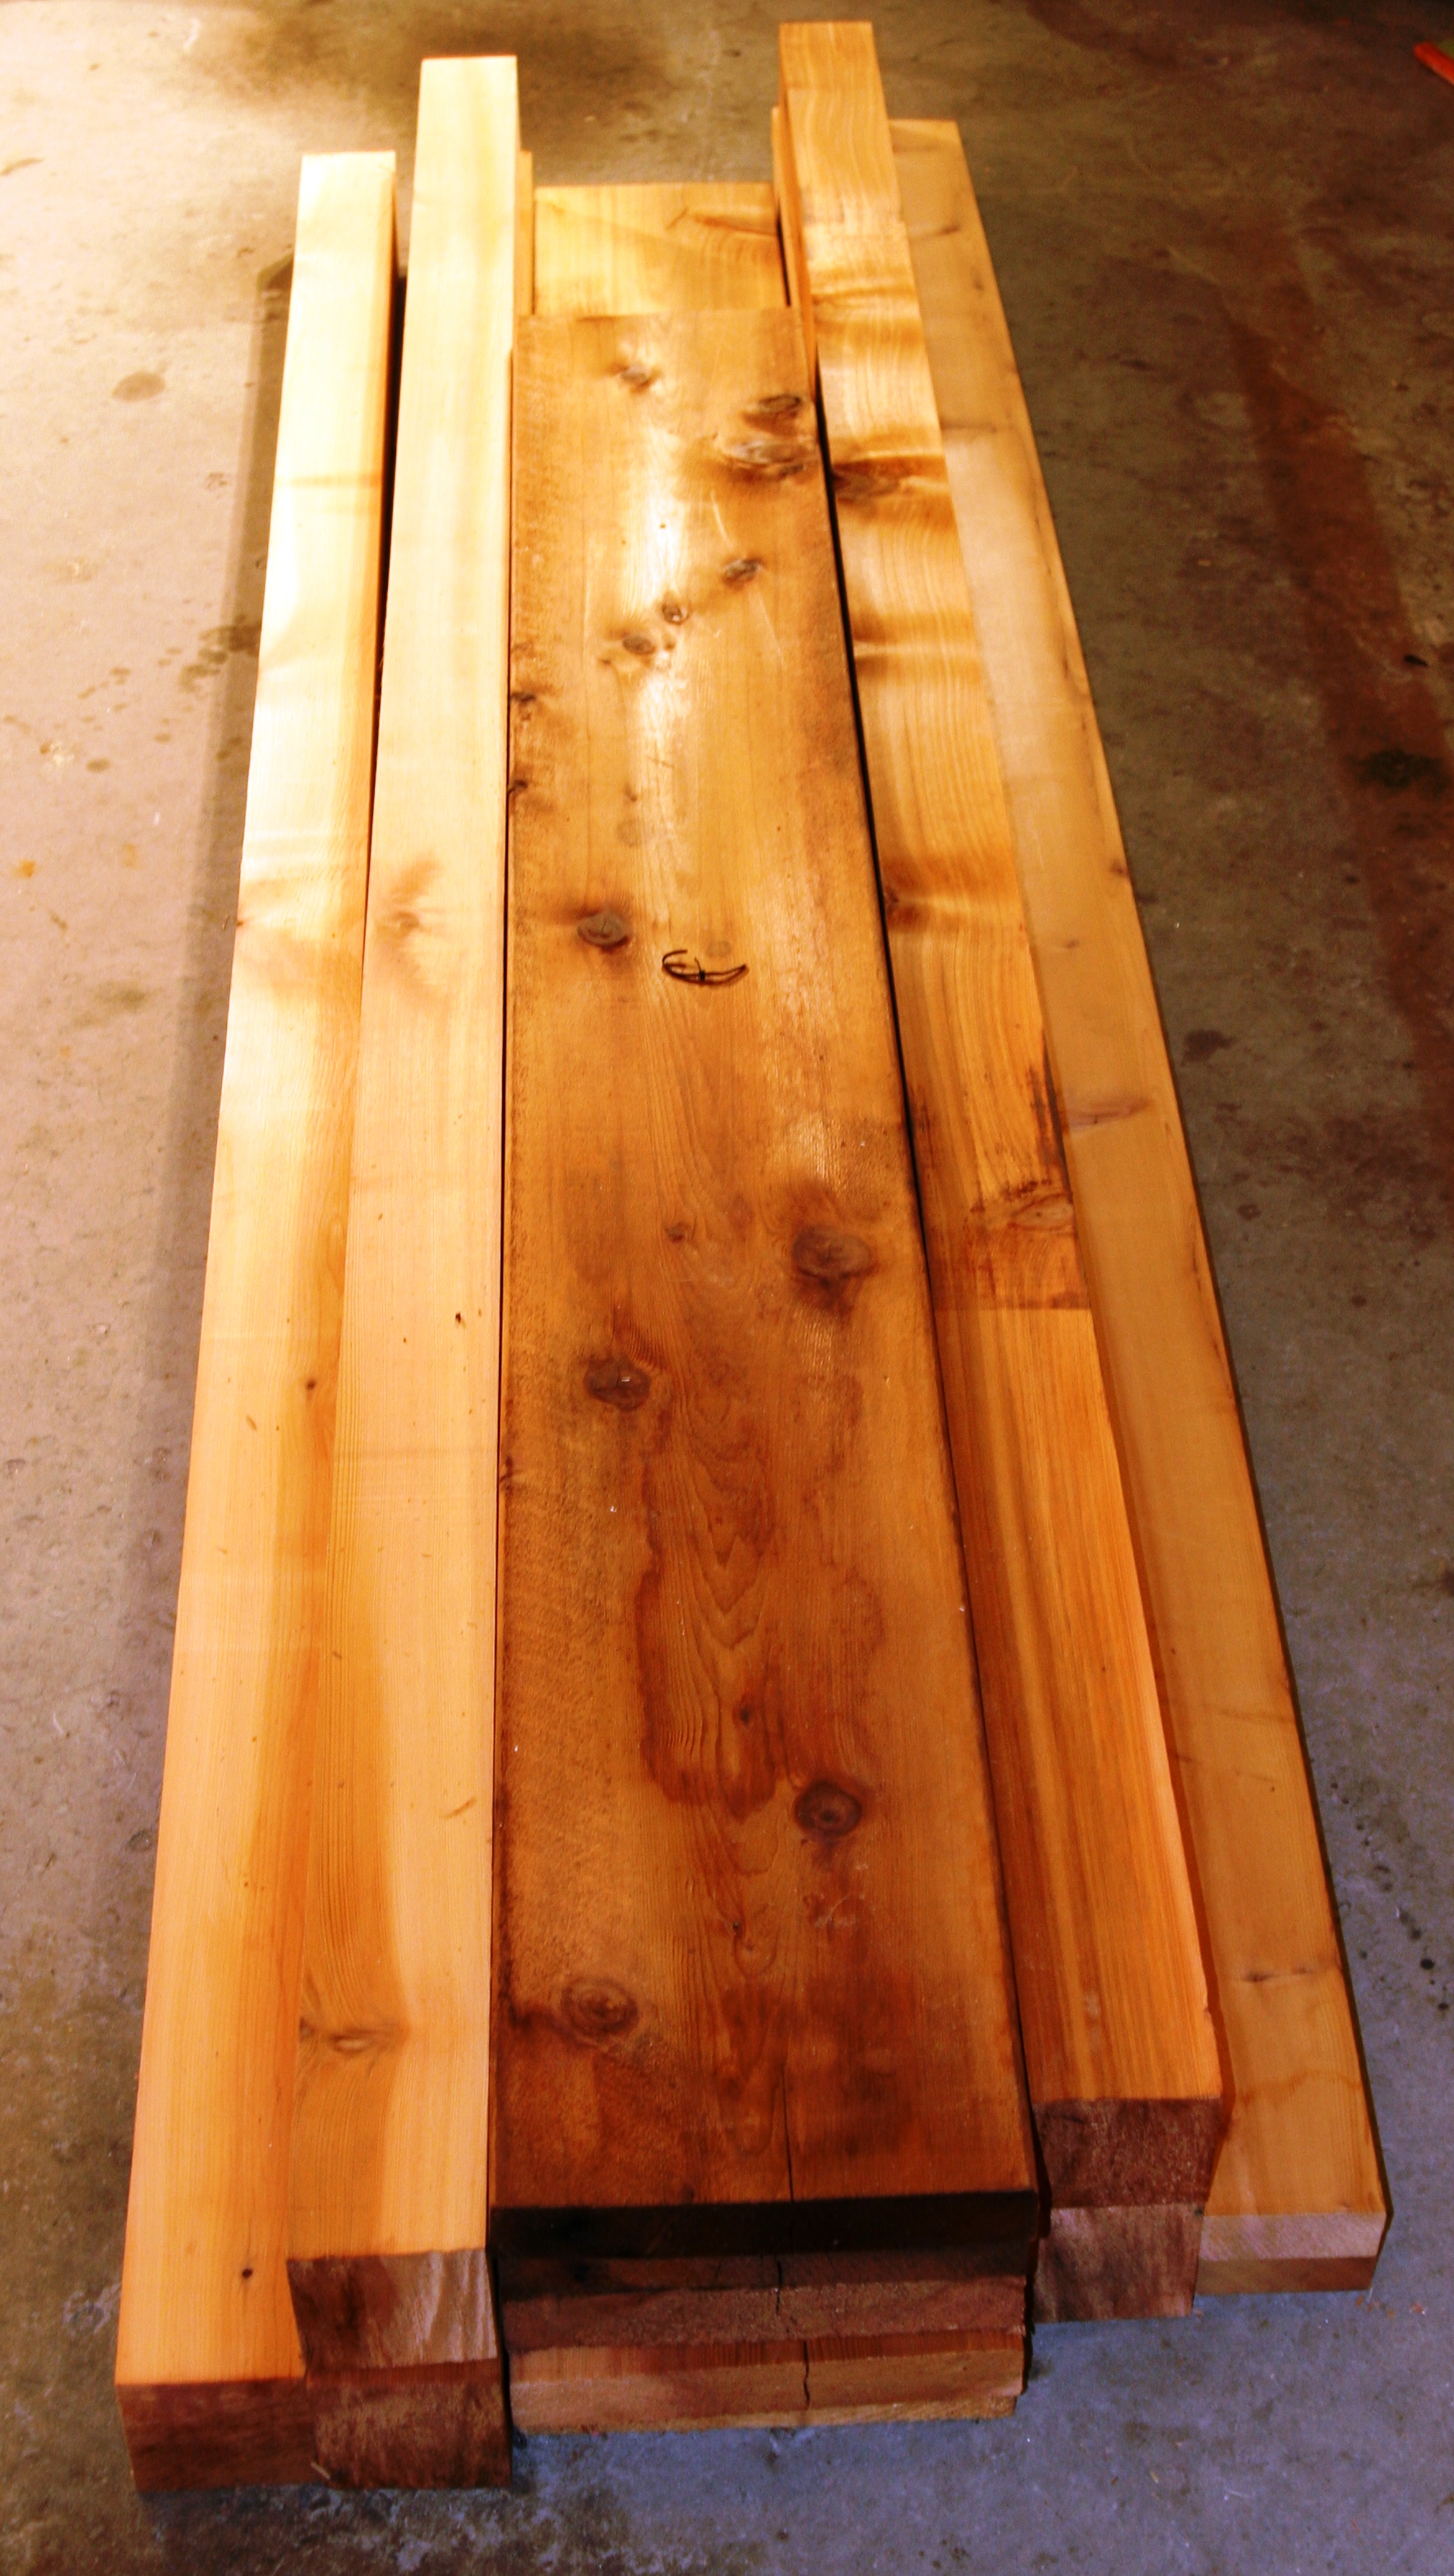 I think you can probably find all of the wood needed at Home Depot or Lowe’s but I picked mine up at a lumber yard recommended by a friend. If you live in North Atlanta you can just walk into Thomas Lumber Supply and show the guy at the front desk the list of lumber needed and they will get it together and load it into your vehicle for you.
I was planning to use pine but Thomas Lumber only had the wood I needed in Cedar. According to what I read either would work fine. The cedar was more than the $100 I planned for but the boards were straight and looked good. From what I read on Shanty2Chic’s site many people struggle to find good wood so I was happy to find good lumber. It didn’t seem like enough wood when they loaded it in the van but when I was done building the table there were large scraps left over.
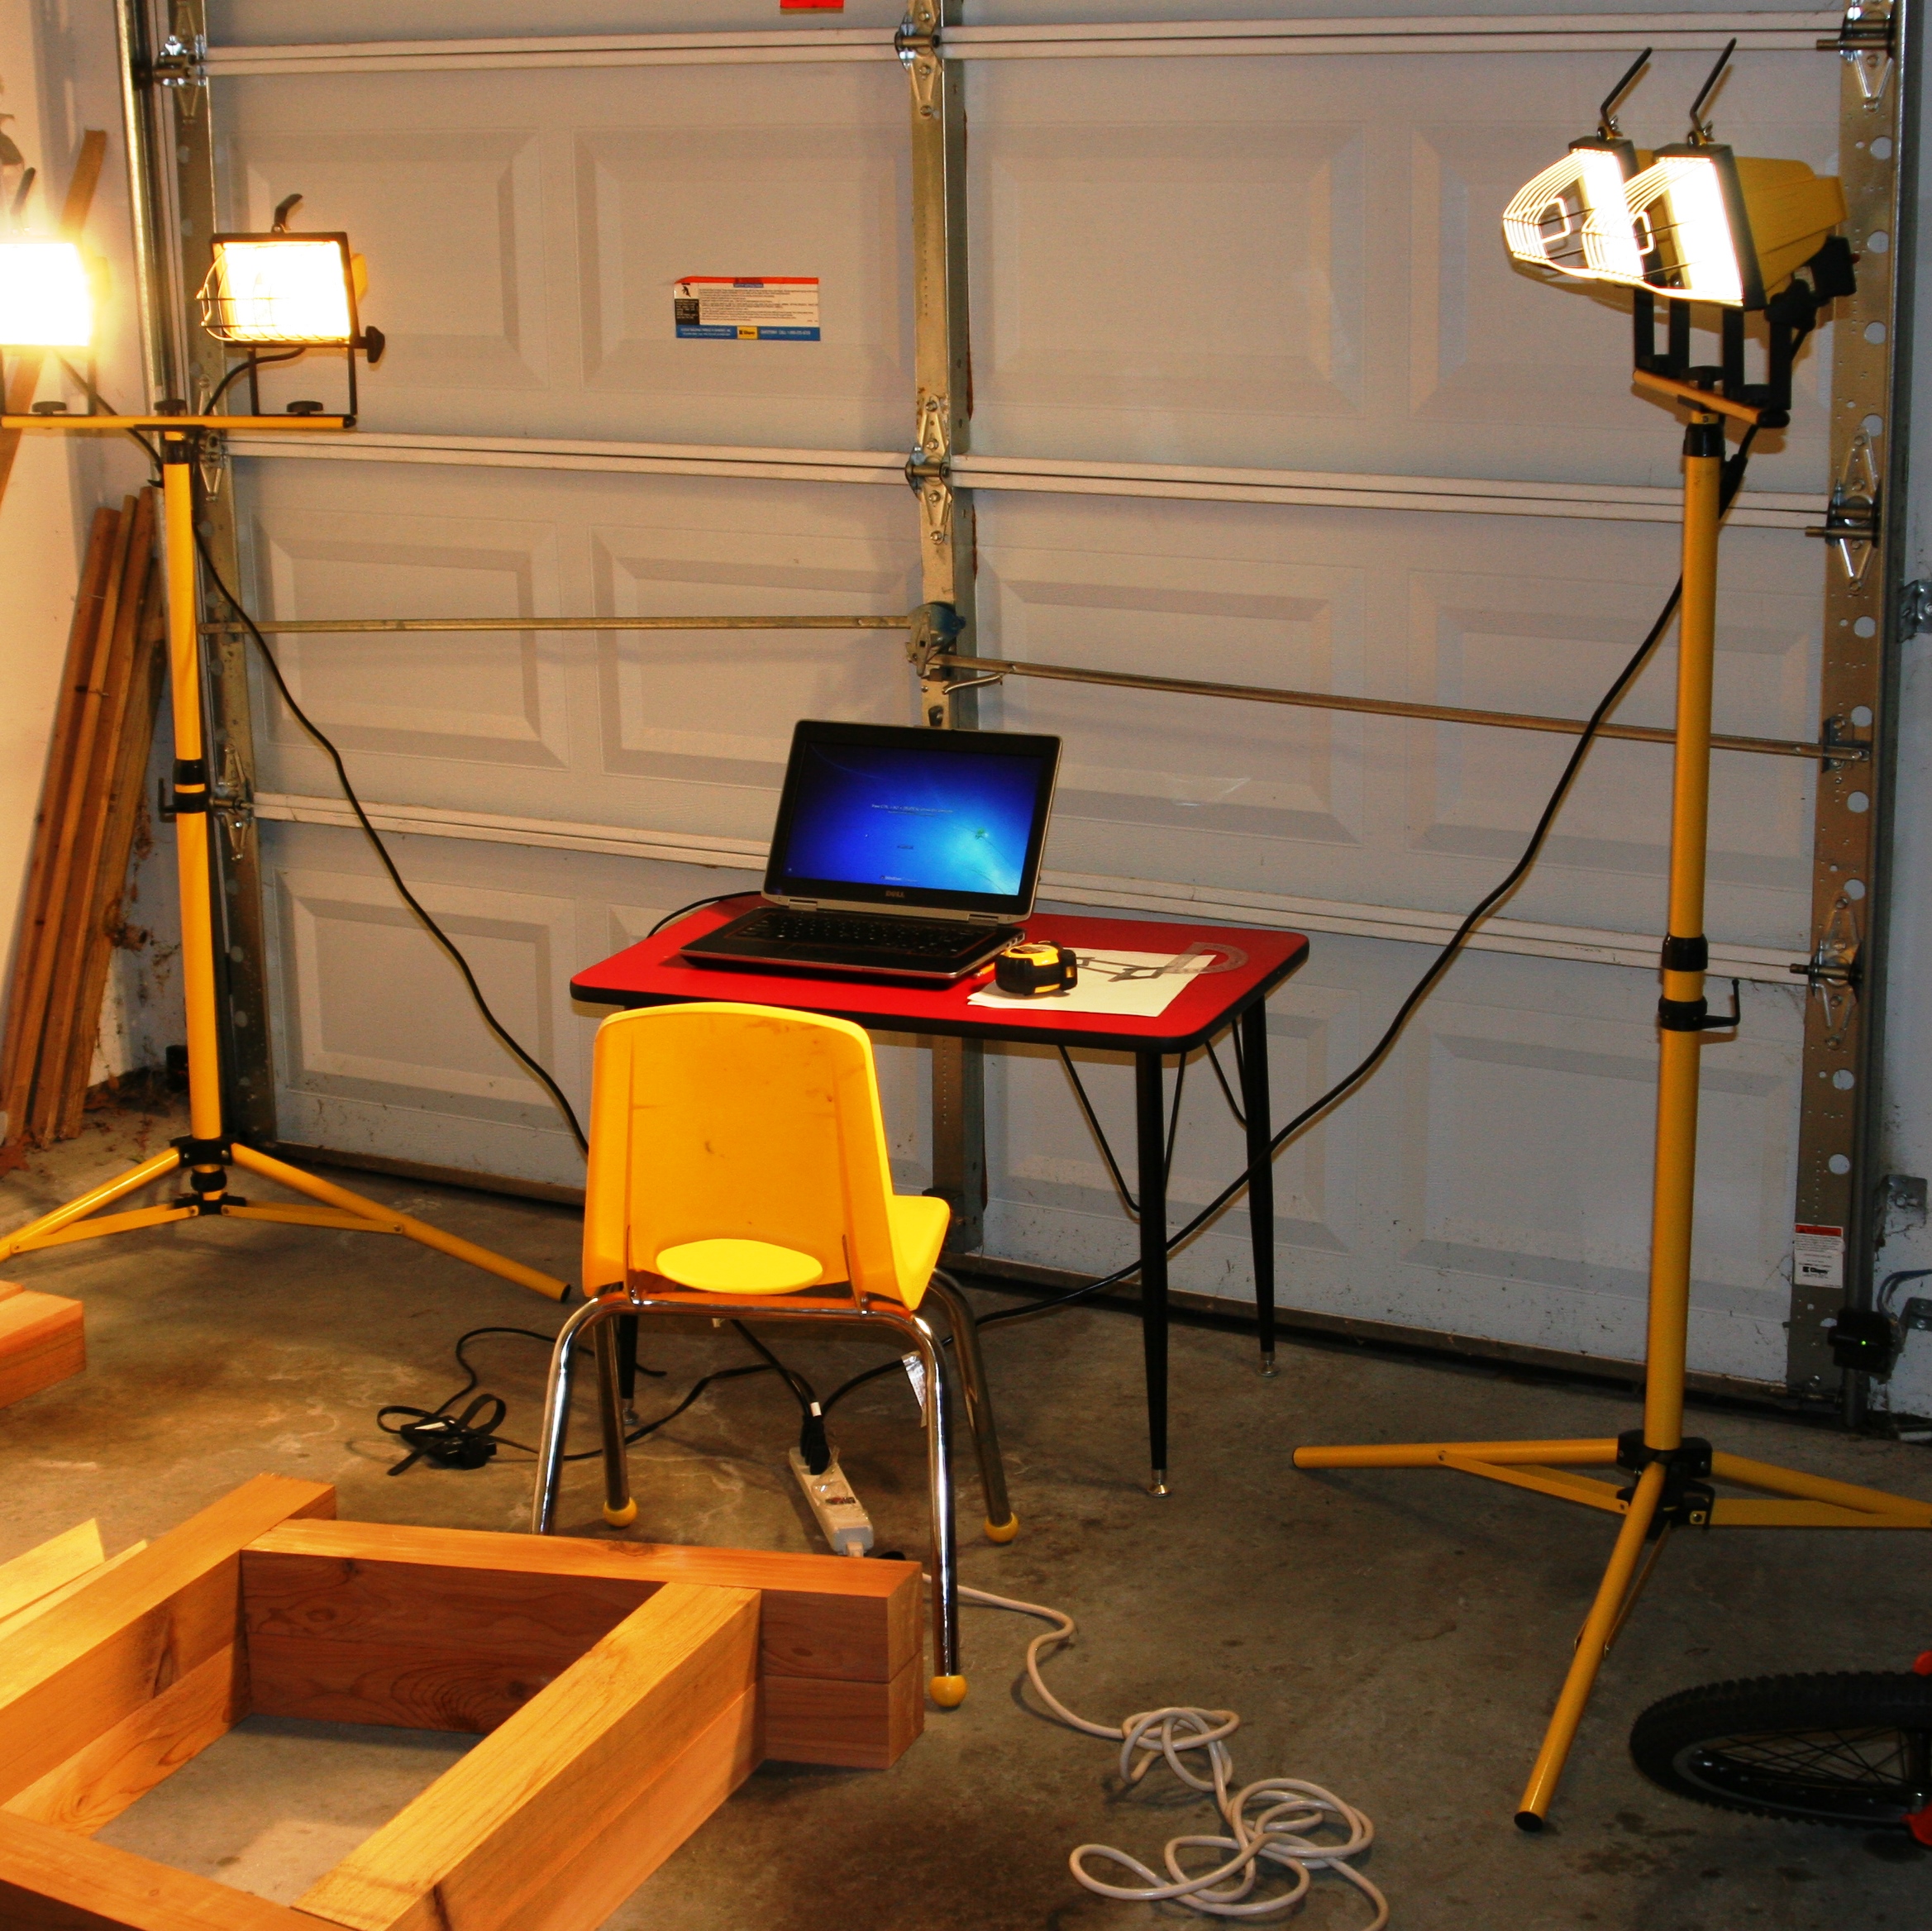
I don’t have a workshop so I ended up setting up an area in the garage to work on the table. I set up a little table for my laptop and worked on the table where our van is usually parked. It was freezing outside so I left the door closed and used 4 halogen lamps for light (and heat).
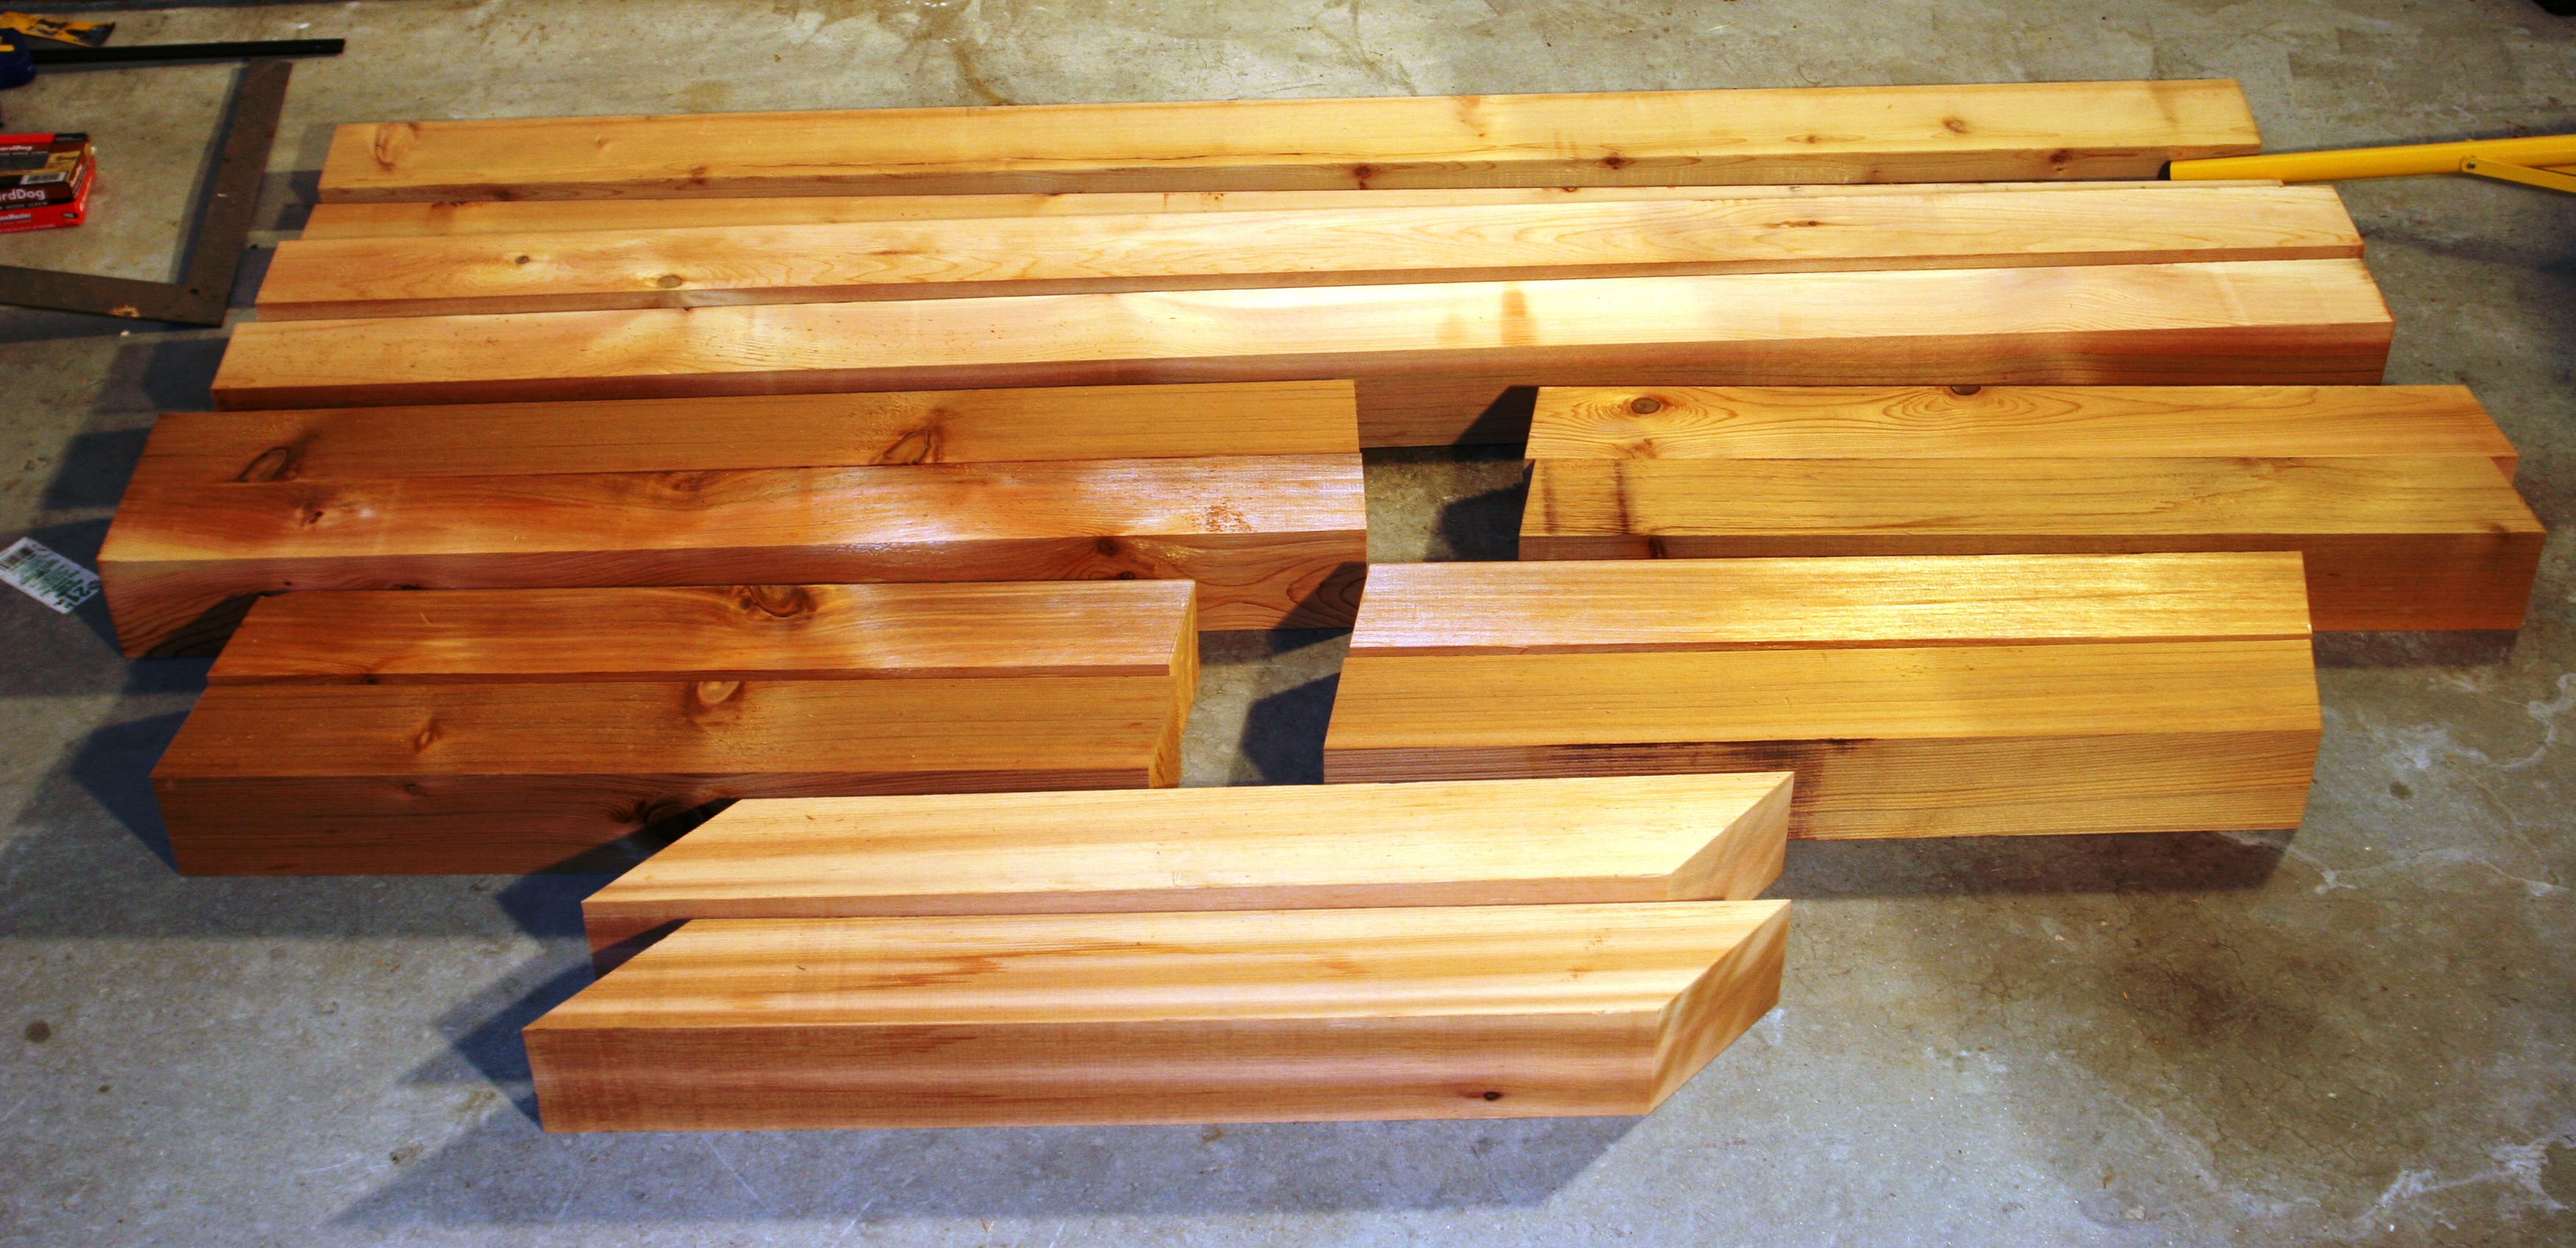
 I started by making all the cuts first. Well, almost all the cuts. I didn’t cut the boards that go on top until later so I could use a circular saw and just cut a straight line across the ends once the tabletop was assembled. Here’s a pic of the cut boards:
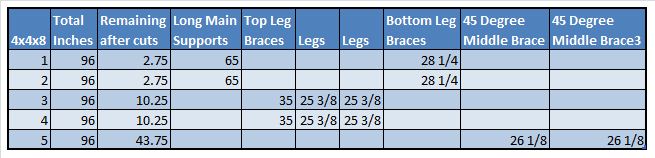
Ana’s site didn’t make it clear how to distribute the cuts among all the 4×4 boards so I put together a quick chart in Excel to make sure I made efficient use of the wood and to ensure I wouldn’t end up shorting myself on accident:
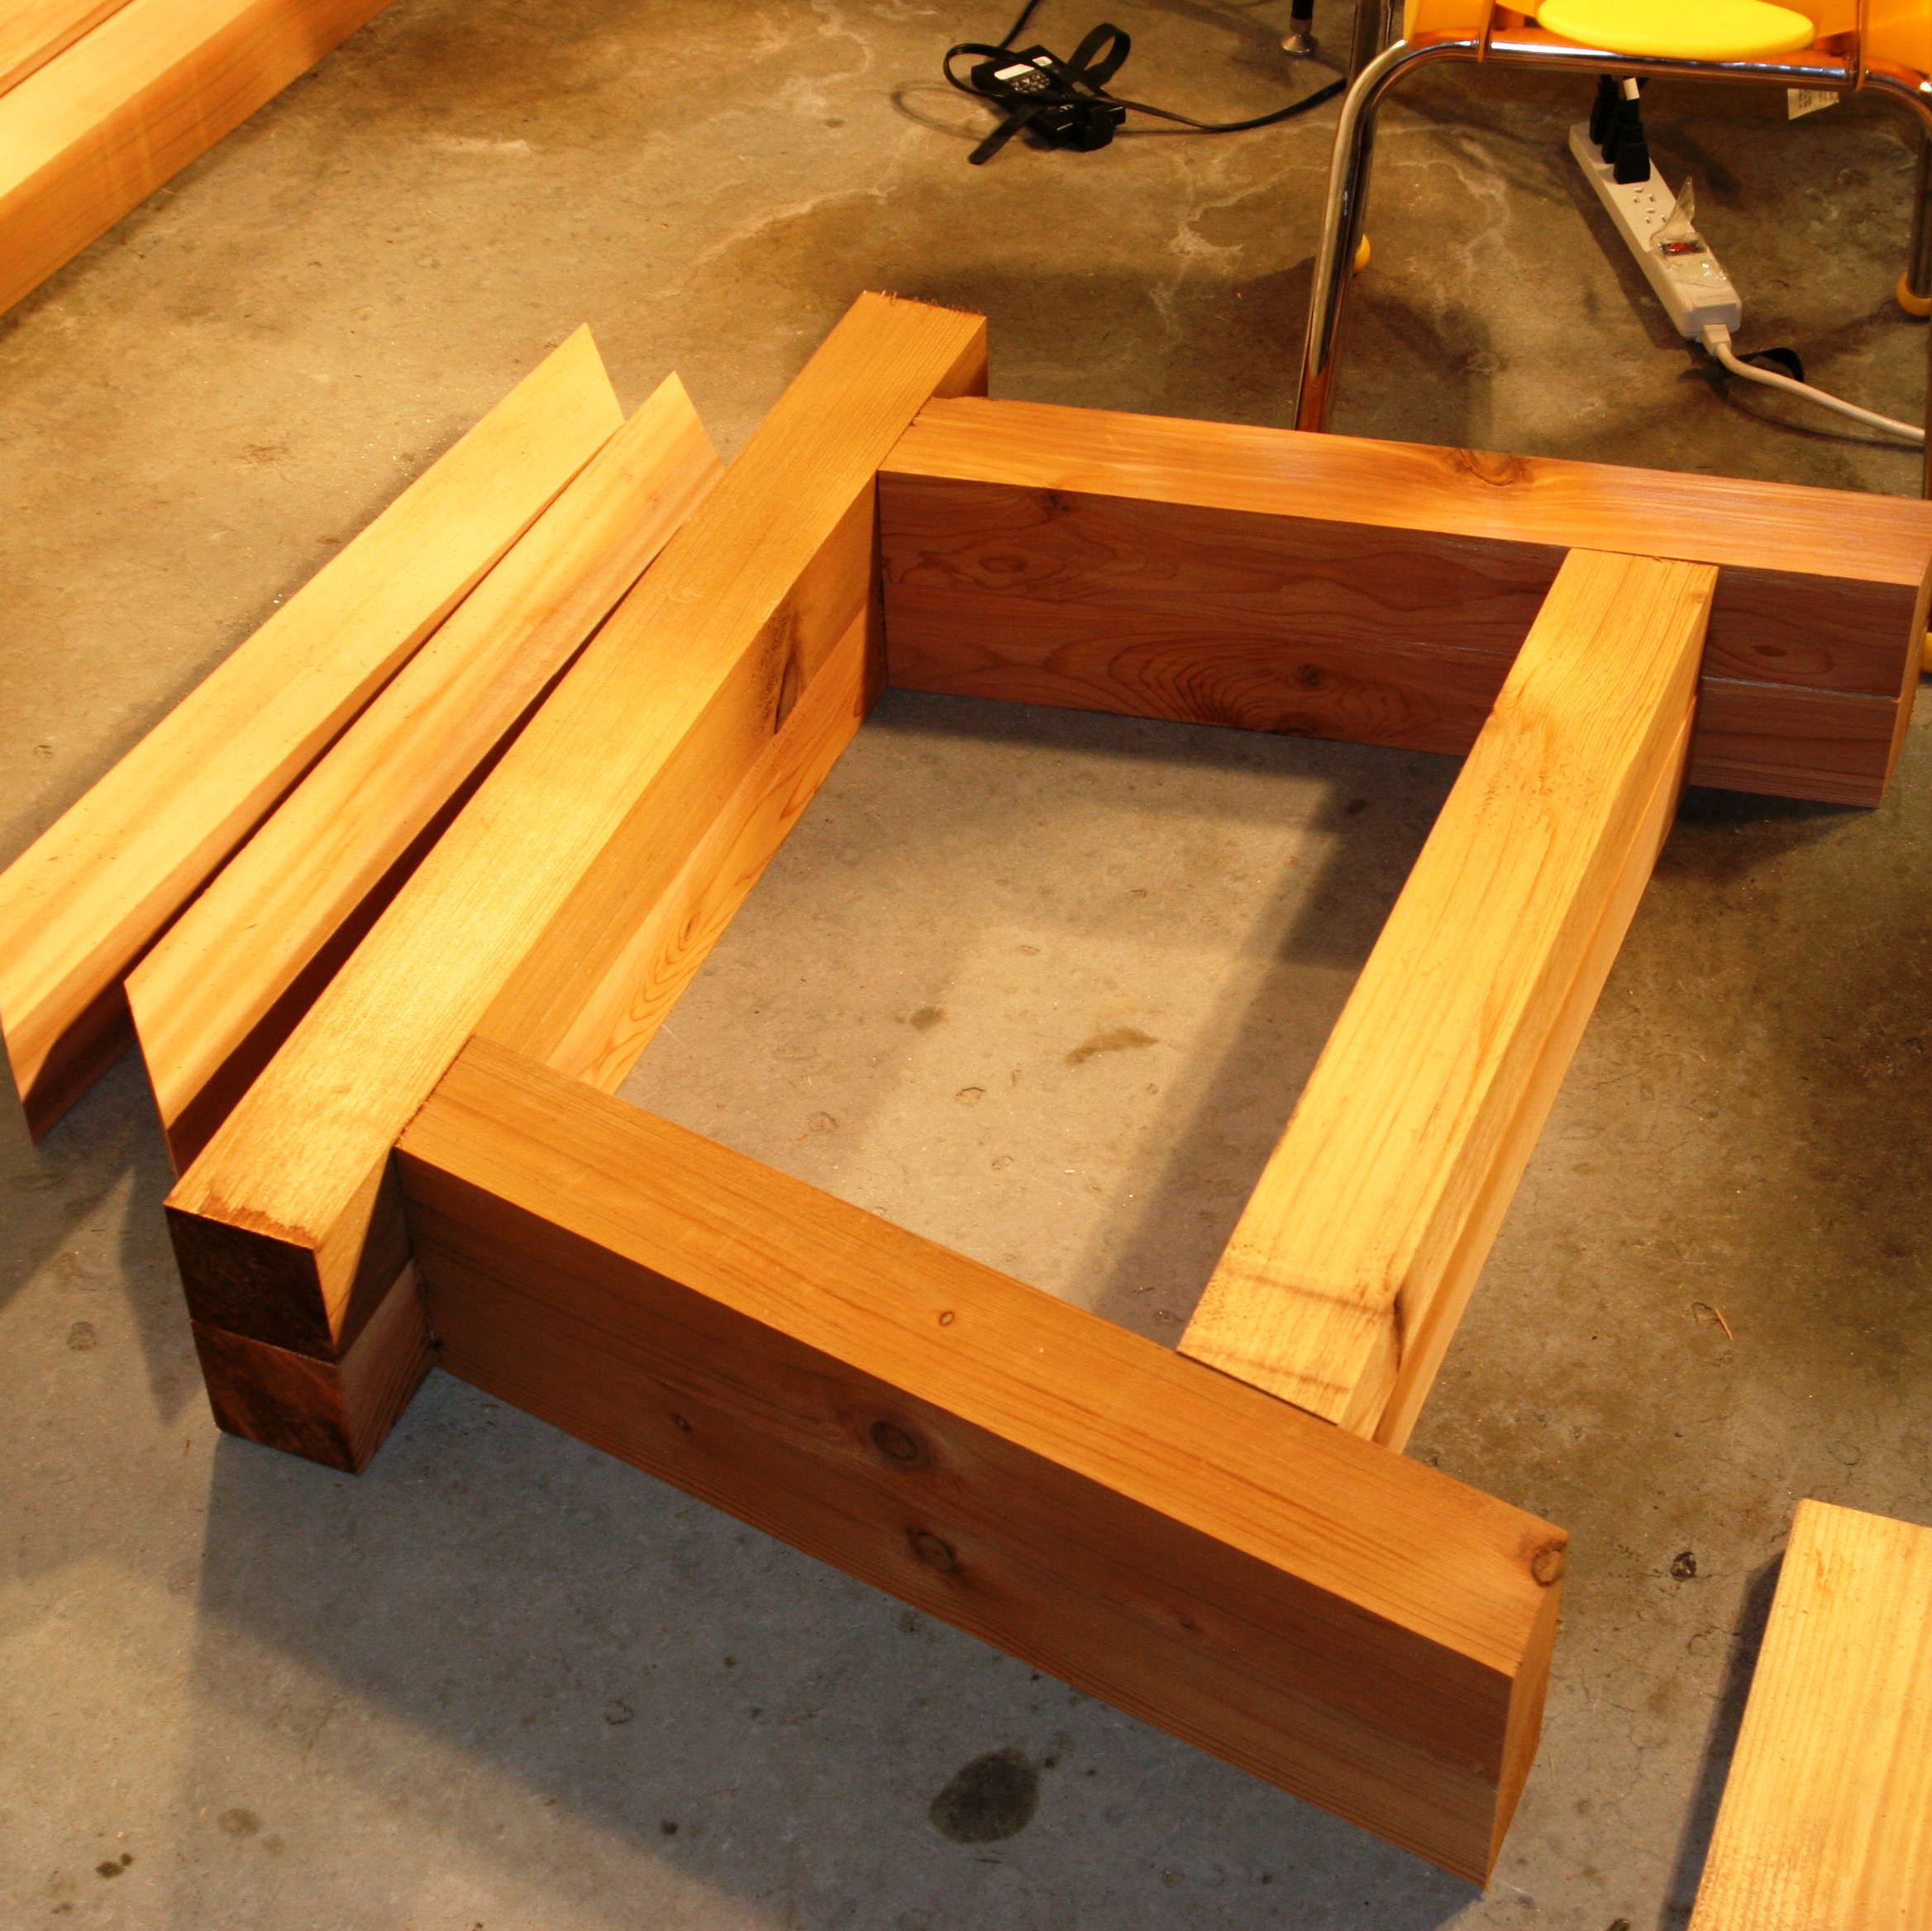
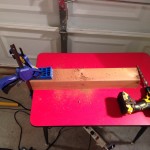
 Several of the cuts I had to measure using the tape measure but once I had a cut of each piece I used it for a template and cut each piece to exactly match the template piece. When all the cuts had been made I lined them up in their positions to see how well they fit together and to make sure I had cut all the angles correctly:
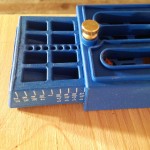
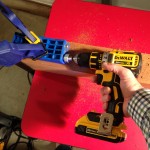
 Now its time to bust out the Kreg Jig HD! This was the funnest part of the whole process! It was a little confusing at first until I figured out how it worked and what all the pieces were for. The first step is to set the Kreg Jig pocket hole size to 1.5 inches. The second step is to set the drill bit so that it inserts into the hole only as far as the chart in the manual shows. There is a piece that slides onto the drill bit and an included wrench for tightening a little screw that locks the drill bit guard into place. Then you just need to clamp the Kreg Jig HD onto the first piece of wood and start drilling holes. For the table top I attached the clamp directly to the Kreg Jig but for the 4x4s I used the Irwin clamps to lock the Kreg Jig in place. Here are some pictures that might help shed some light on these steps:
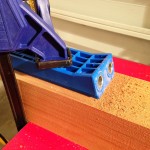
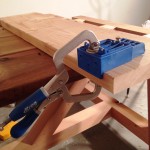
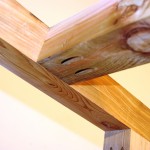
Once the pocket holes are drilled you can begin connecting all the pieces. I used the Kreg Jig clamp to help keep the seams aligned. Here are some pics of the table slowly starting to take shape:
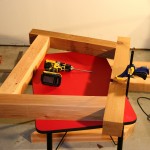
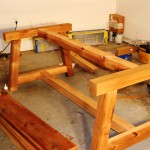
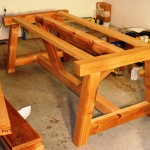
At this point I realized it was really going to work! All I had to do was connect the table top boards using pocket holes, use the circular saw to trim the edges of each end of the table top, and then fasten the top to the table. Here are some pics of the completed table:


We still have to finish staining the table but its been so cold lately I’m not sure when we will have the opportunity. We will post the pictures of the final stained table when its done. I also plan to build the matching benches before my vacation is over next week. I’ll let you know how it goes.
As a reminder, if you get confused looking at the plans on Ana White’s site then you should check out Shanty2Chics site as it has more pictures and details. If you have any questions please let me know. I highly recommend this project for beginners. It feels awesome to start with a pile of wood and finish with a beautiful, sturdy table!

One thought on “Ana White 4×4 Farmhouse Truss Beam Table”
Comments are closed.