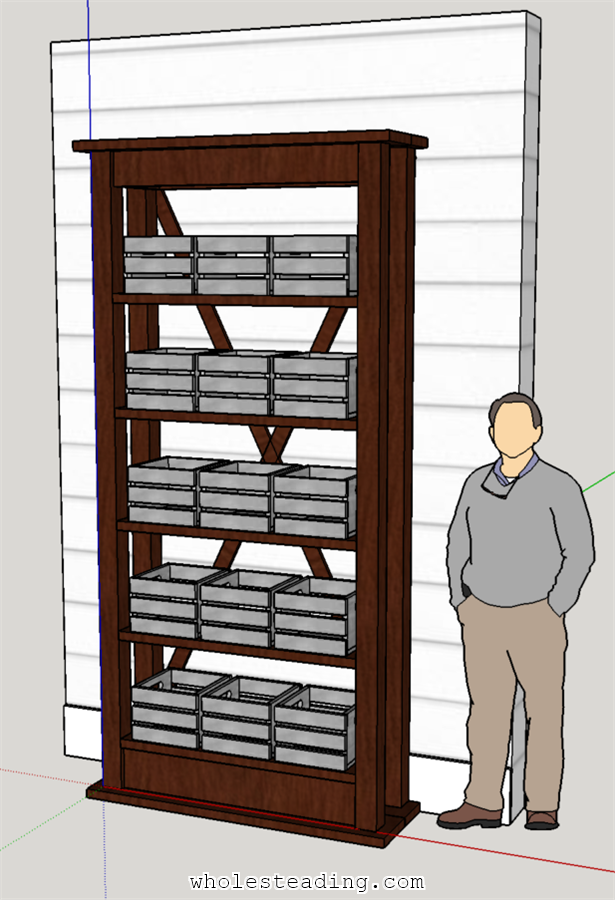
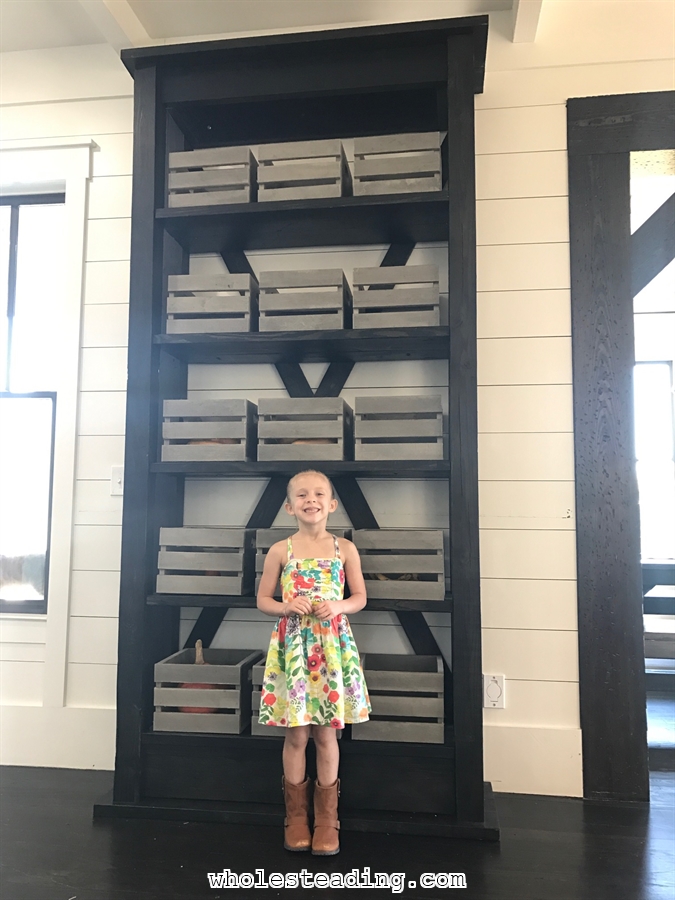
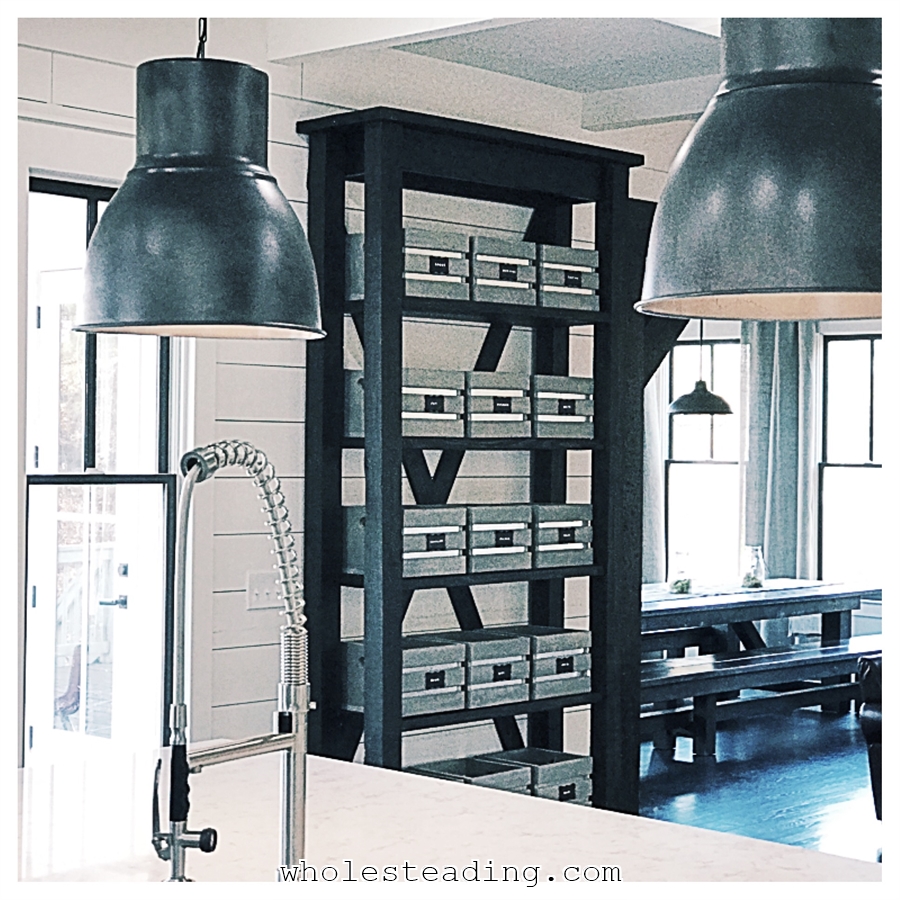
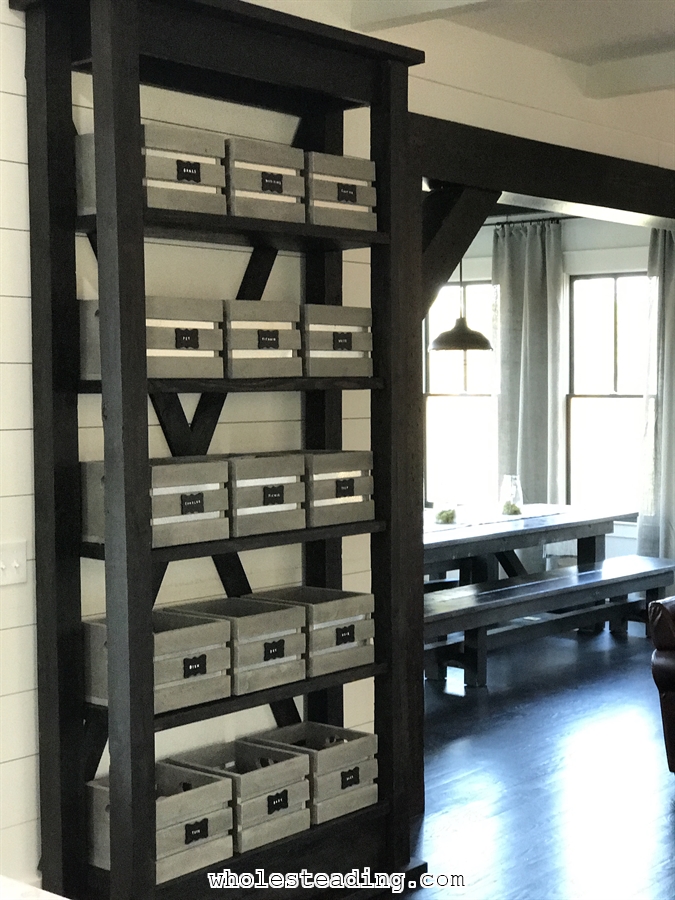
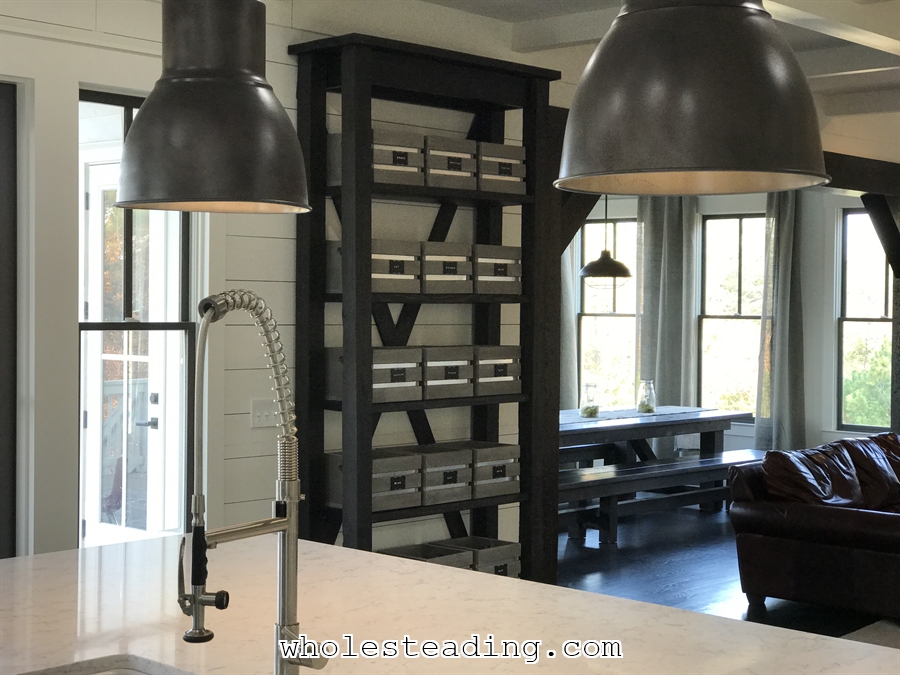
We built this homemade wood shelf unit a couple months ago but held off on writing this post as we wanted to finish the crates that go with it first. The shelf was surprisingly simple to make and cost a fraction of what it would if you purchased something similar from a store. The unit is solid wood, nearly 9 feet tall, is anchored to the wall, and stained to match the decor of our house. This post contains the instructions and pictures to build both the homemade wood shelf and the crates.
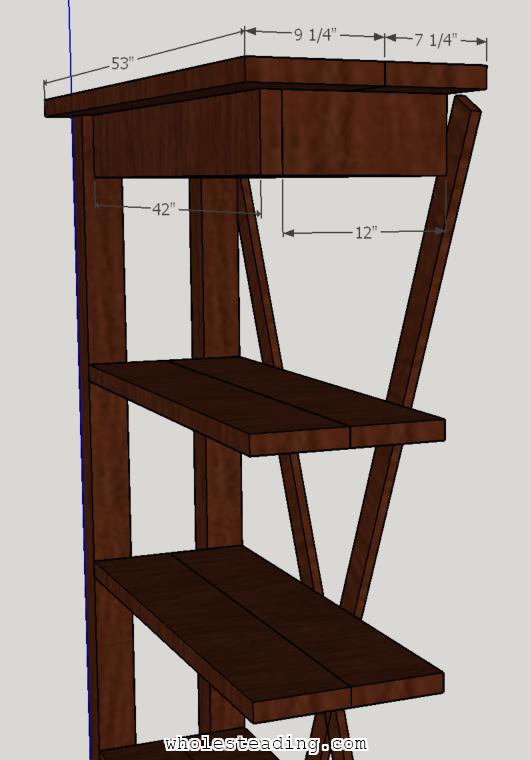
I started by sitting down with Bethany and designing the unit in Sketchup. We had various versions with 6 shelves, painted gray., wider crates, etc. This is the design we both ultimately agreed on:
We purchased the wood at Lowe’s but you can purchase the boards from any lumber yard. Here is a rough estimate of what you will need to build the shelf (the crates are listed separately further below):
Materials:
- Four 10′ 4×4’s
- One 8′ 2×6
- Seven 8′ 2×8’s
- Two 8′ 2×10’s
- Two 10′ 1×4’s (or whatever width you prefer for the X on the back of the unit
- HD Kreg Jig Pocket Hole Screws
- Various length wood screws
Tools:
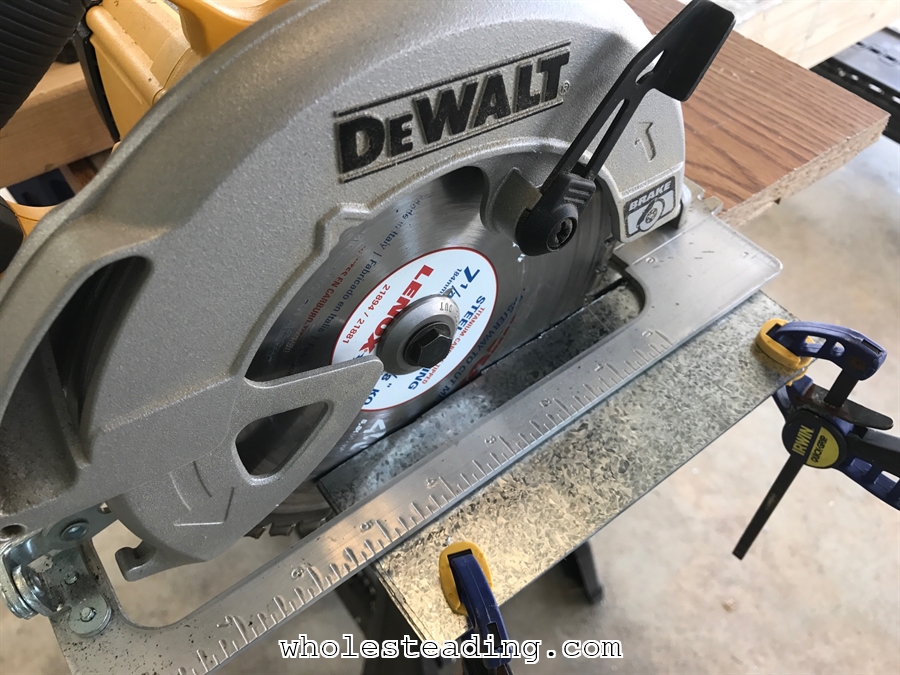
- Saw (I used both a Miter Saw and a Circle Saw but you can use almost anything that will cut a board as “rough” is “ok” for this project
- Kreg Jig HD
- Electric Drill
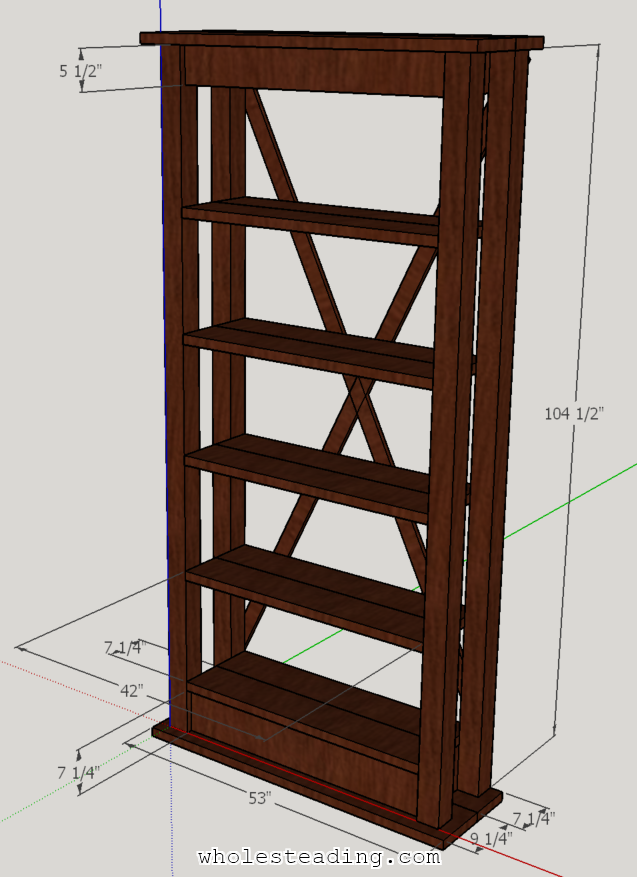
Here are the dimensions for all of the cuts you will need to make:
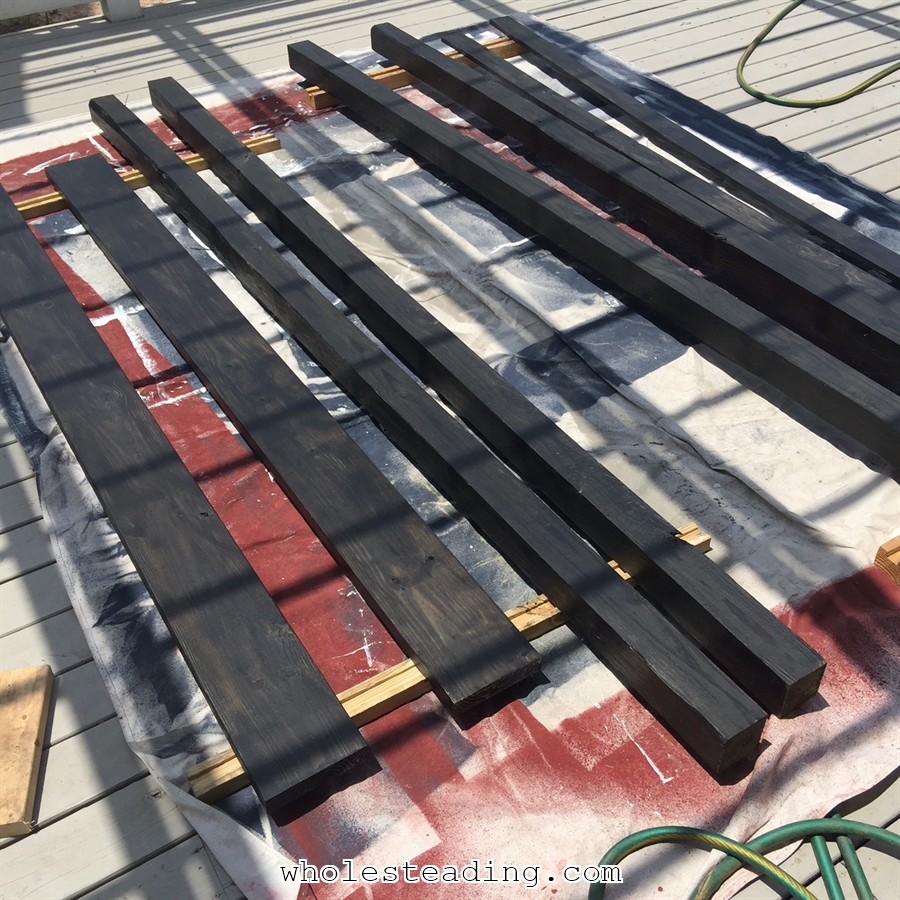
I’m going to provide simplified instructions but if you have questions please leave a reply and I can try to give you helpful answers. I highly recommend that you stain or paint all of the pieces of wood first (we used Minwax Ebony):
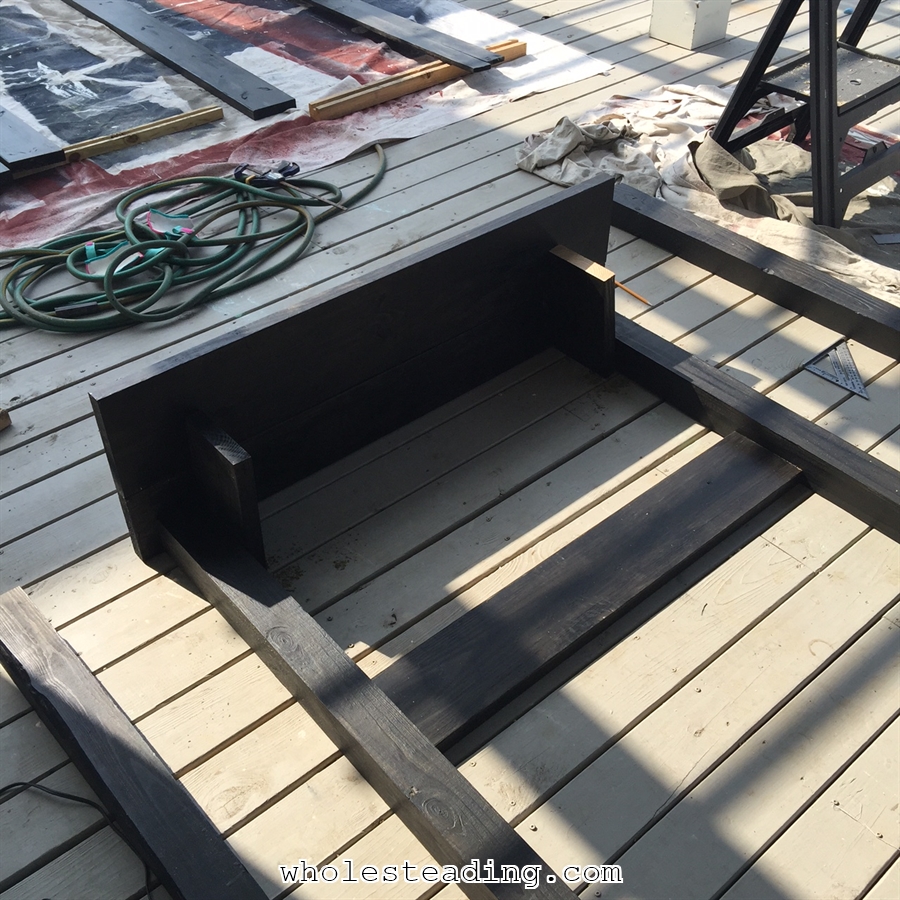
 Once the pieces are painted, begin by assembling the back of the unit, as if it was laying down flat on the ground. Lay down two of the 4×4’s (cut to length) and connect them to the top of the unit. Use the Kreg Jig HD to connect the two top boards together and to fasten the 4×4’s to the top section. I used the cut boards as spacers to make sure the 4×4’s were evenly spaced and parallel while I connected the top section. Here is another picture showing the dimensions of the top boards and a picture of what it looked like as we assembled the back of the unit:
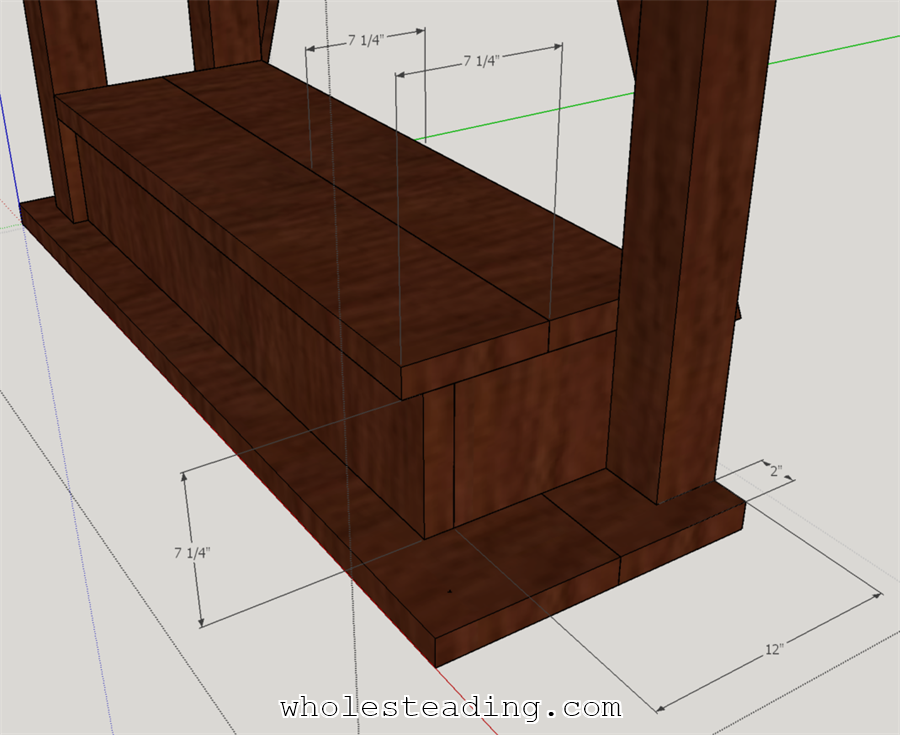
 Once the top is connected you will do the same with the bottom. Here is a close-up of the bottom showing some additional detail/dimensions:
 After the bottom is attached you simply insert each shelf and attach them with the HD pocket hole screws. The shelves should have the pocket holes drilled in them ahead of time so that once you insert them you can easily insert the screws and attach them to the 4×4’s. Remember to consider the placement of each shelf as you decide where to place the pocket holes. For the lower shelves you want the pocket holes underneath but for the ones above eye level the holes can be placed on the top of each shelf.
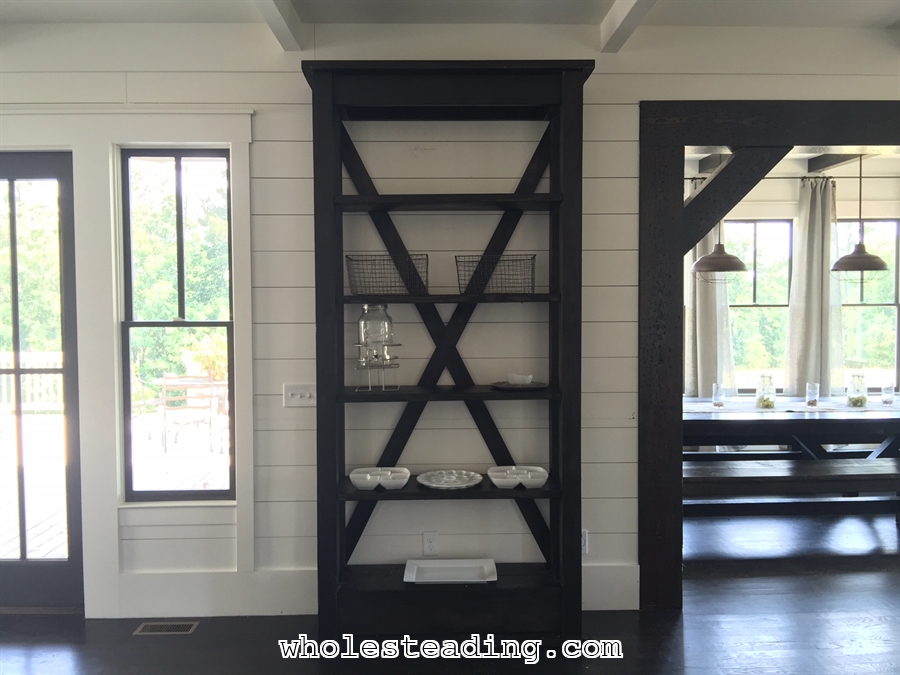
When you get done the shelf should look like this:
Now its time to build the crates. Here are the dimensions for the crate:
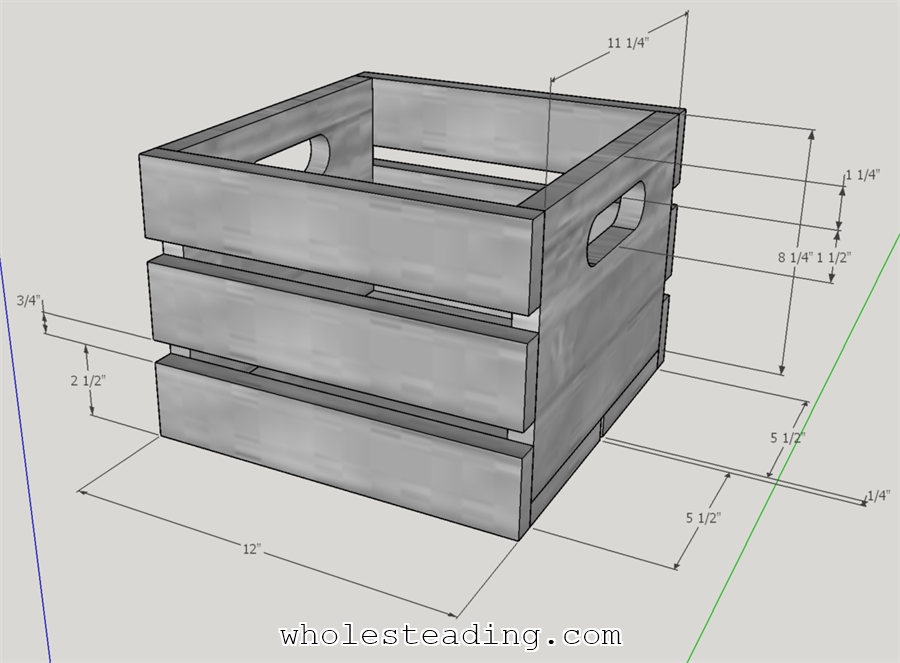
The wood crate dimensions can easily be adjusted based on your personal preferences but ours are made out of 1×12’s for the sides with the handles, 1×6’s for the bottoms, and 1×3’s for the slats on the remaining sides. This is a rough estimate of what you will need to finish the crates:
- Three 8′ 1×12’s
- Four 8′ 1×6’s
- Twelve 8′ 1×3’s
- We made the handle openings by using a Spade Drill Bit and a Jig Saw. We drilled a 1.5″ circle for each end of the opening and then used a jig saw to connect the tops and the bottoms of the circle on each side of the opening to each other.
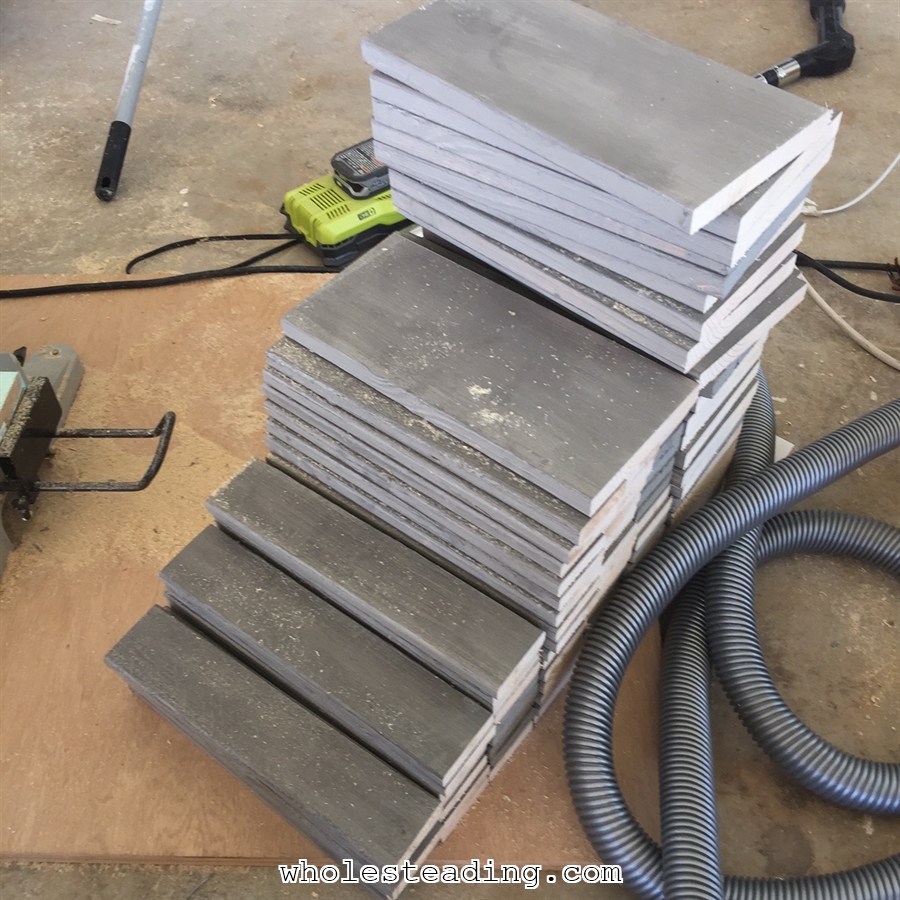
I highly recommend painting (we use Sherwin Williams Pavestone and then dry-brush distressed the paint with Minwax Ebony) and then cutting every single piece first. If you are using a miter saw you can measure the first one, place a guide down and then quickly cut all of that same piece using the guide. Bethany and I put this off for weeks, dreading the time it was going to take to cut the boards but ended up doing it in a surprisingly short amount of time thanks to the guides.
 I used a Ryobi Electric Brad Nailer (BEST TOOL EVER!) with 2″ brad nails to attach the boards. I started by attaching the bottom boards to the 1x12s. I then lined up the sides with the ends of the 1×3’s and then nailed those in too.
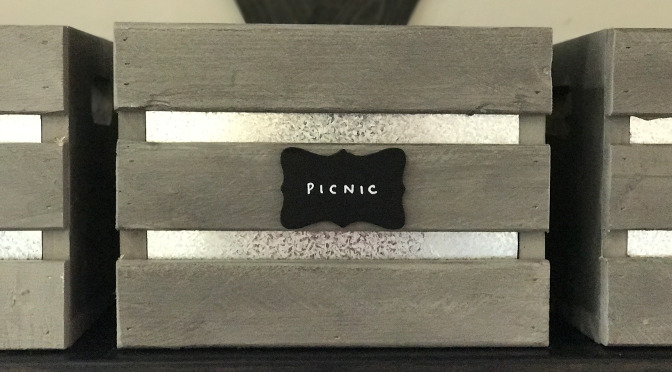
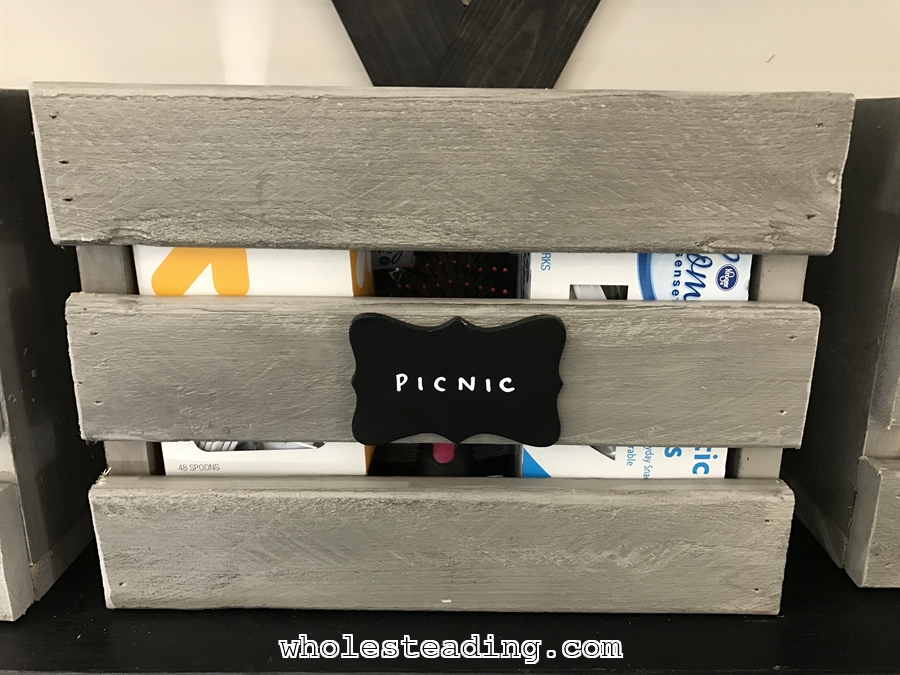
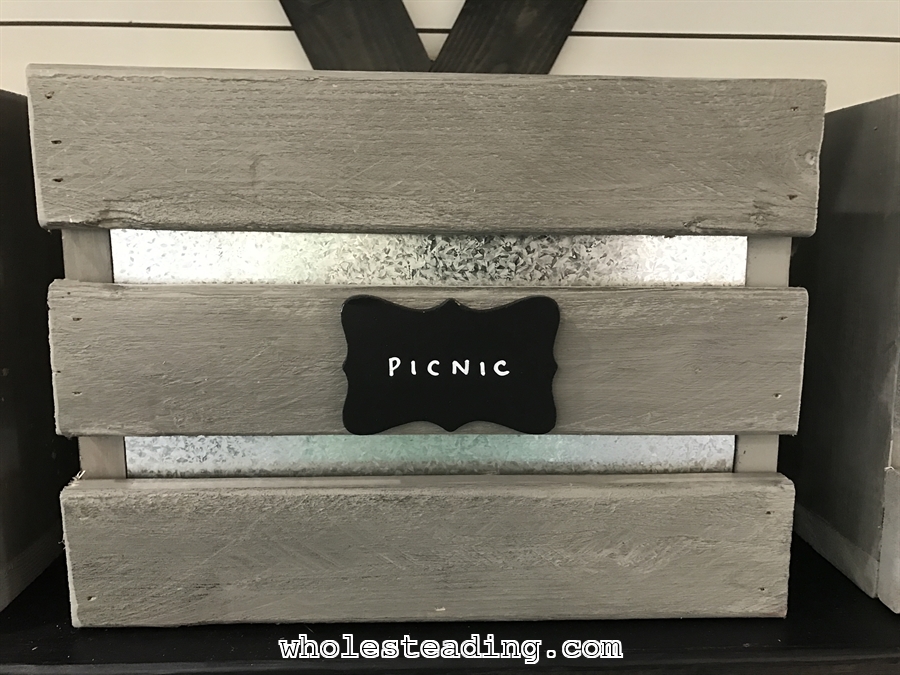
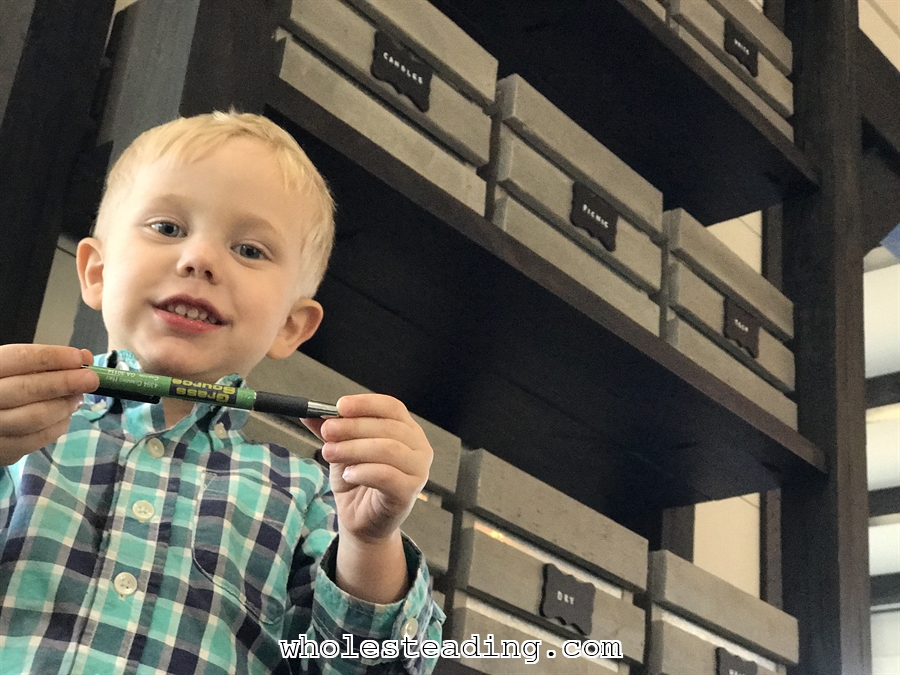
 When we finished assembling all of them we attached wooden labels to the front. However, when we put everything in it still looked a little bit messy because you could see the contents through the slats. This is right at a focal point in the center of our main floor so Bethany wanted to put a thin piece of wood painted black behind the front slats of each crate. She mentioned it would look even better if it was metal. I remembered a stack of galvanized roofing I had in the garage that was left over from when we built our chicken coop. We ended up having just enough to cut a piece of metal for each crate. I cut the metal using a circle saw with a special blade designed to cut metal (if you end up ordering a blade be sure to get the right size for your saw)
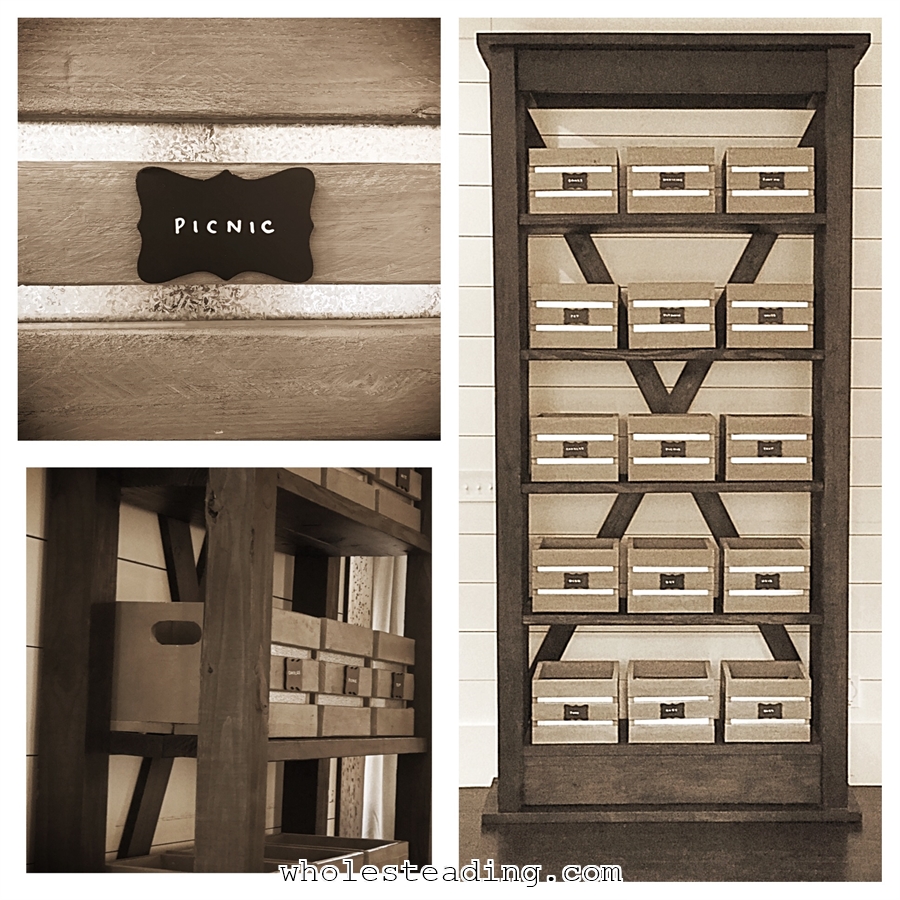
Here is what one of the crates looked like before and after the metal piece was glued to the inside using Liquid Nails:
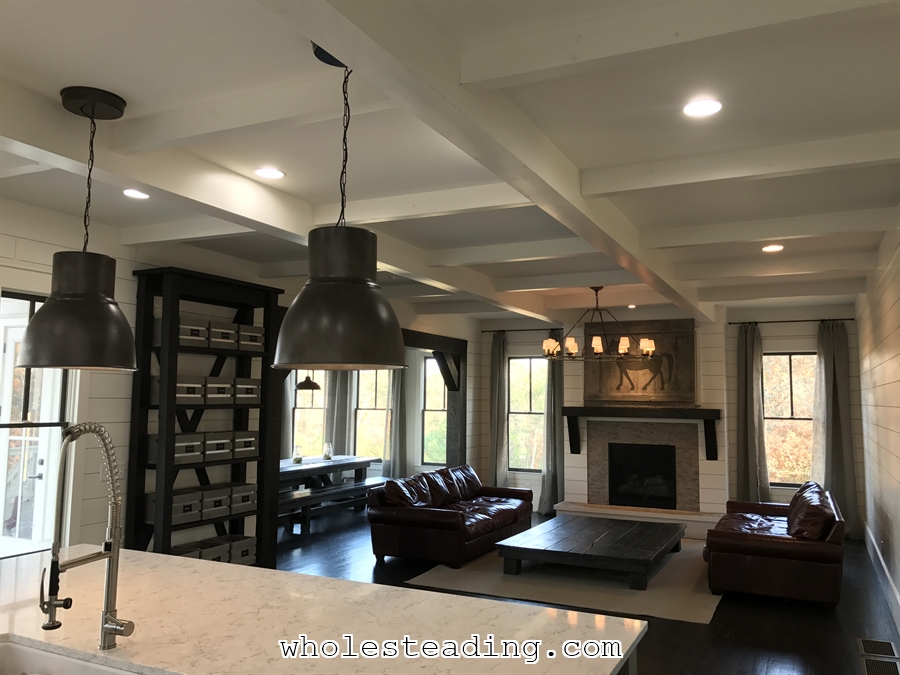
Here are some pictures of the final homemade wood shelf with the crates on the shelves:
 Please choose the picture you like best and add it to your Pinterest board. Here are some more to choose from:
 If you enjoyed this post please take a few seconds and share it on Facebook! Thanks, Anthony
PS – At the time of writing this we are less than 1,000 Likes away from hitting 20,000 Likes on Face! Thanks to everyone who has “Liked” our Facebook Page!

Love love love
So clever, and wonderful storage.
I love that you are building your own furnishings! The shelf looks beautiful! I would imagine spending thousands of dollars on a similar piece retail. However, I’m sure you poured a lot more love into making your own. You just can’t buy that kind of quality!