If you are not familiar with the term “Chicken Tractor”, its basically just a portable chicken run so that chickens can be moved around to eat fresh grass, much like a tractor mowing a yard. We had originally planned to allow the chickens to free range in our backyard. That lasted for a couple weeks….right up until we lost 6 chickens to a family of Georgia Red Foxes. The chickens seemed so happy free-ranging so we hated to leave them locked up in the chicken coop and attached run with no access to fresh grass. That’s when we decided it was time to design and build a “Chicken Tractor”.
I spent some time searching Google for designs and looking at pictures of other people’s chicken tractors. I saw several I liked but few that provided instructions on how to build one. I ended up using Google Sketchup to design a tractor that would meet our requirements:
Source of water so the chickens can stay hydrated during the hot Georgia summer
Sturdy enough to protect the chickens from predators
Protection from the bottom so predators can not dig under the side walls
Large enough for 14 chickens
Roof to provide shade and to keep them dry in the rain
Similar style to our homemade chicken coop and a way to easily transfer the chickens from their main coop to the chicken tractor
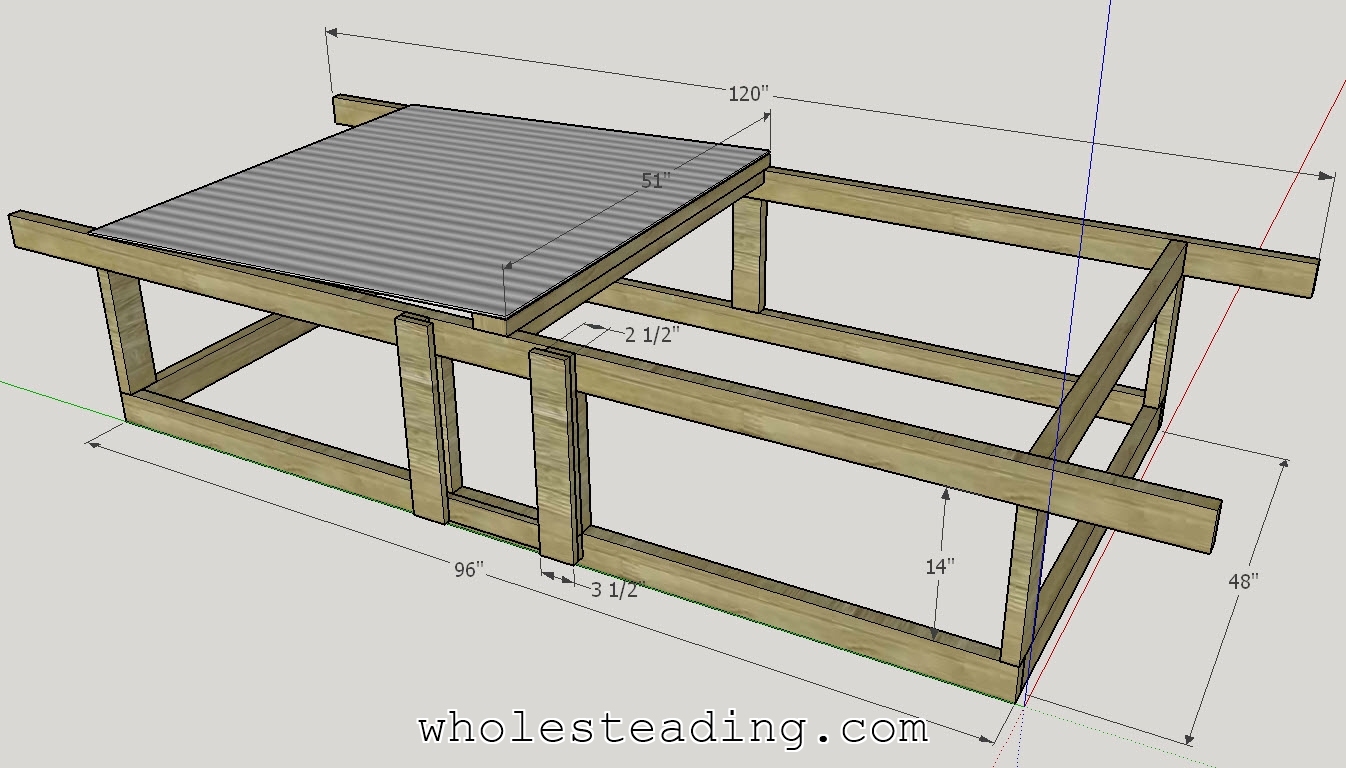
Here is the final Sketchup drawing:
Sketchup drawing of our Chicken Tractor design
The entire frame is made of 2x4s and the door is made from a combination of 1×3’s and 1×4’s. I used wood screws (various lengths) where possible and Kreg Jig HD pocket holes and HD screws everywhere else. I don’t plan to provide step by step plans like I usually do but if you want to build this and need more help please leave a reply and I will answer your questions as time permits.
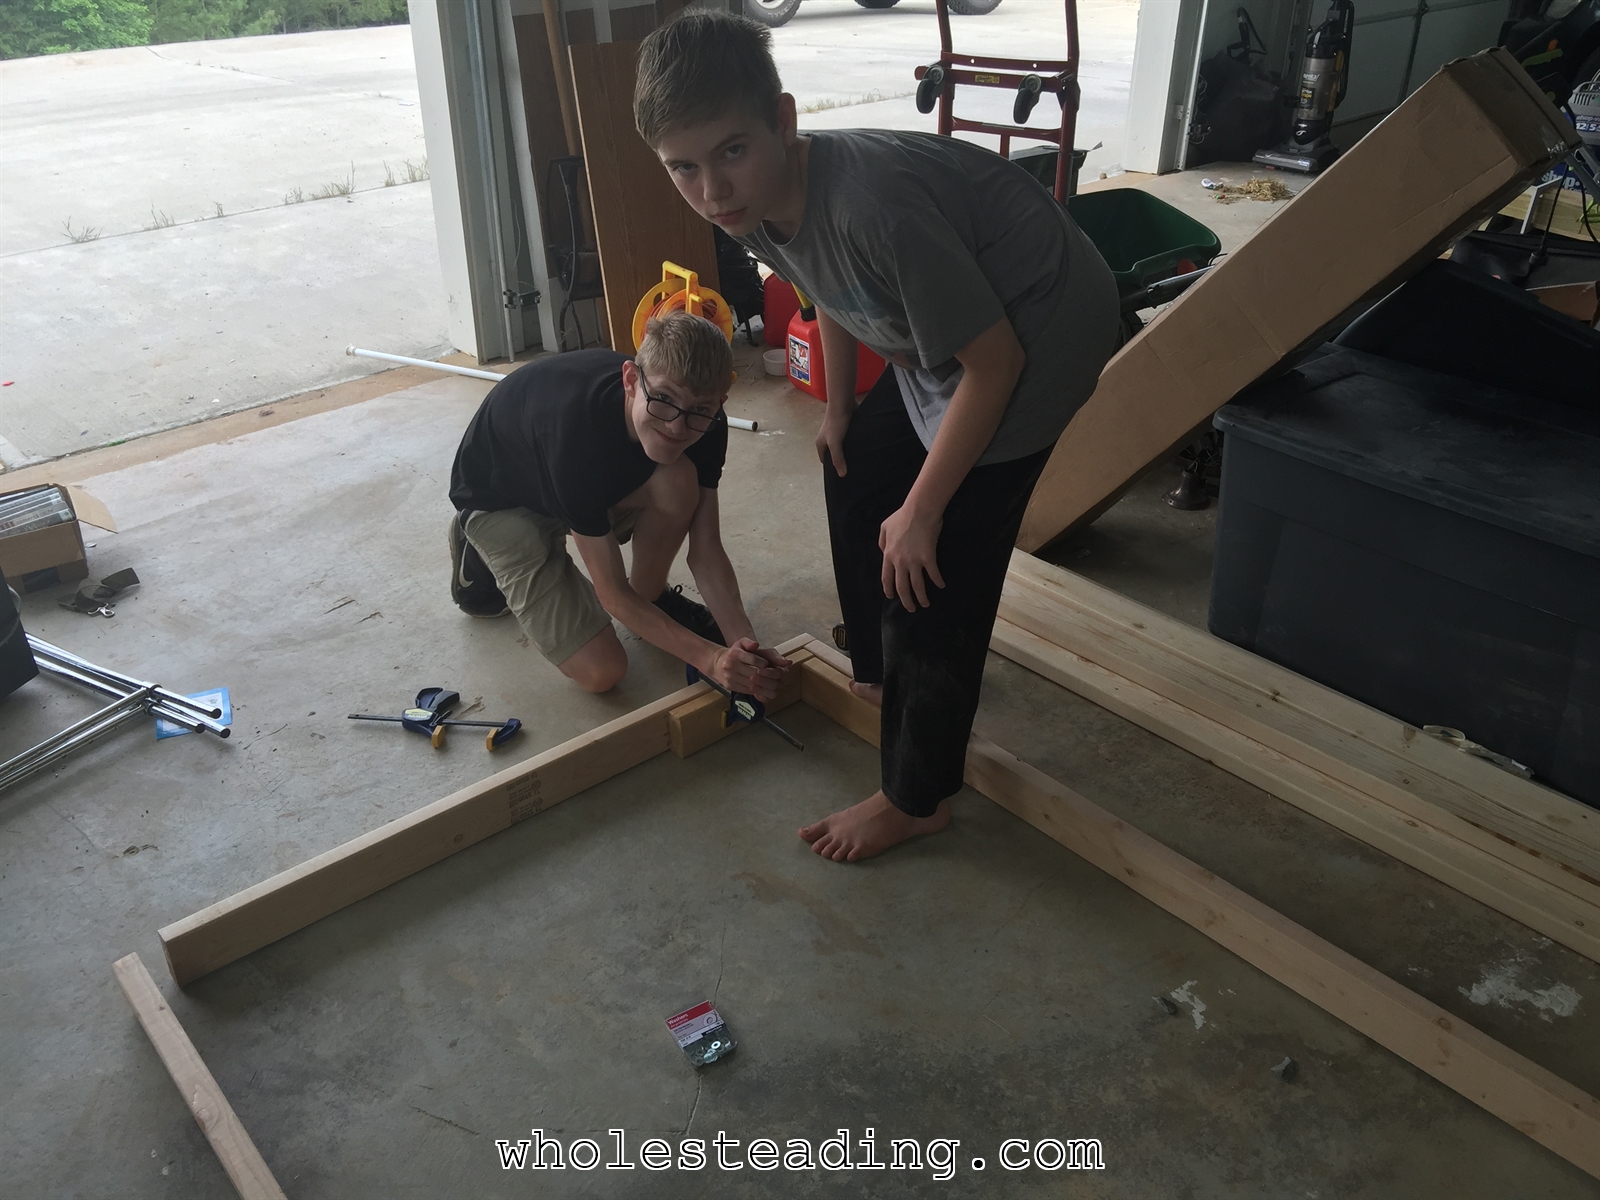
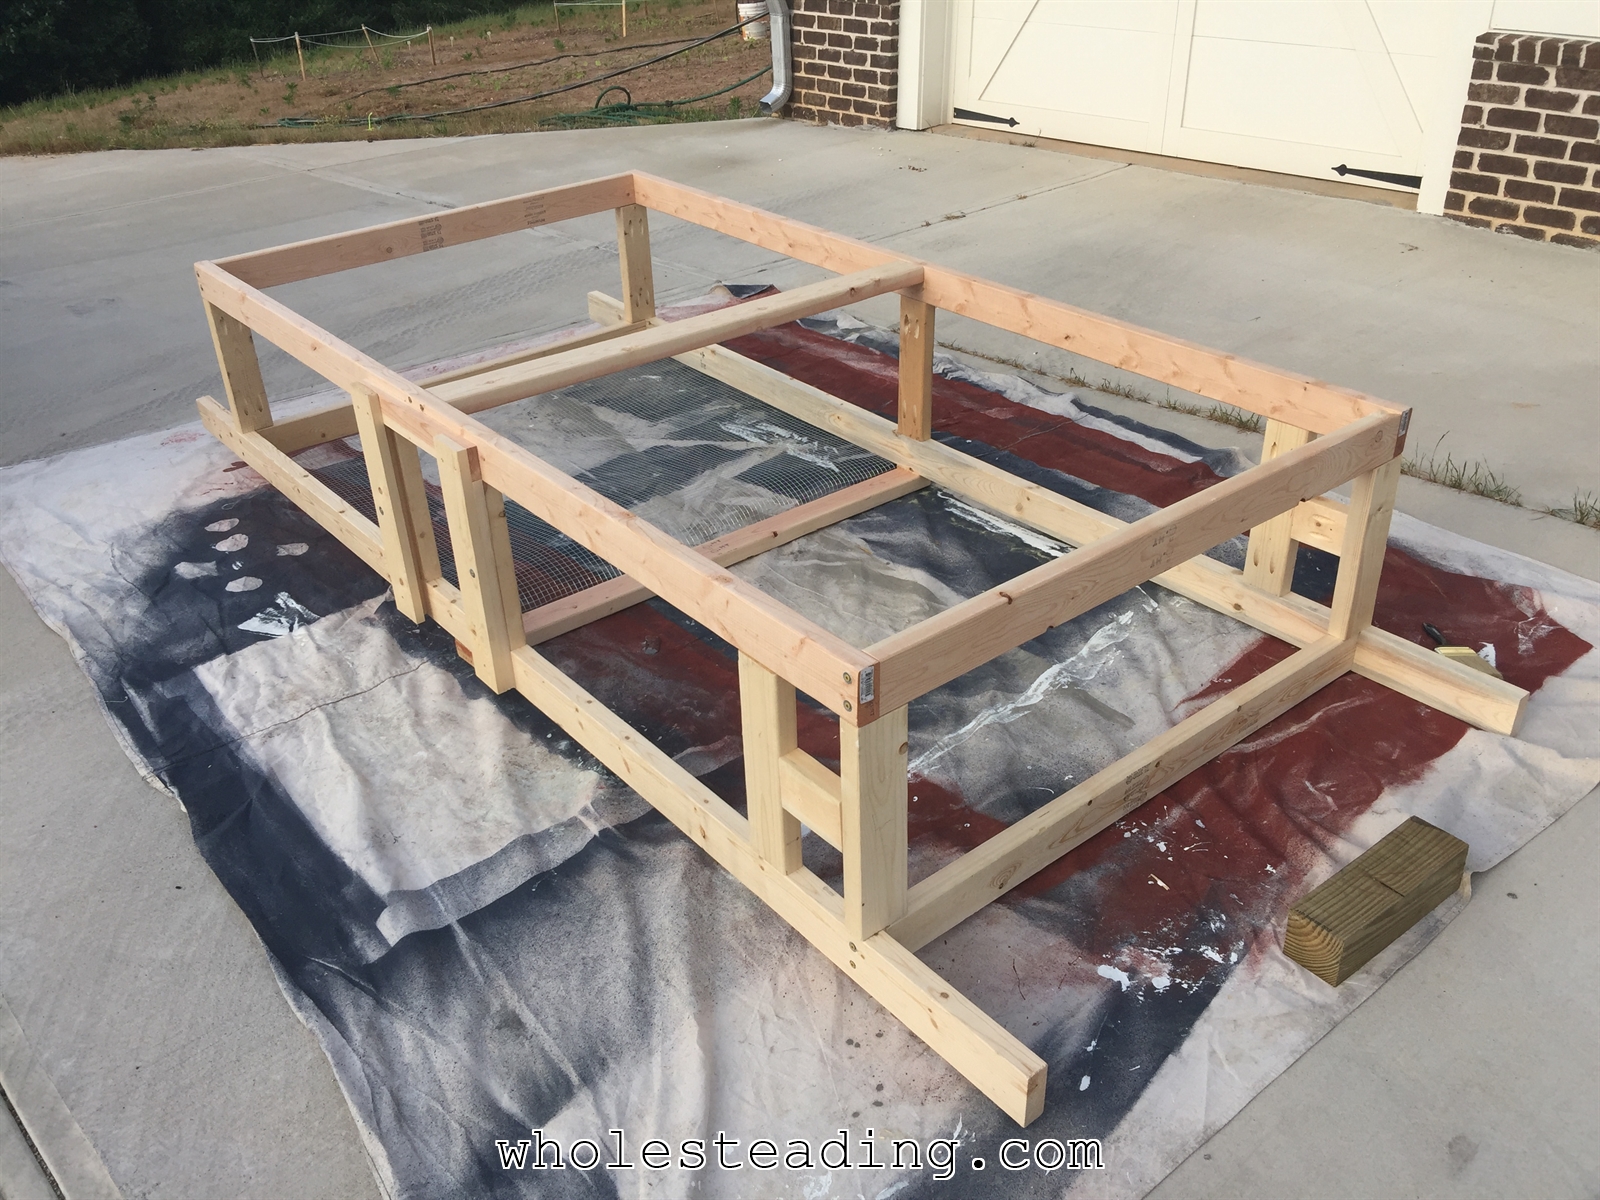
Here are some pictures of the building process:
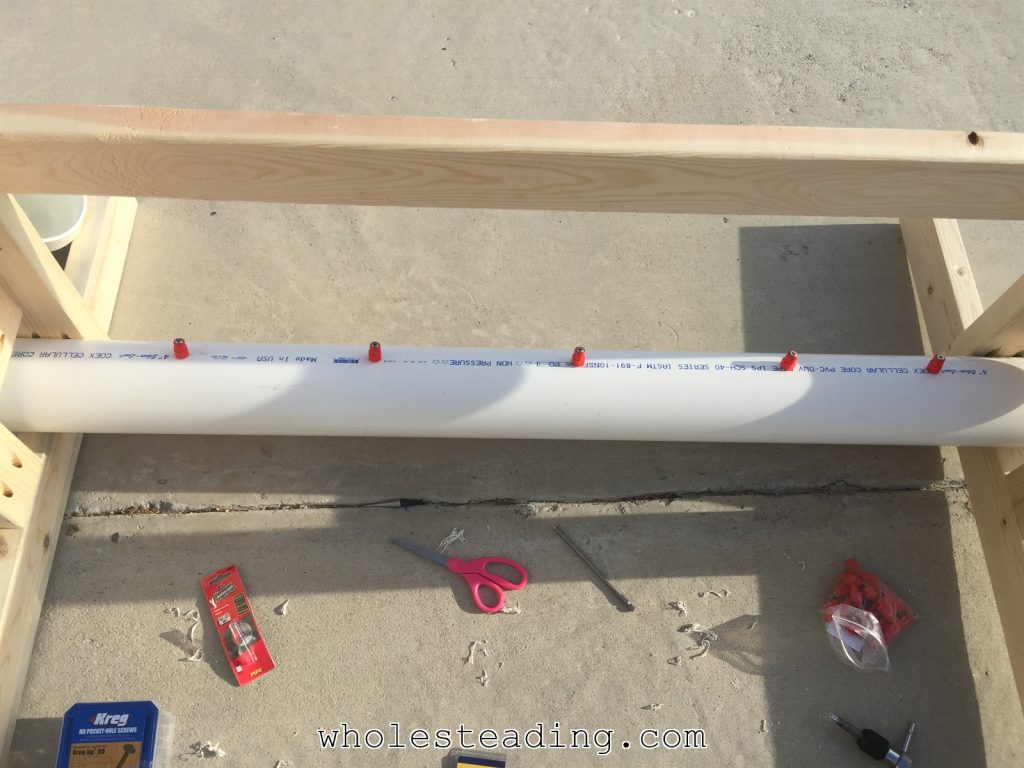
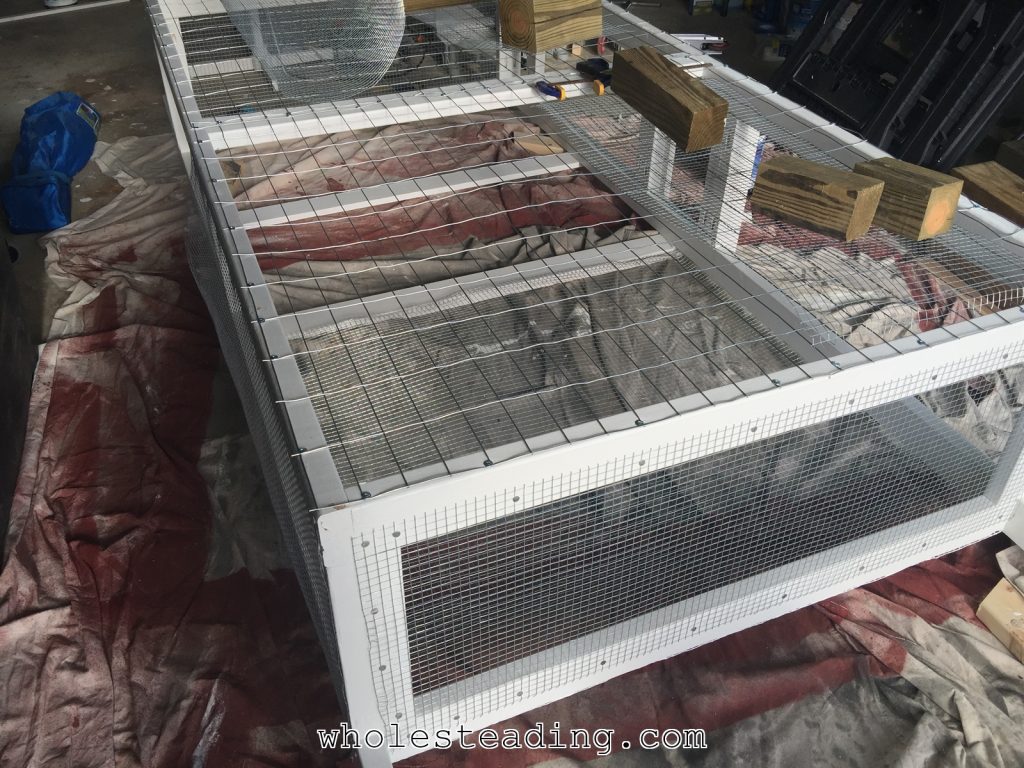
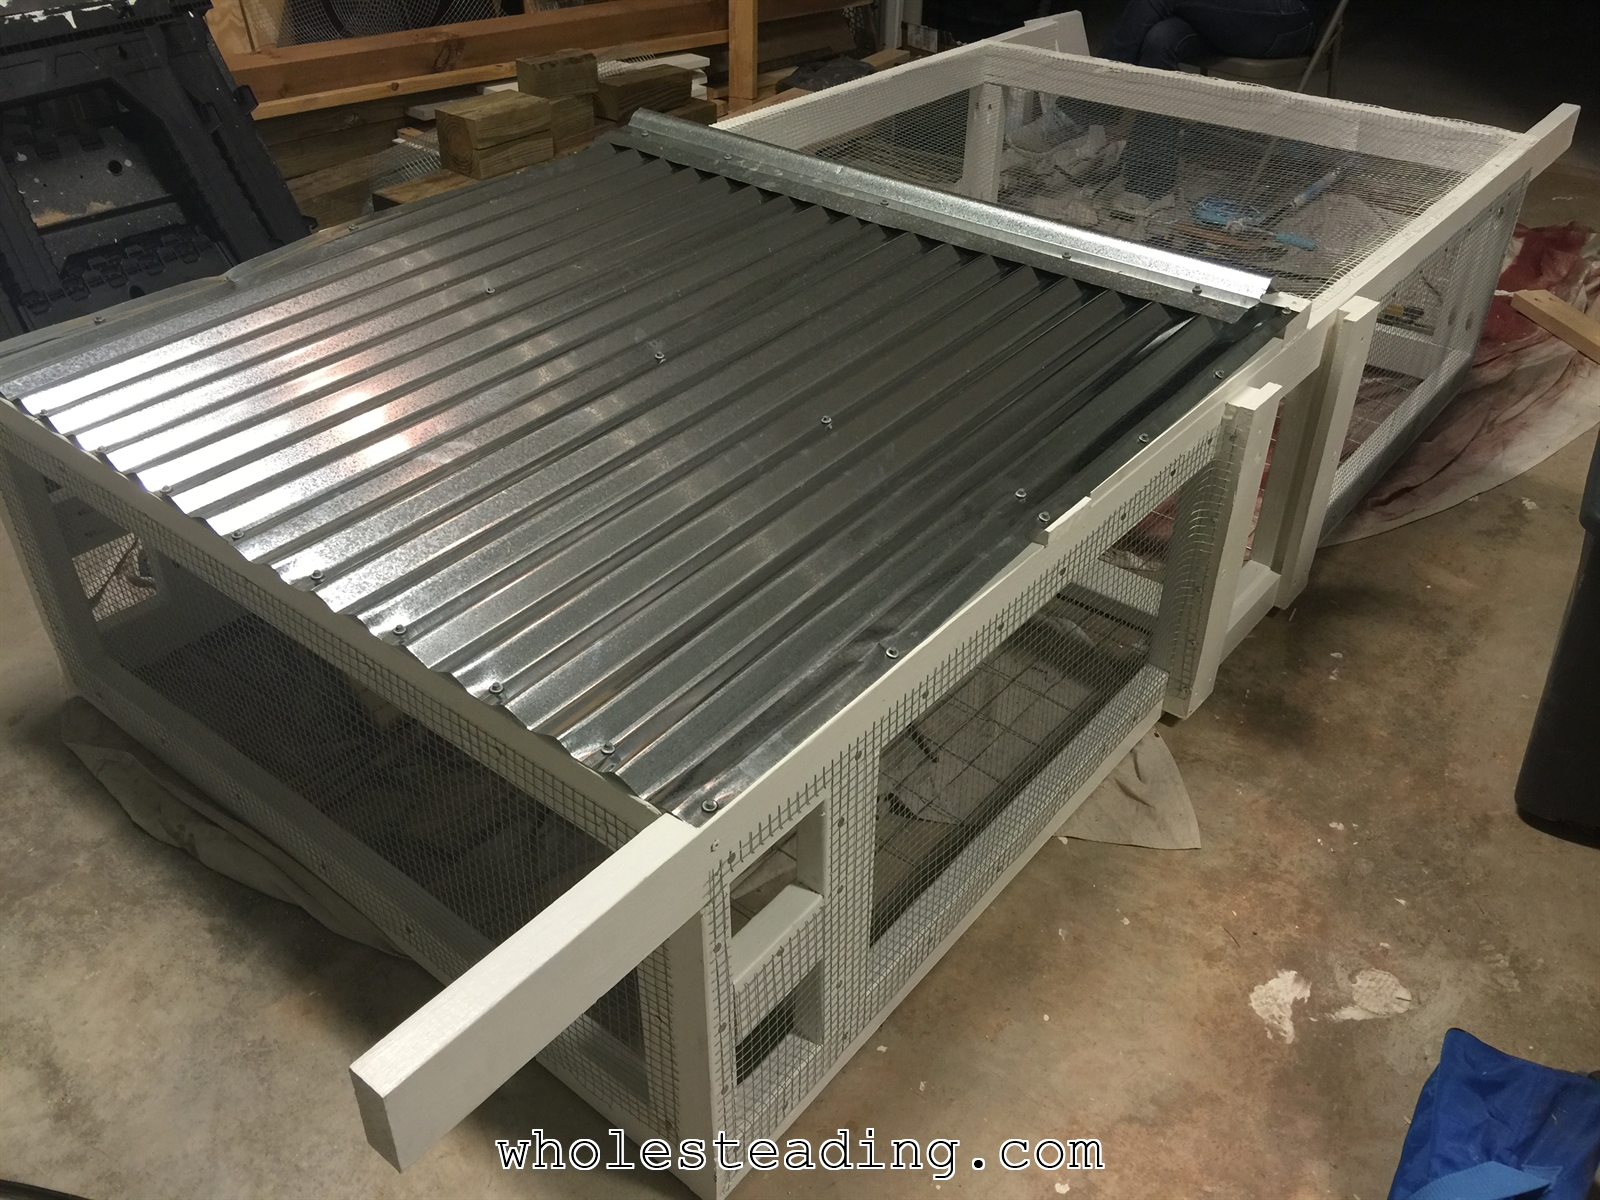
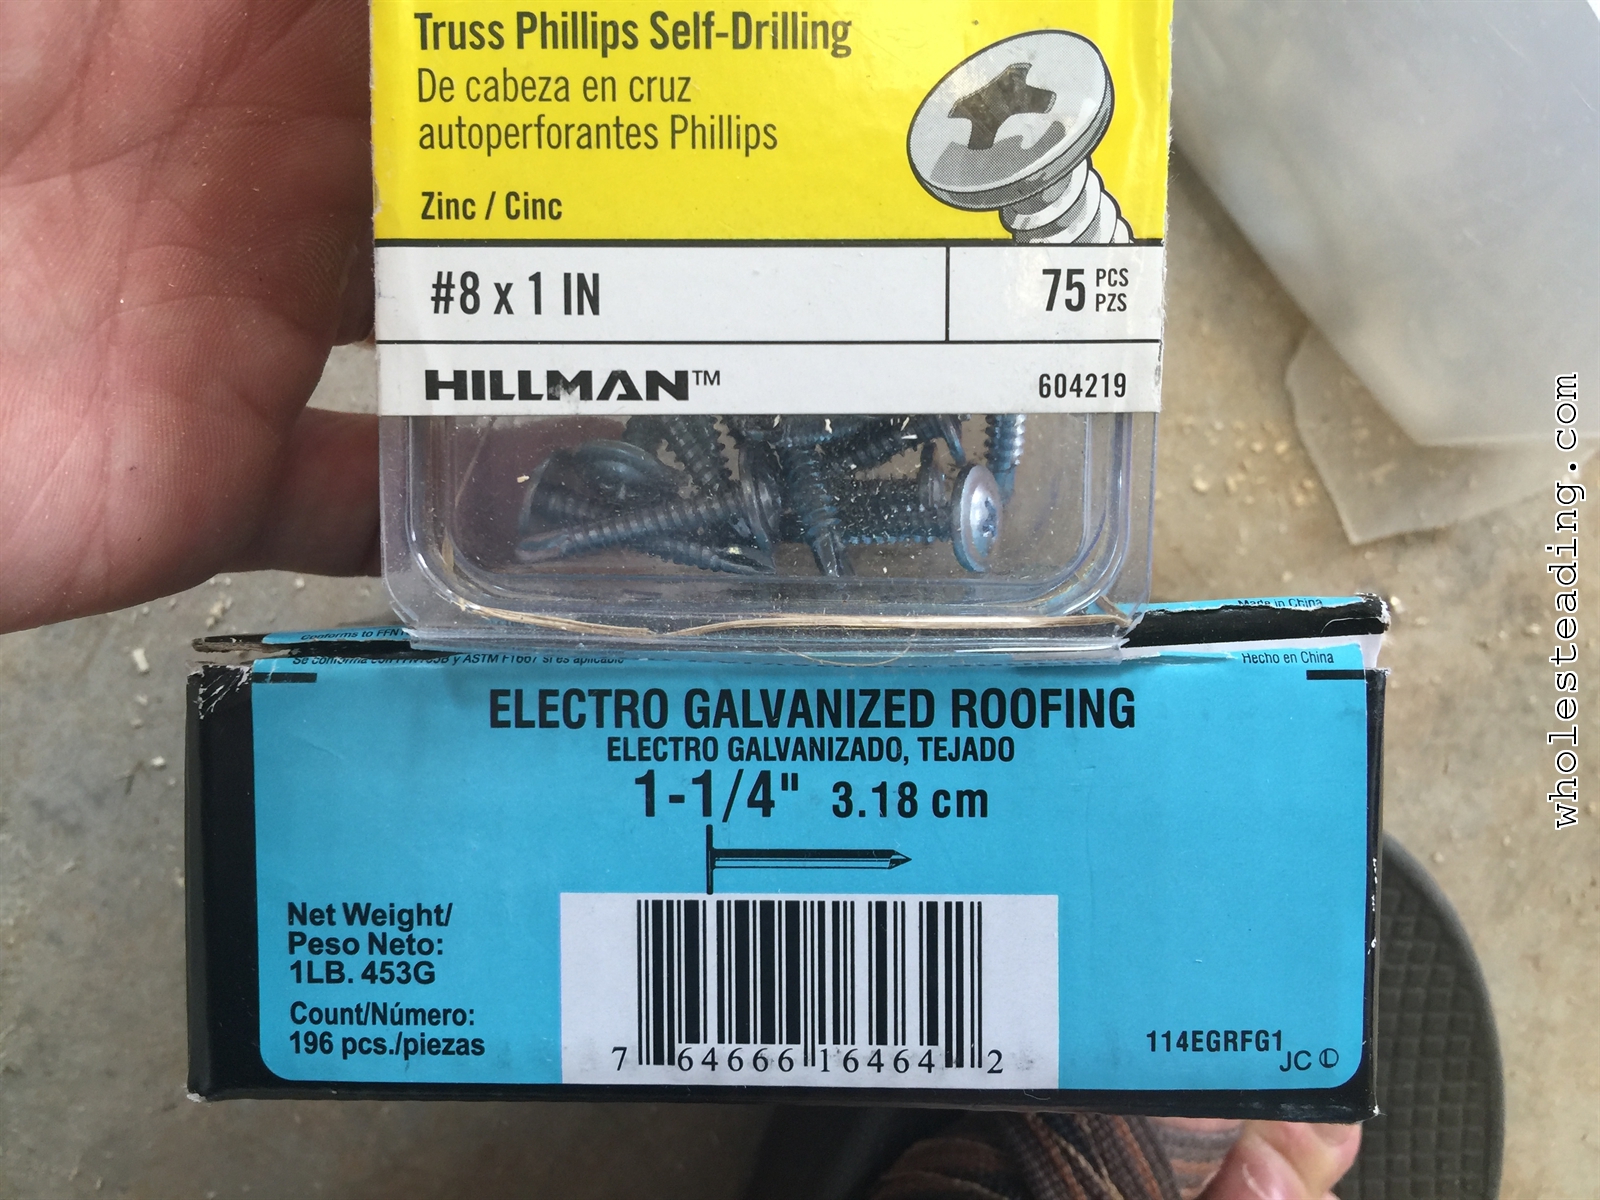
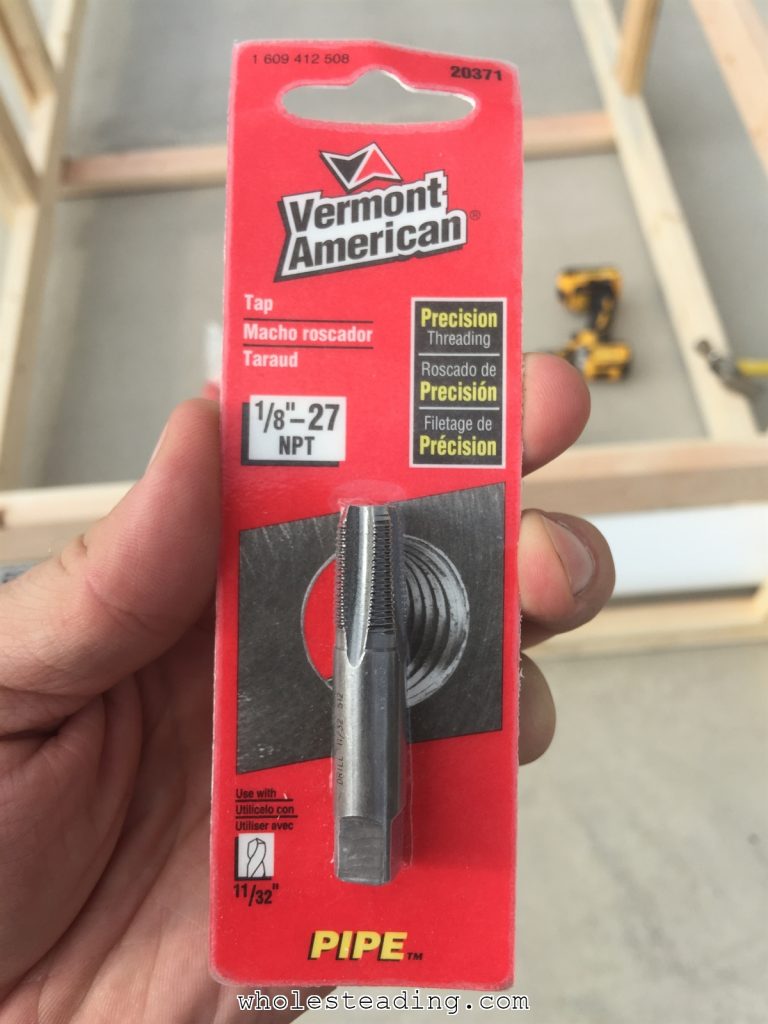
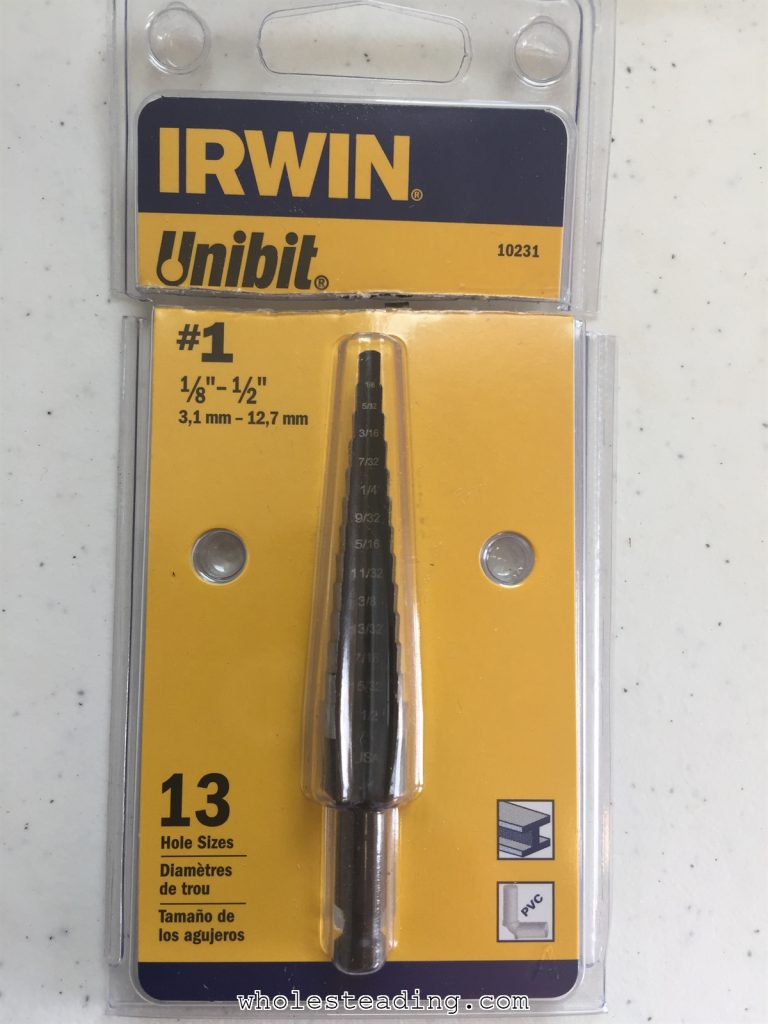
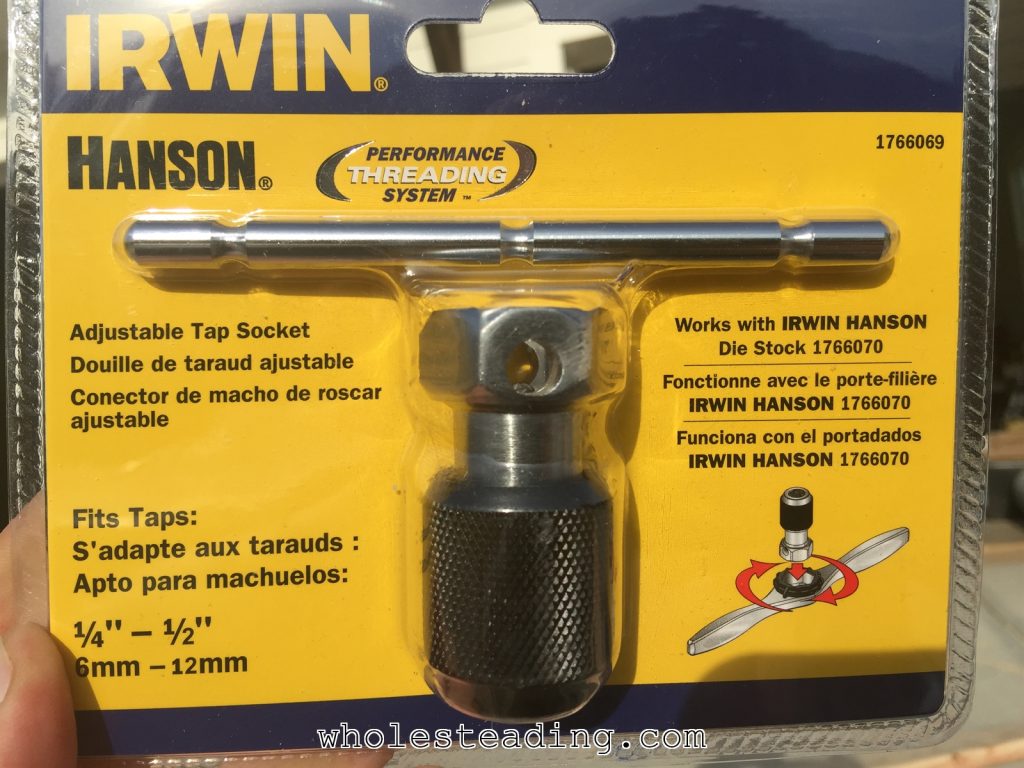
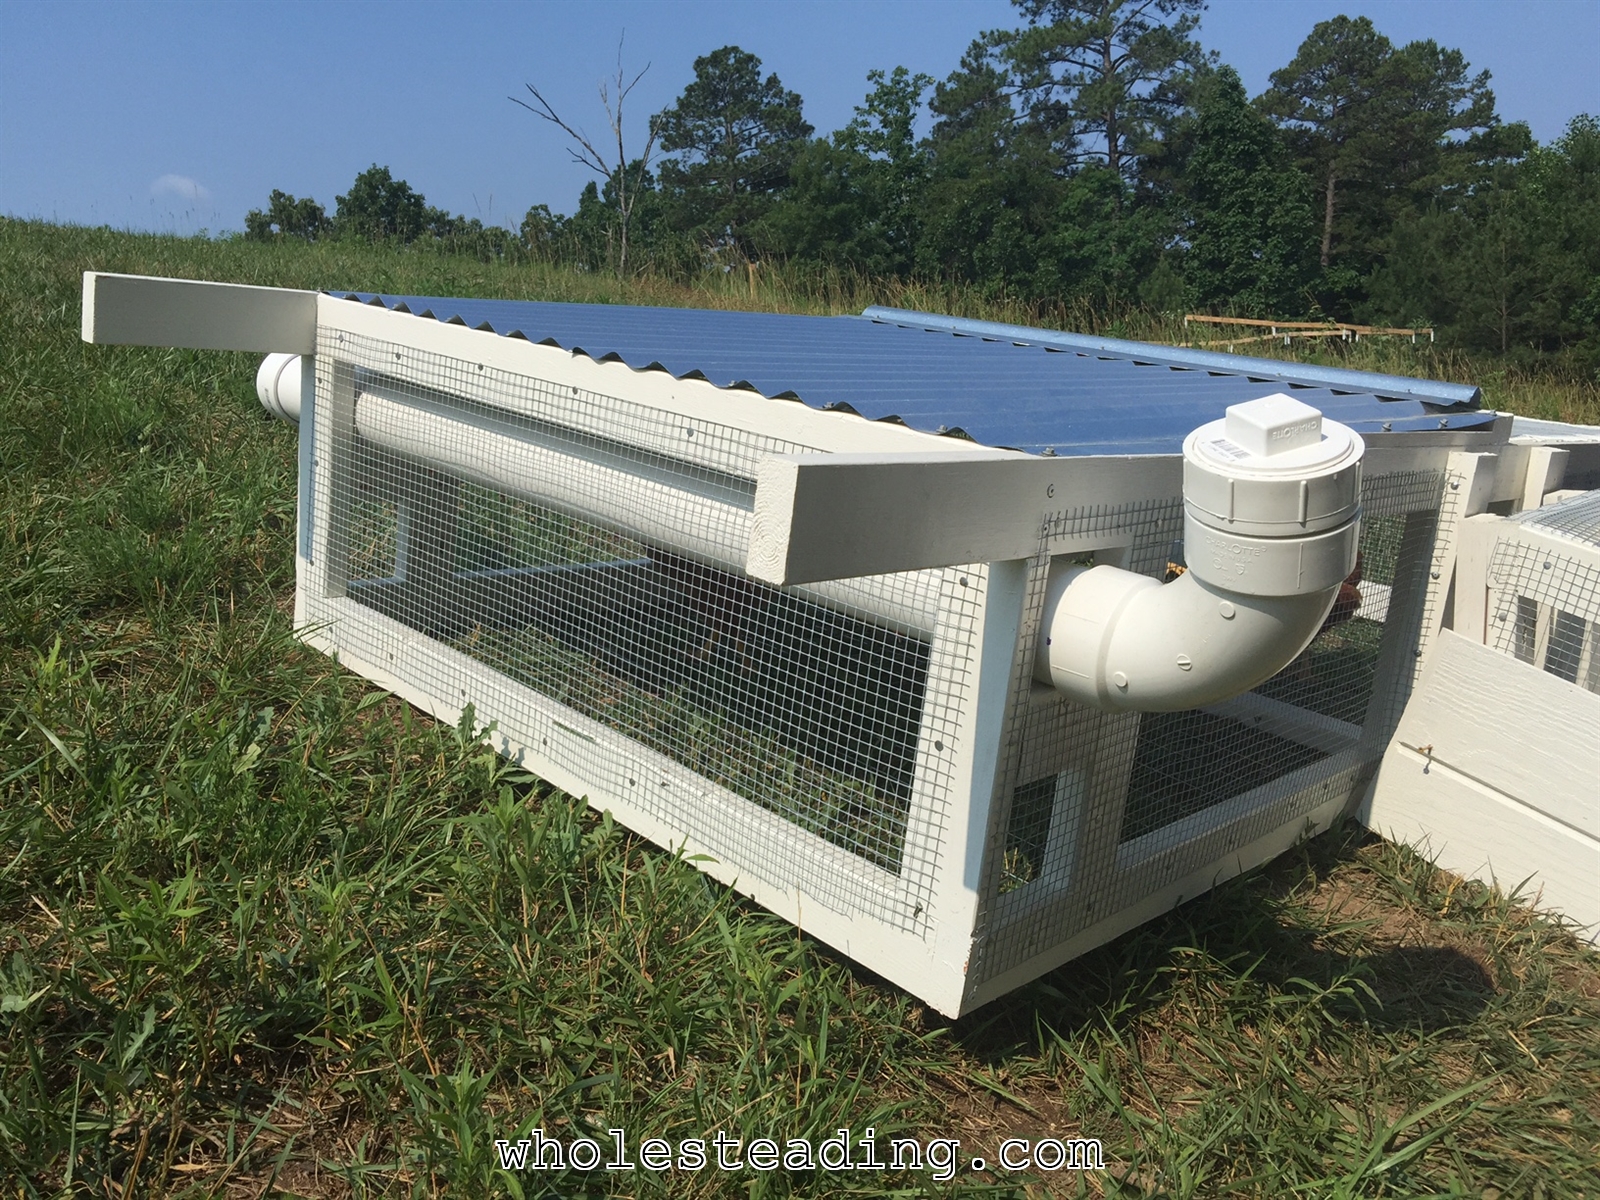
The kids helped with almost every step. Canaan is measuring and making the cuts and Harvest and Noble are putting the washers on the screws and starting them in the pilot holesCanaan and Noble assembling the bottom frame. They are using clamps to attach a 90 degree guide to each corner before driving the screws in. We started by making sure the distance from corner to opposite corner was equal and then used the guides to help keep the wood in position during the fasteningThe finished frame. Ready for paint, roof, and wire mesh.We added some 2×4 braces in the corner of each side and inserted a large PVC pipe into the holes. I then attached 5 commercial chicken water nipples to the pipe. Click on the image to be taken to the Amazon page for the red water valves shown in this picture.After the frame was built and painted we covered the sides with hardware cloth and the bottom with rolled fencing (welded wire) using 1 1/4 inch galvanized roofing tacks and Truss Philips Self-drilling screws. Click on the picture for the link to the hardware cloth on Amazon.com. We picked up the rolled fence wire at Lowes.After the wire was all nailed on we flipped it back upright and attached the metal roofing.These are the tacks and screws we used to attach the hardware cloth and fencing wireThis is the tap I used make the holes for the commercial chicken water nipples. Click on this picture for a link to the Amazon pageIt was much easier to use the tap by first drilling a small hole using this Unibit. Click the picture to be taken to the Amazon page for this bit.This is used to smoothly use the tap to make the threads in the PVC. Once you extract the tap you can insert and hand tighten the red water valves.
Here are some pictures of the water system in the finished chicken tractor:
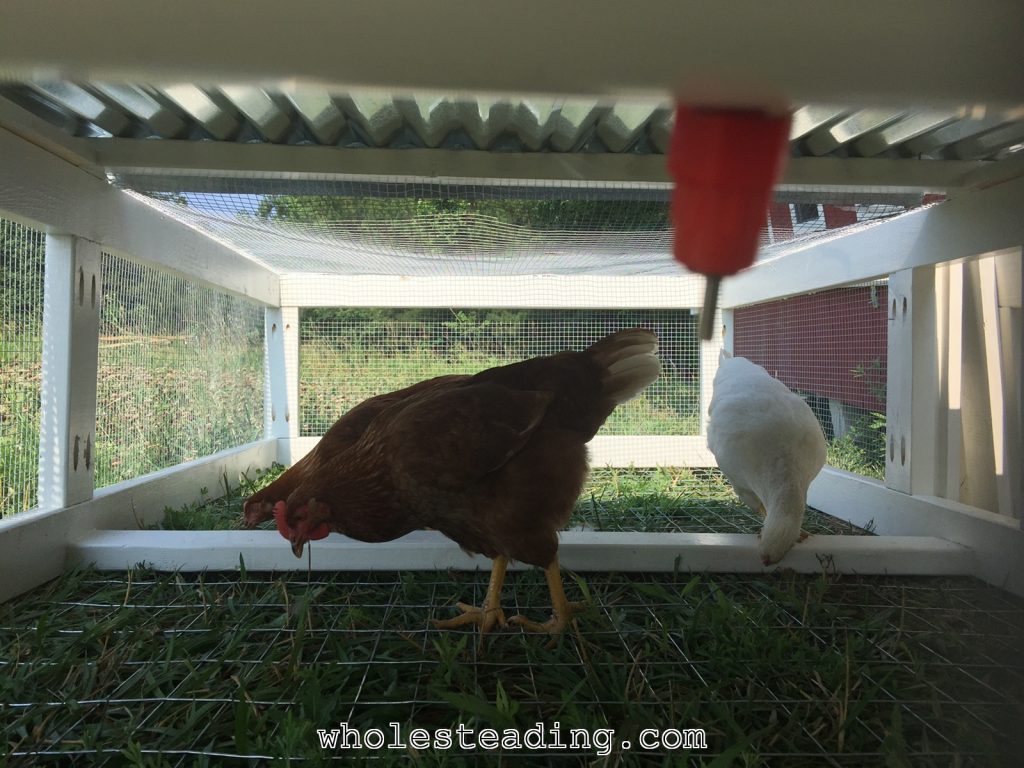
The system is simple. You unscrew the cap, fill it with water, and put the cap back on. When you want to move the unit you can make it lighter by unscrewing the cap and turning the pipe upside down. The water then freely flows out. When you get the tractor where you want it you just turn the elbow back upright, fill it, and put the cap back on.This is the view of the watering system from inside the chicken tractor. When the chickens press their beaks against the little metal stick water is released into their mouths.
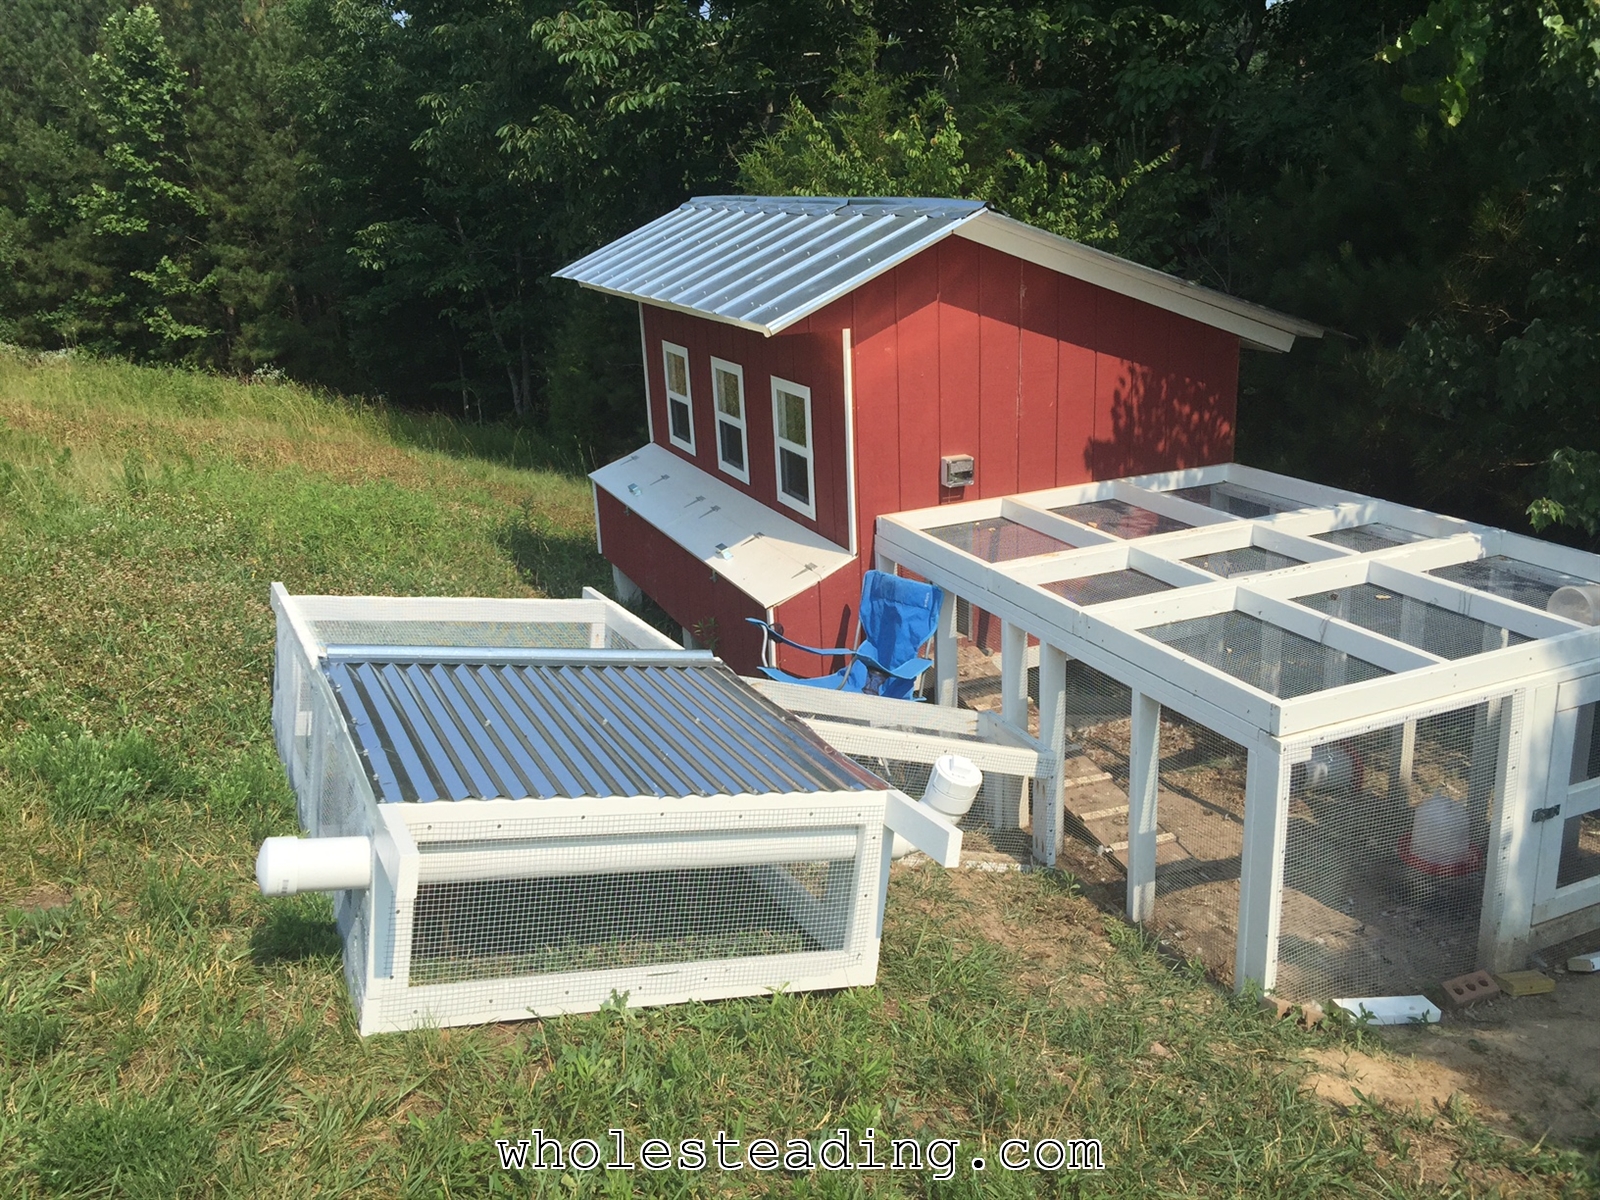
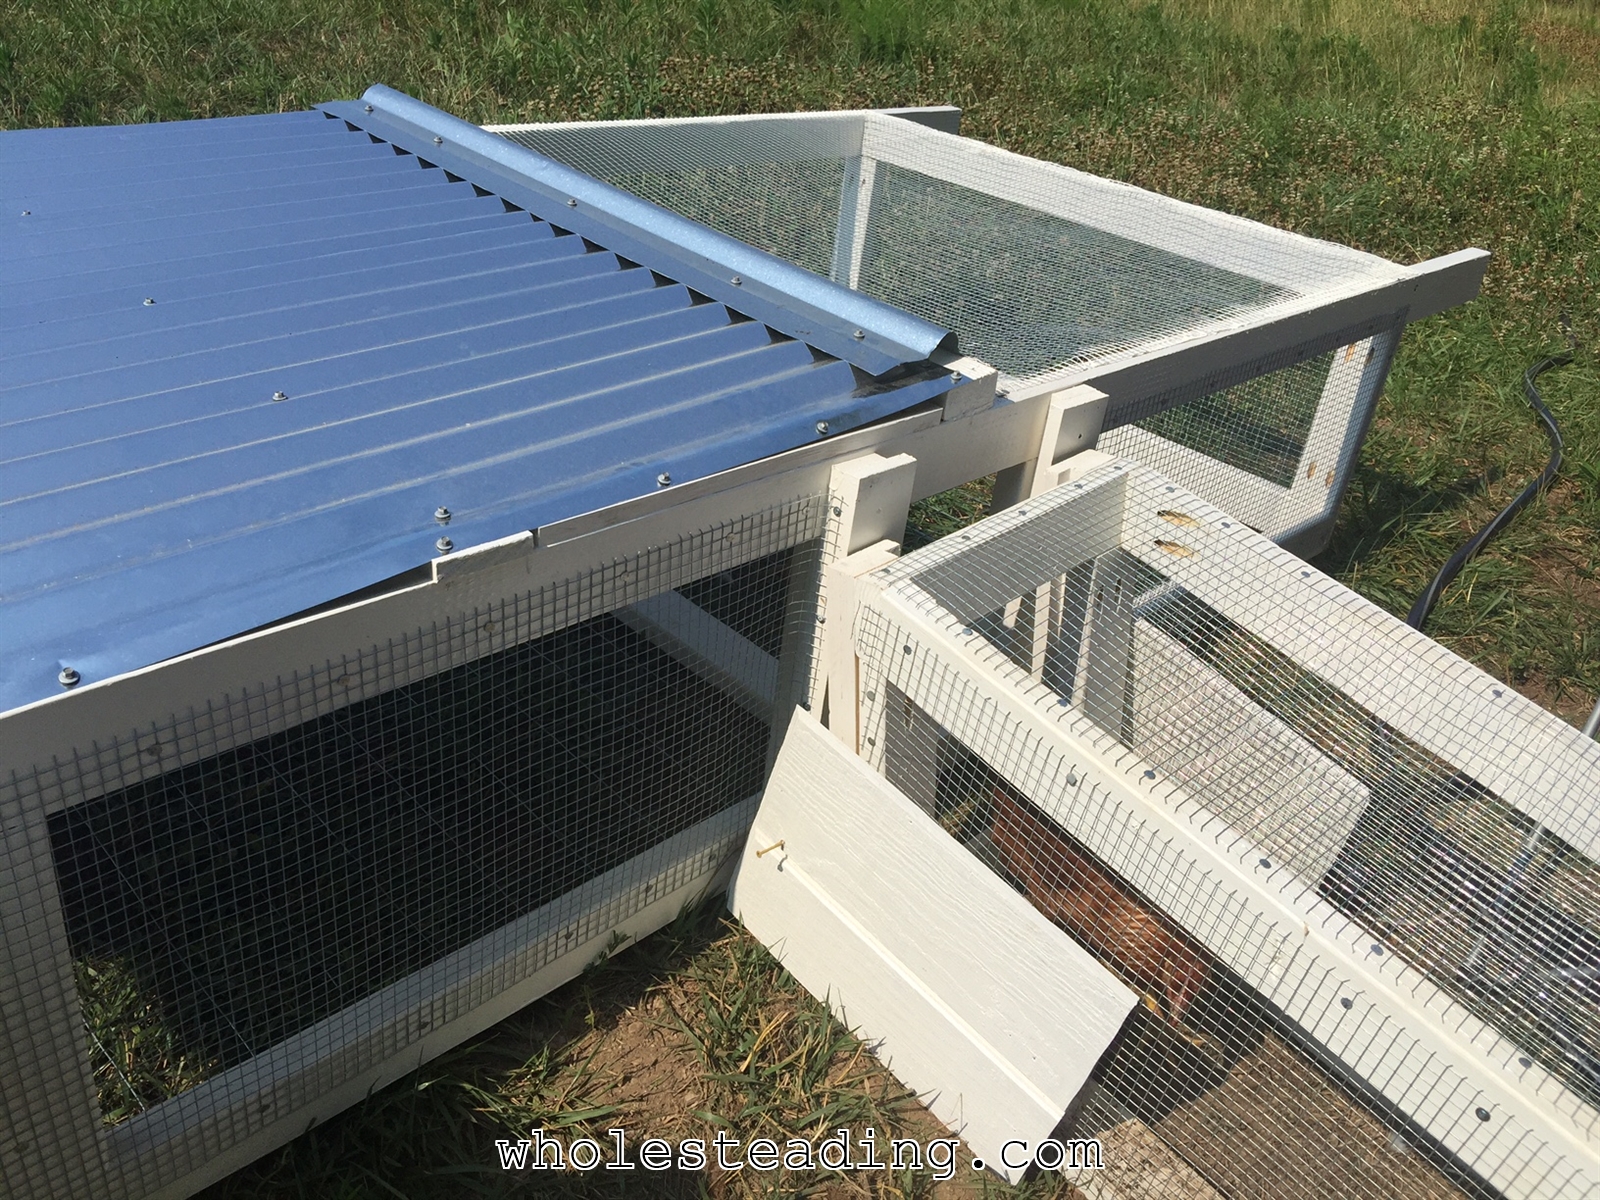
Here are some pictures of how the unit can hook up to the main coop. I built a little tunnel off of the main run and put a matching door on the end of the tunnel. Both doors have to be removed for the chickens to move freely between the two spaces:
The chicken tractor is pulled up to the “docking station” in this picture. This is where it spends most of its time. Its like an extension to the main run but can also be moved to fresh grassy areas in the yard.This picture shows both doors removed. The doors are propped up against the tunnel until they are needed.
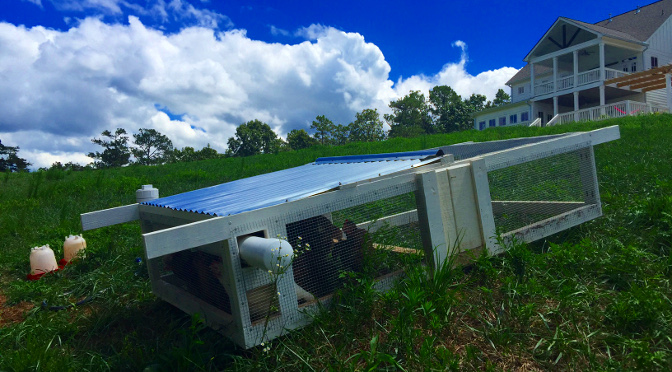
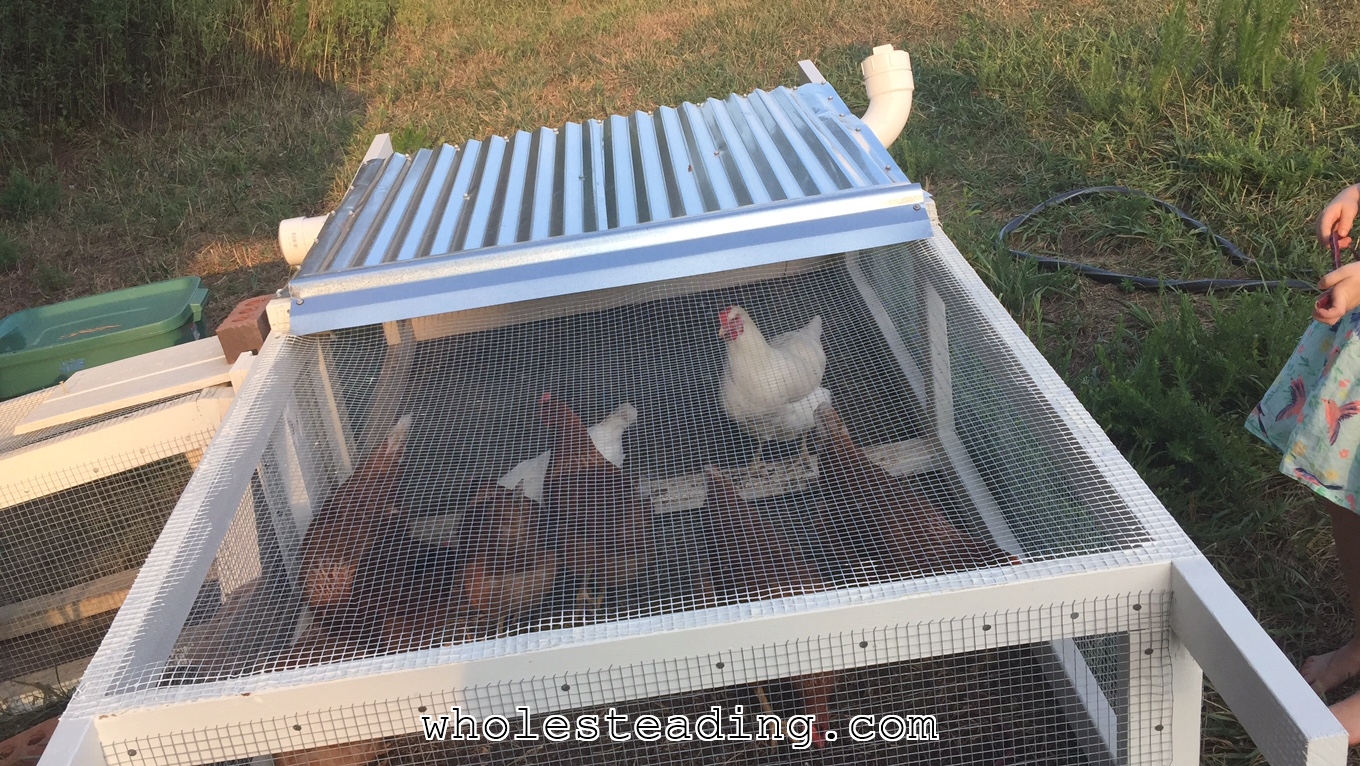
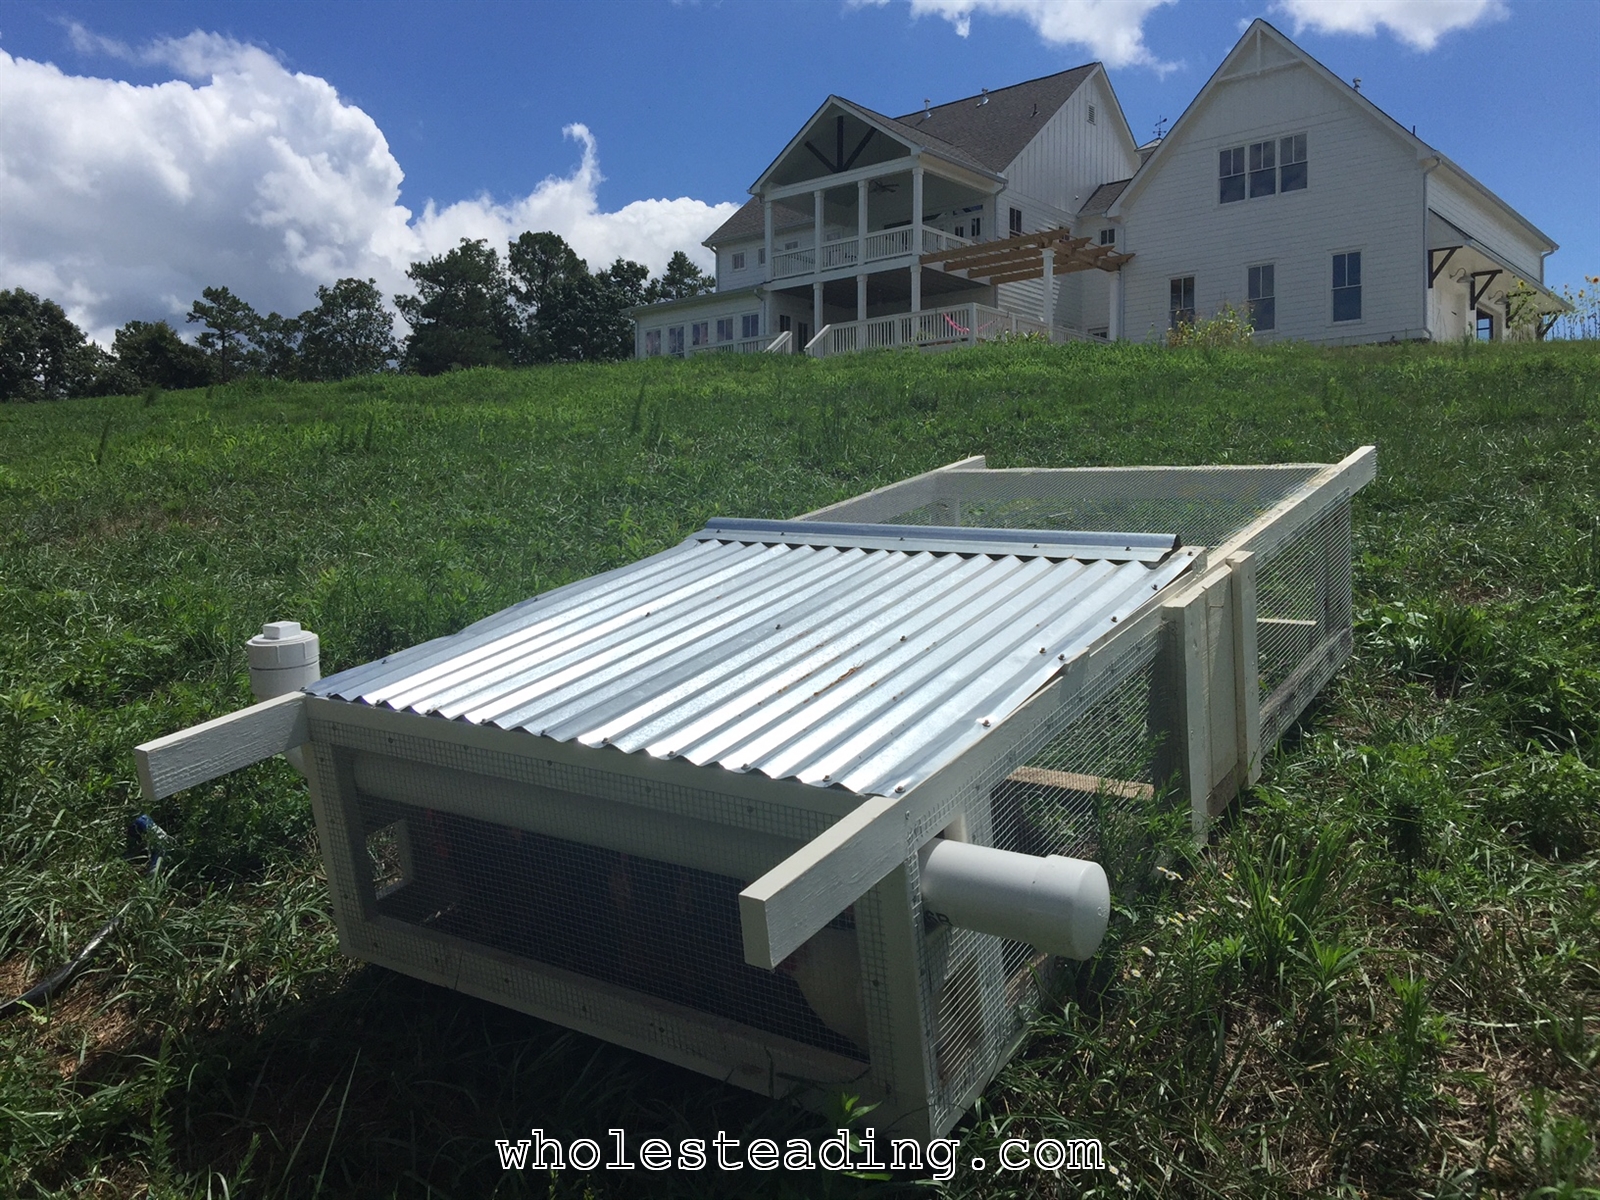
Here are a few pictures of the tractor in use:
The chickens enjoying their new tractorOur new “lawn mower” 🙂
For those that haven’t seen enough yet…here are a couple videos:
As of the writing of this post we are only about 500 Page Likes away from having 10,000 Facebook likes! If you are enjoying our blog, and haven’t already, please take 10 seconds and LIKE our Facebook page:
3 thoughts on “Homemade Chicken Tractor: a mobile home for hens”
Yet another post where you’ve paved the way for us! We’ve been planning to do a chicken tractor ever since we saw one on Polyface Farms. Love how yours hooks up to the chicken coop.
Nice work! My wife has been looking for something like this for years. We were amazed by how much damage chickens can do if left in a particular place. This is on the list for this summer.
Doc, The tractor works great but it’s heavy. I will likely make future versions with thinner dimensions of wood to keep the weight down. Although this version has kept the chickens safe from repeated attacks by large predators and I’m not sure 1x2s would have held up.