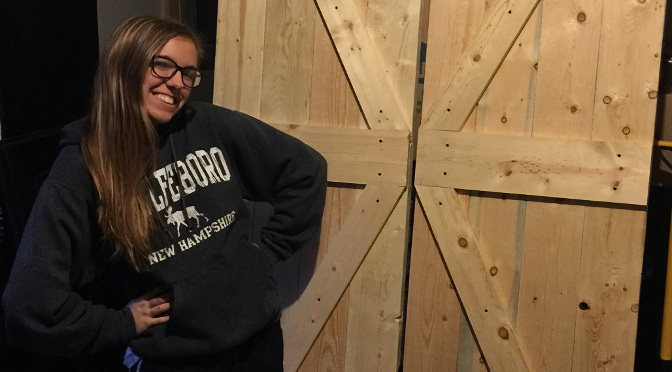
As part of building our new home, we have taken on some of the components of the construction ourselves. One of the things we were not planning to do but ended up taking on is the building of homemade barn doors for our kitchen pantry. When we started looking for a barn door to fit that space we quickly discovered that we were going to have to spend $800 or more to get the look and feel we were going for. Bethany finally talked me into just making them ourselves. I had no idea how easy it was going to be. I wish I would have taken more pictures of the process but hopefully there are enough pictures here to convince others intimidated by this project that it really is no big deal. I made them in two afternoons and needed only a miter-saw, a Kreg-Jig HD, pocket hole screws, a cordless drill, some clamps, and some regular wood screws.
The steps are pretty straight forward:
First: Pick out the main boards…any size will work…just base the decision on the size of the door opening you are trying to cover
Note: Any 2-by material is a good choice, such as 2x6, 2x8, 2x10, 2x12, etc....but you don't want to choose pressure treated wood since pressure treated lumber is so much heavier than the same sized untreated lumber.
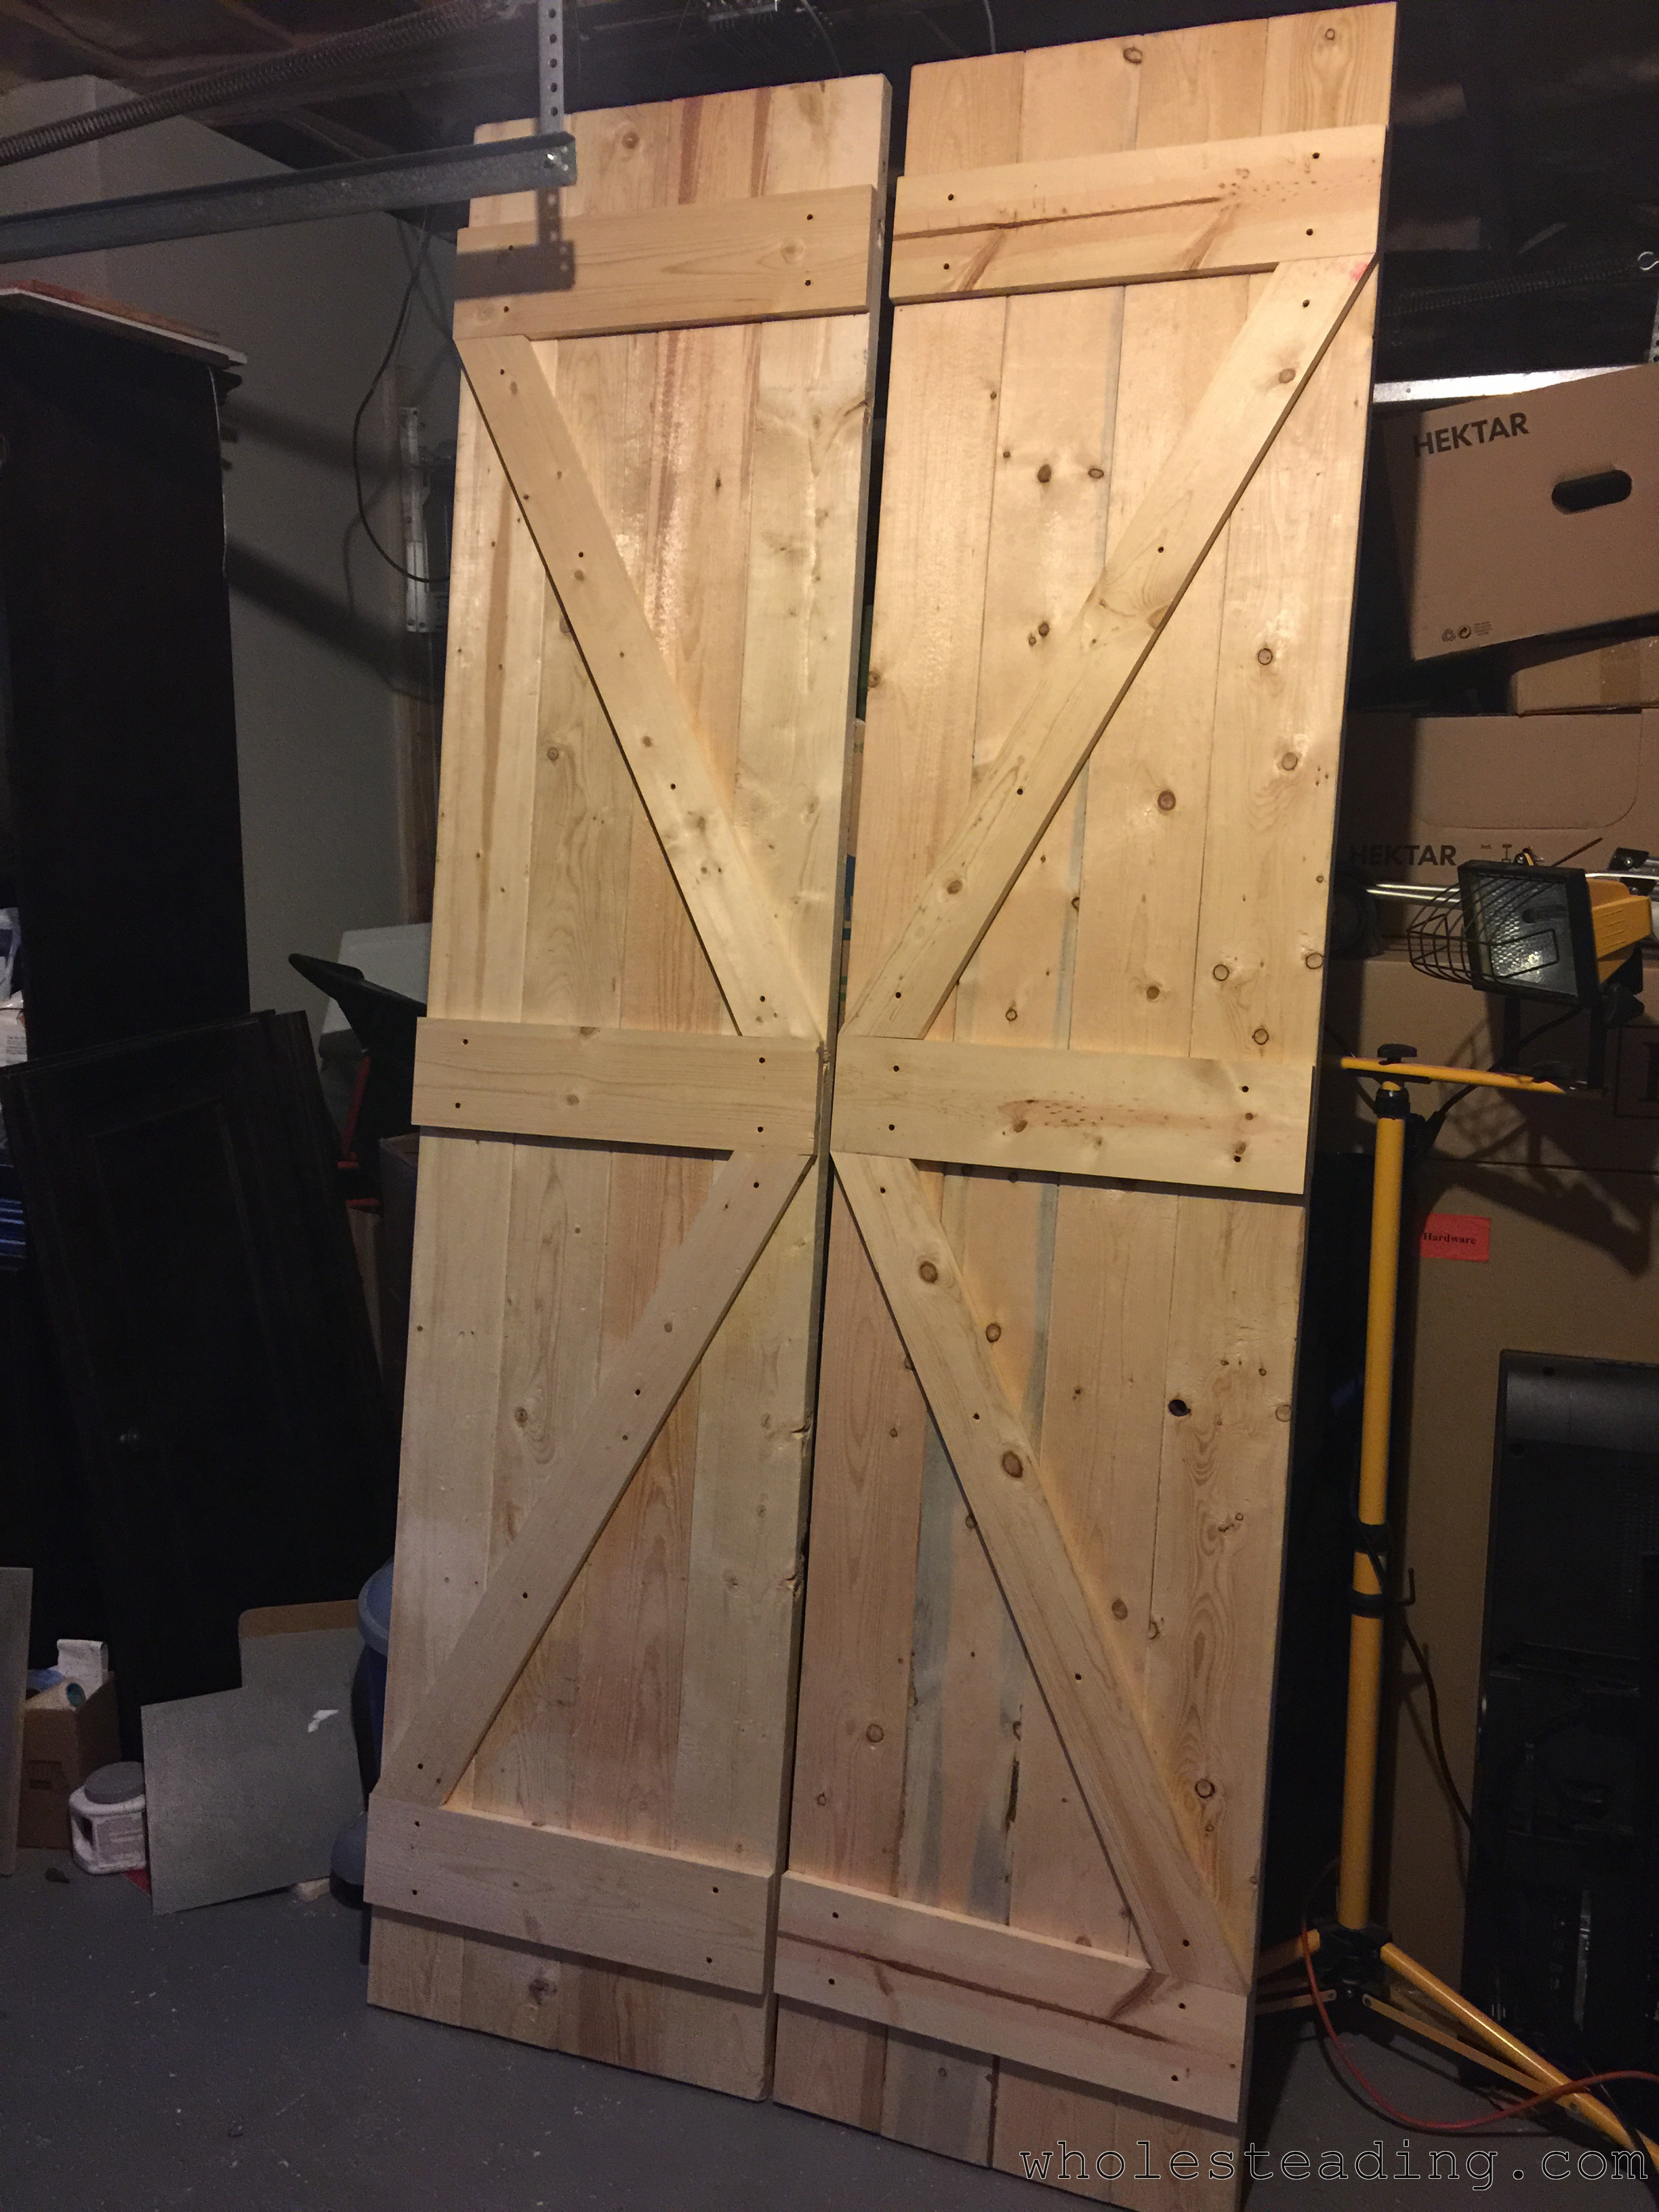
Second: Pick out the size of the boards for the design on the front…any 1-by material is a good choice (1×4, 1×6, 1×8, etc.). Cut the boards to length as desired using the miter-saw.
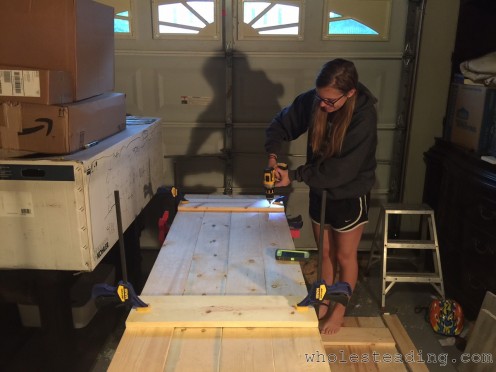
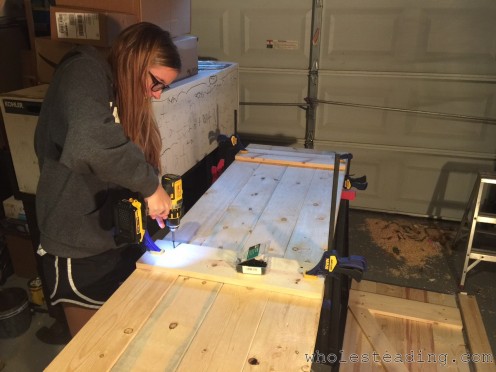
Third: Drill pocket holes and connect the main boards using HD pocket hole screws.
Note: If you have never used a Kreg Jig HD to connect boards like this, it's the same as how the table top is assembled in THIS post.
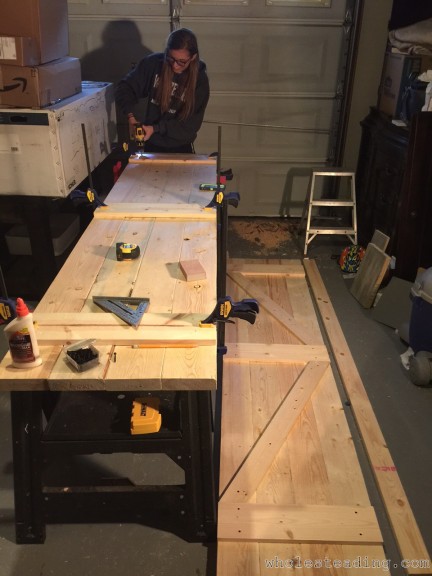
Fourth: Then cut the smaller boards for the desired front pattern (X shape, / shape, etc.) and attach them with the wood screws. We just laid the boards on top of the partially finished doors until we got the look we wanted, marked them with a pencil, and made the cuts.
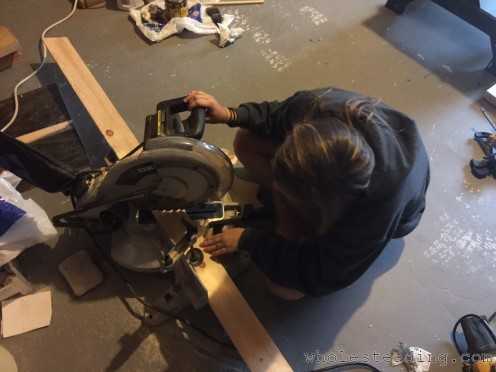
Here are some pictures of the project…my daughter Mannah helped make the cuts, drill the pocket holes, and place the screws:
Here are some videos of Mannah working on the doors…no instructions but thought I’d include the videos for those who know Mannah ? ):
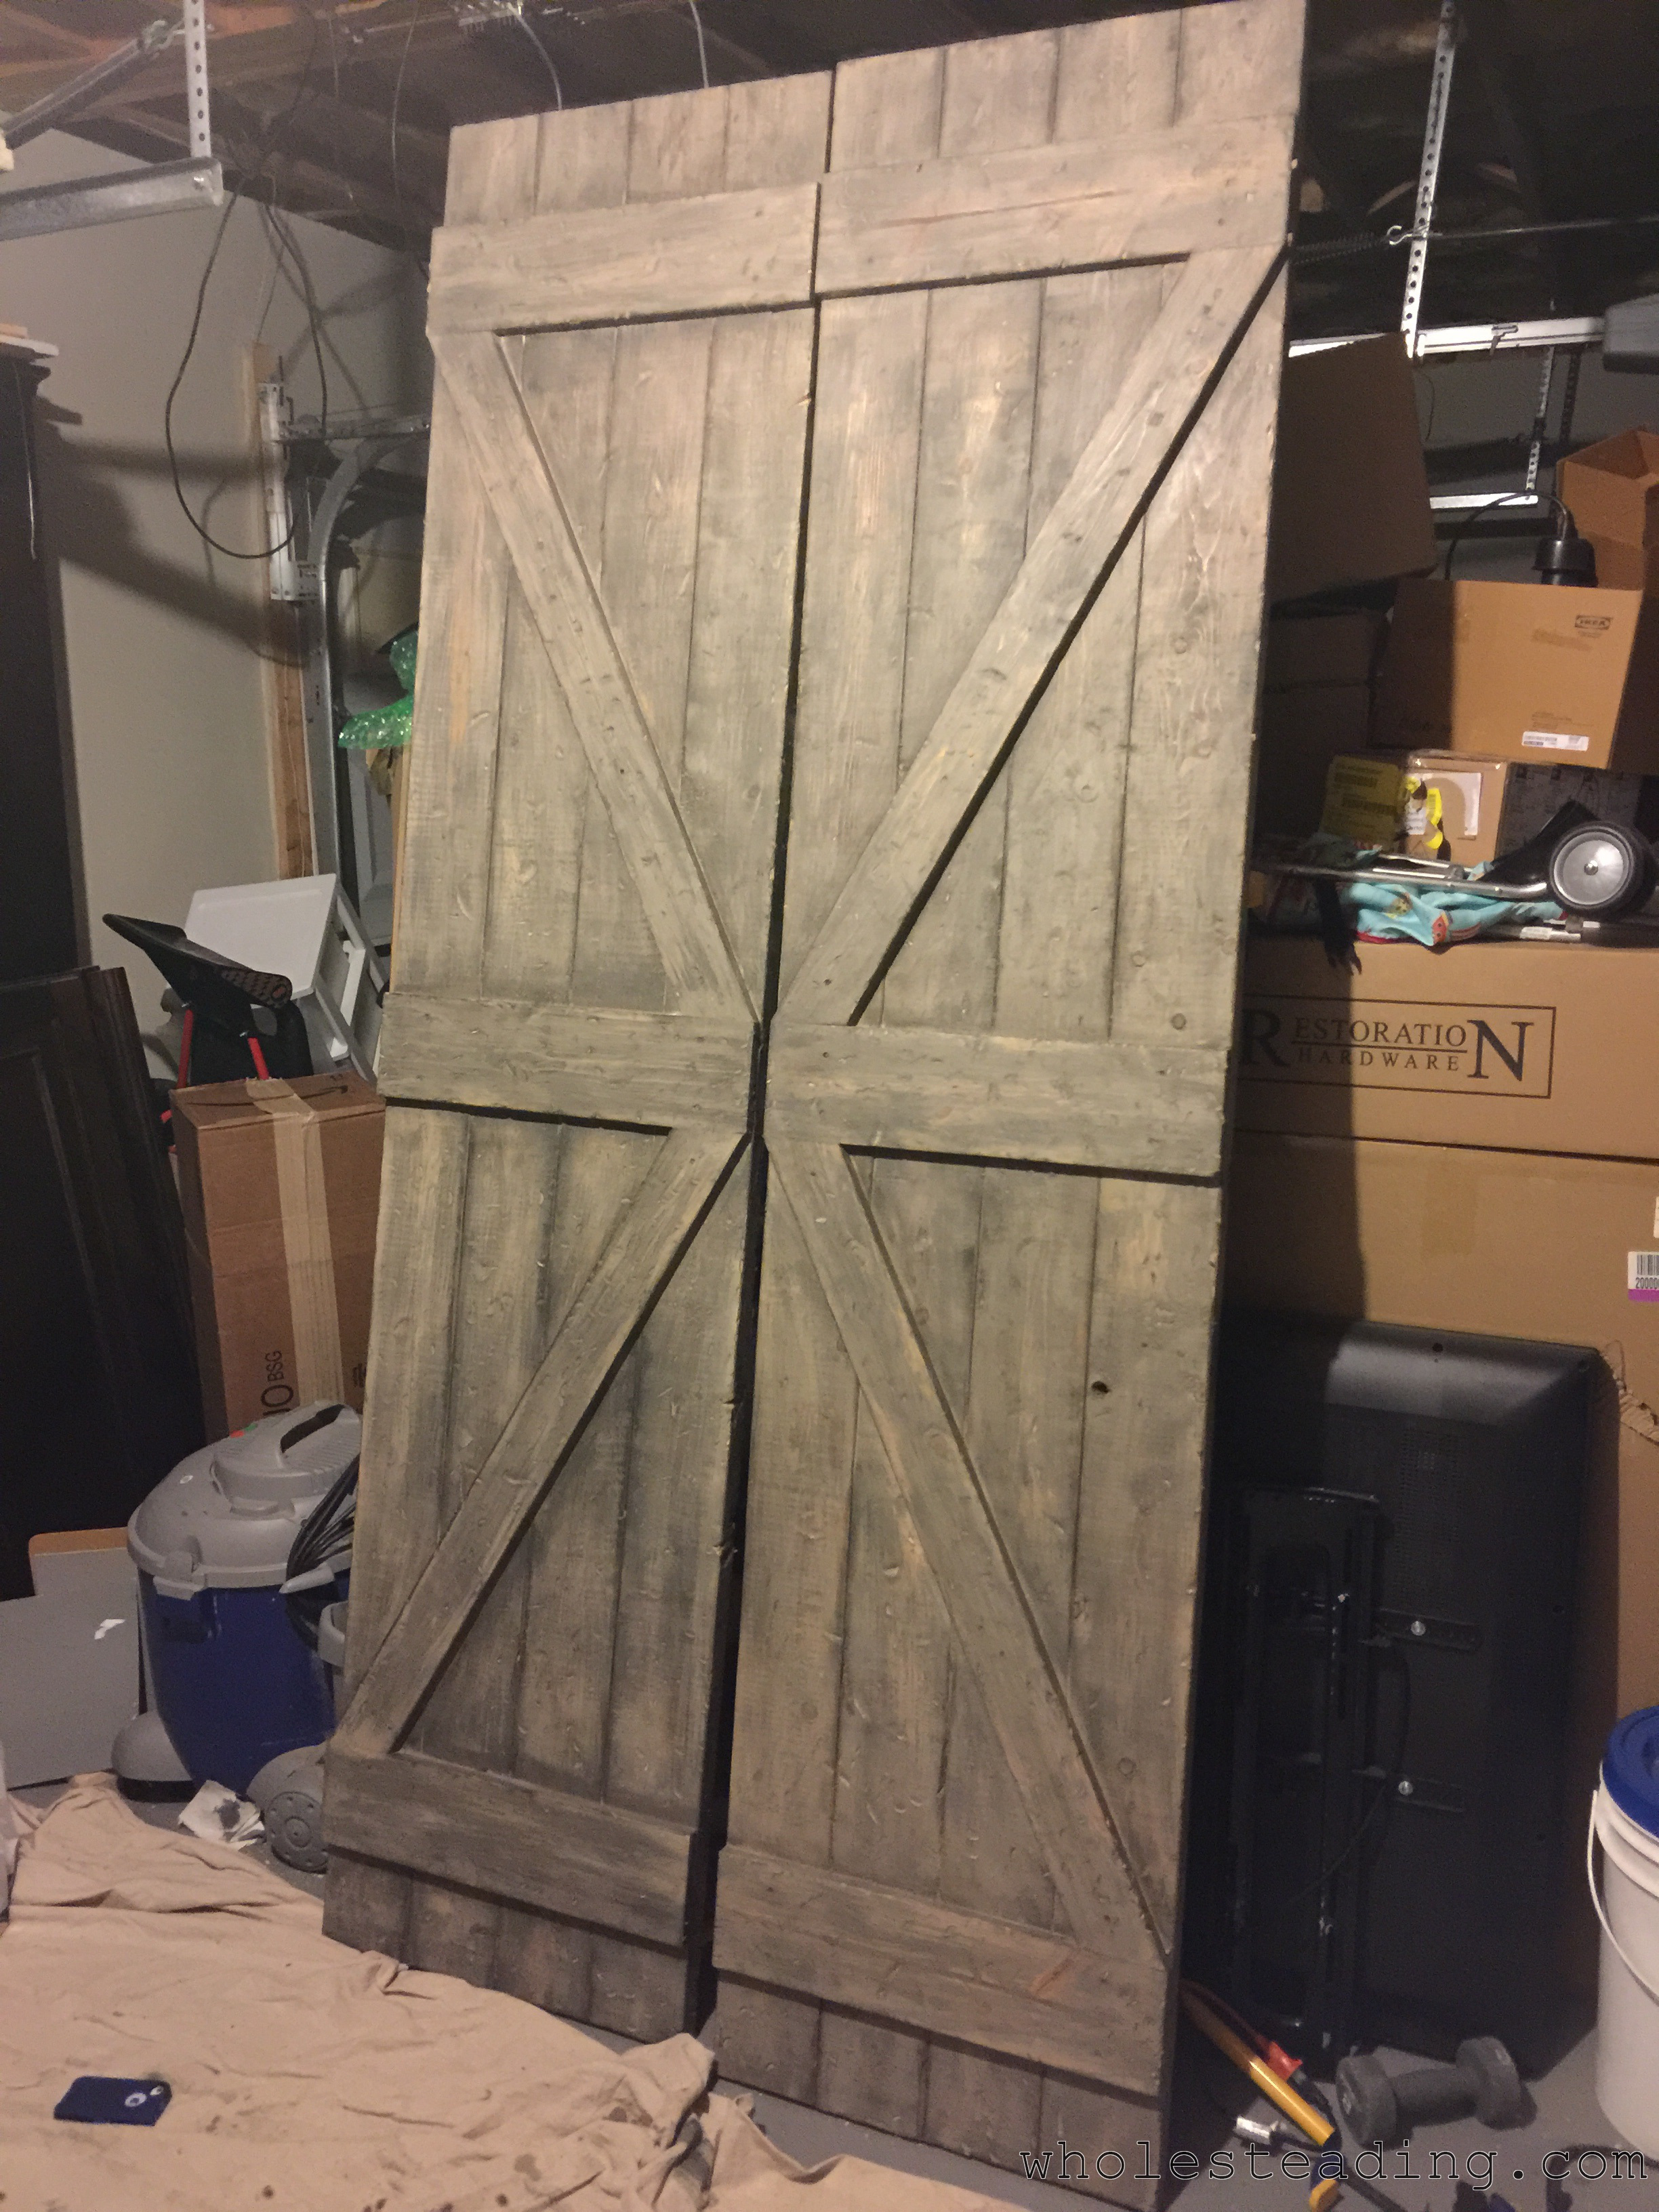
Once the doors were built Bethany distressed them and then painted, stained, and waxed the doors. Unfortunately, I only have one picture of the doors during this process.

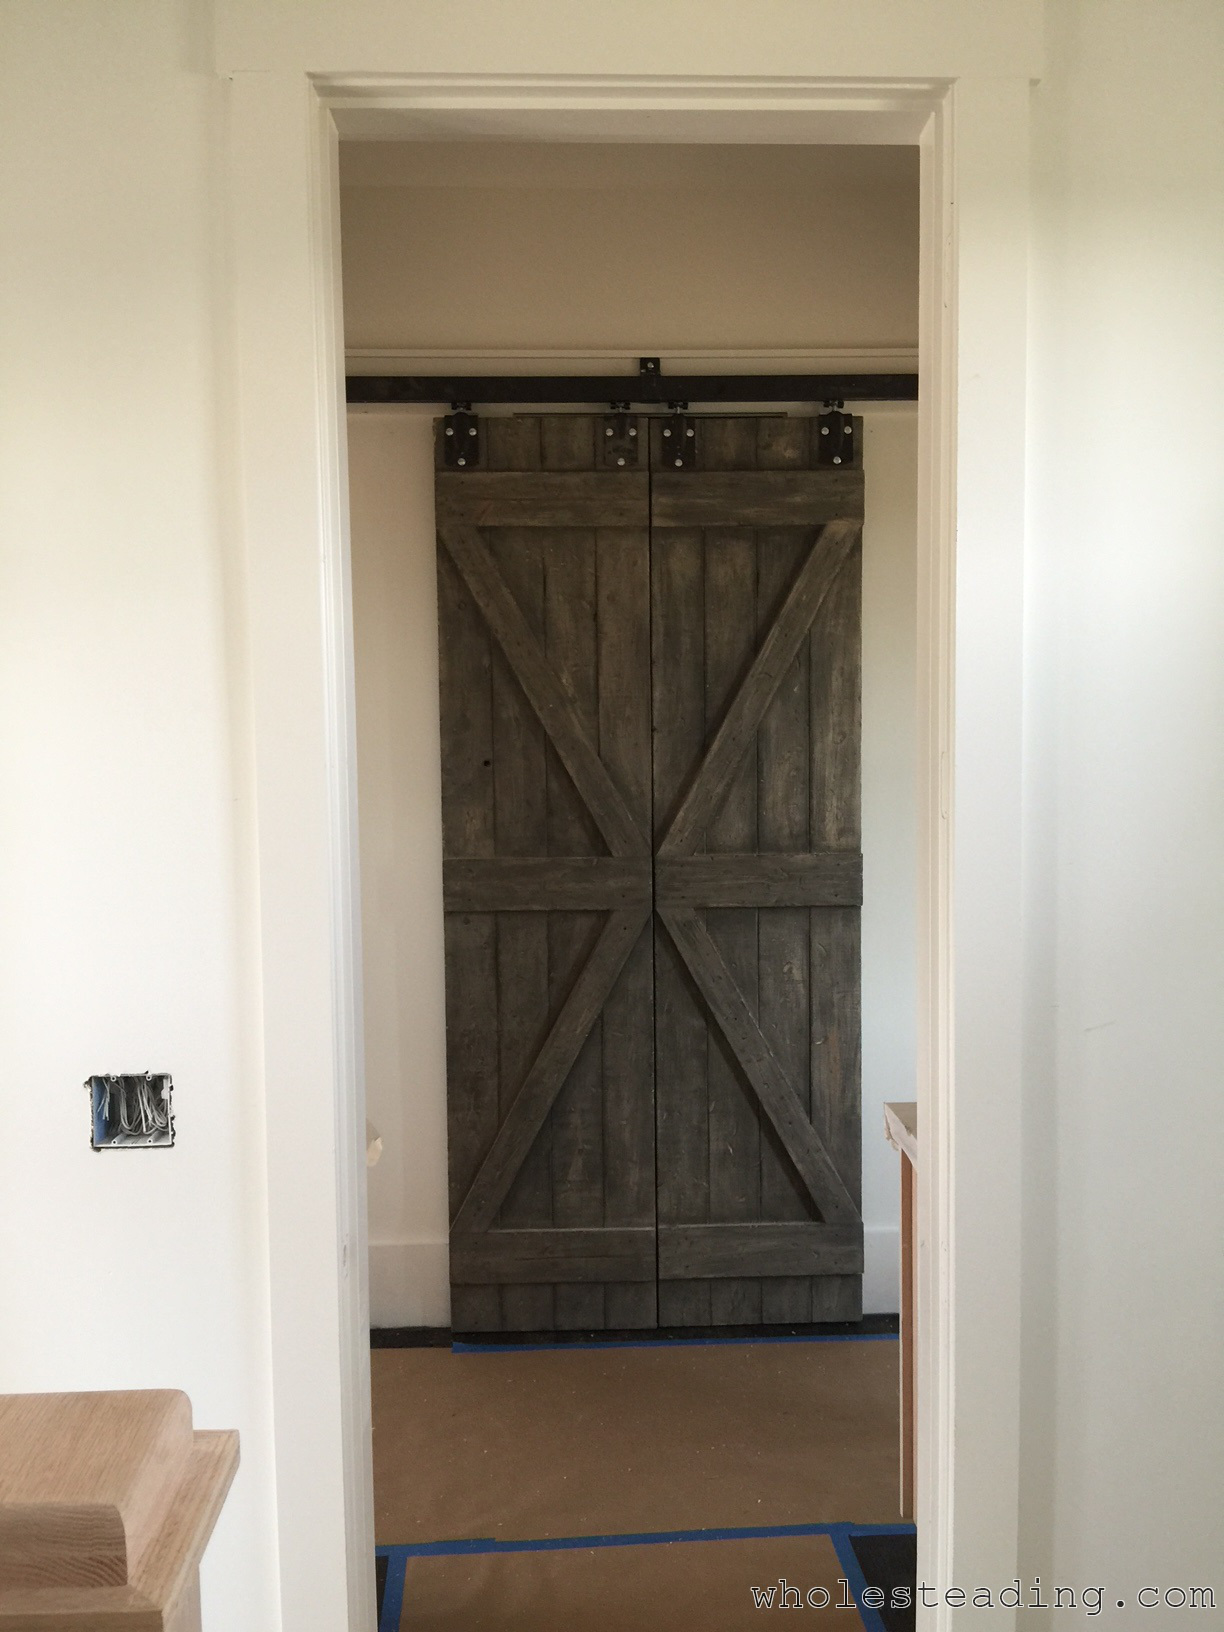
We found good, sturdy barn railings at Tractor Supply and then Bethany painted them with Rustoleum Oil Rubbed Bronze Spray Paint.
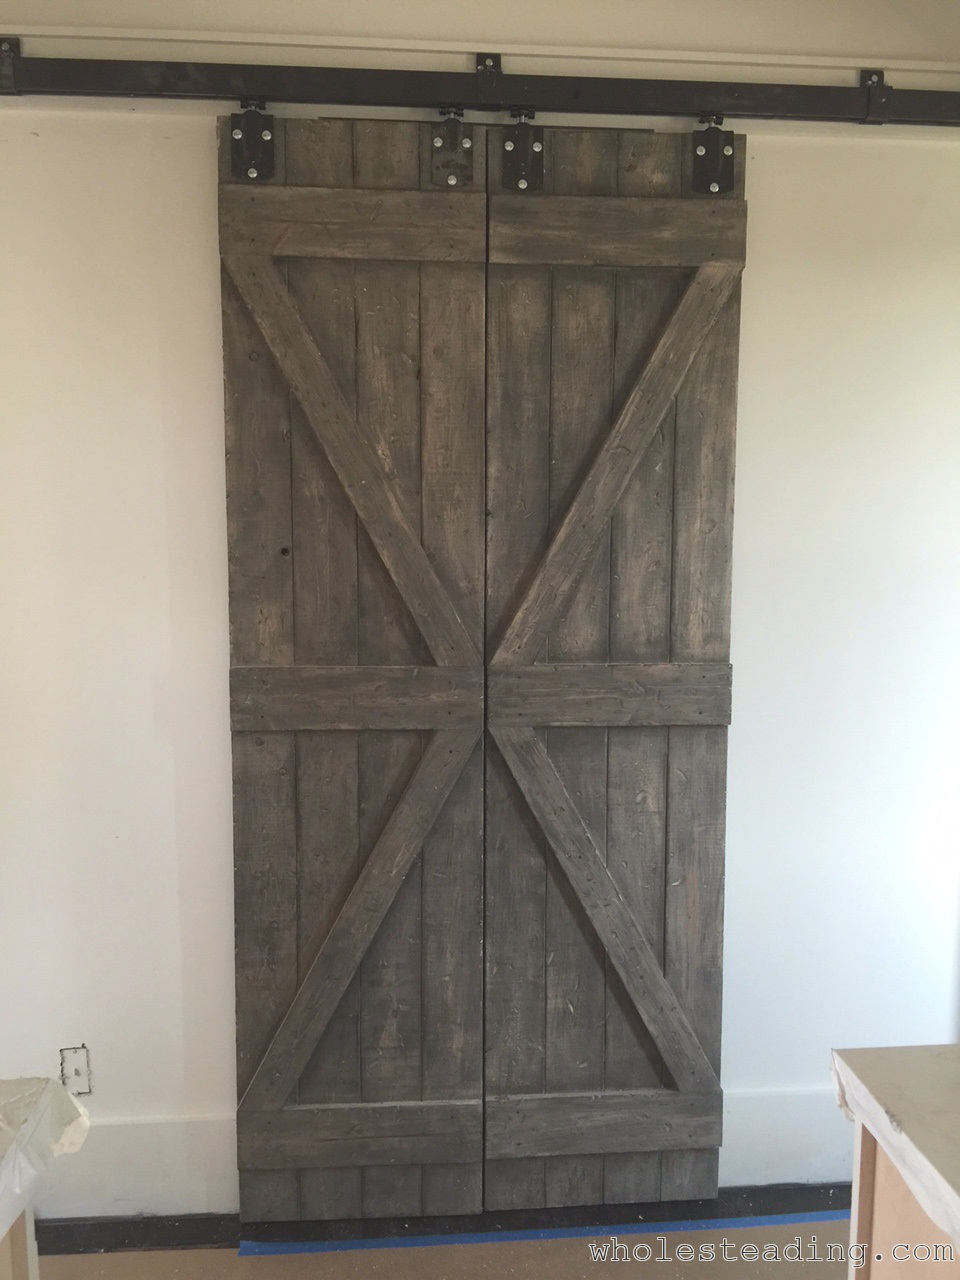
Here are some pictures of the barn doors mounted in front of the kitchen pantry opening:
We also built shutters for one of the indoor windows that Bethany plans to finish the same way. She plans to take lots of pictures of the process and post directions for those that would like to know how to accomplish this look. I’m not sure of the paints and stains used so I will let her cover all of that in the shutter post. If you have questions about how to build these or about how they are finished, just leave a reply and we will help as best we can.
If you like how our doors turned out please take a second and post one of the images above to Pinterest…thanks!
